Using Observable Classes, Part 2
Introduction
In part 1 of this tutorial you learned how to re-build most of the to-do list we built over four classes last year.
In part 2 of this tutorial we will finish the job, using the Observation and SwiftData frameworks.
Let's get started.
Deleting items
To delete items, we must add the .onDelete view modifier.
However, the onDelete view modifier only works on a ForEach structure – it does not work when attached to a List structure.
Why does .onDelete not work when attached to a List structure?
Well, a List can include static values that are not contained in an array:
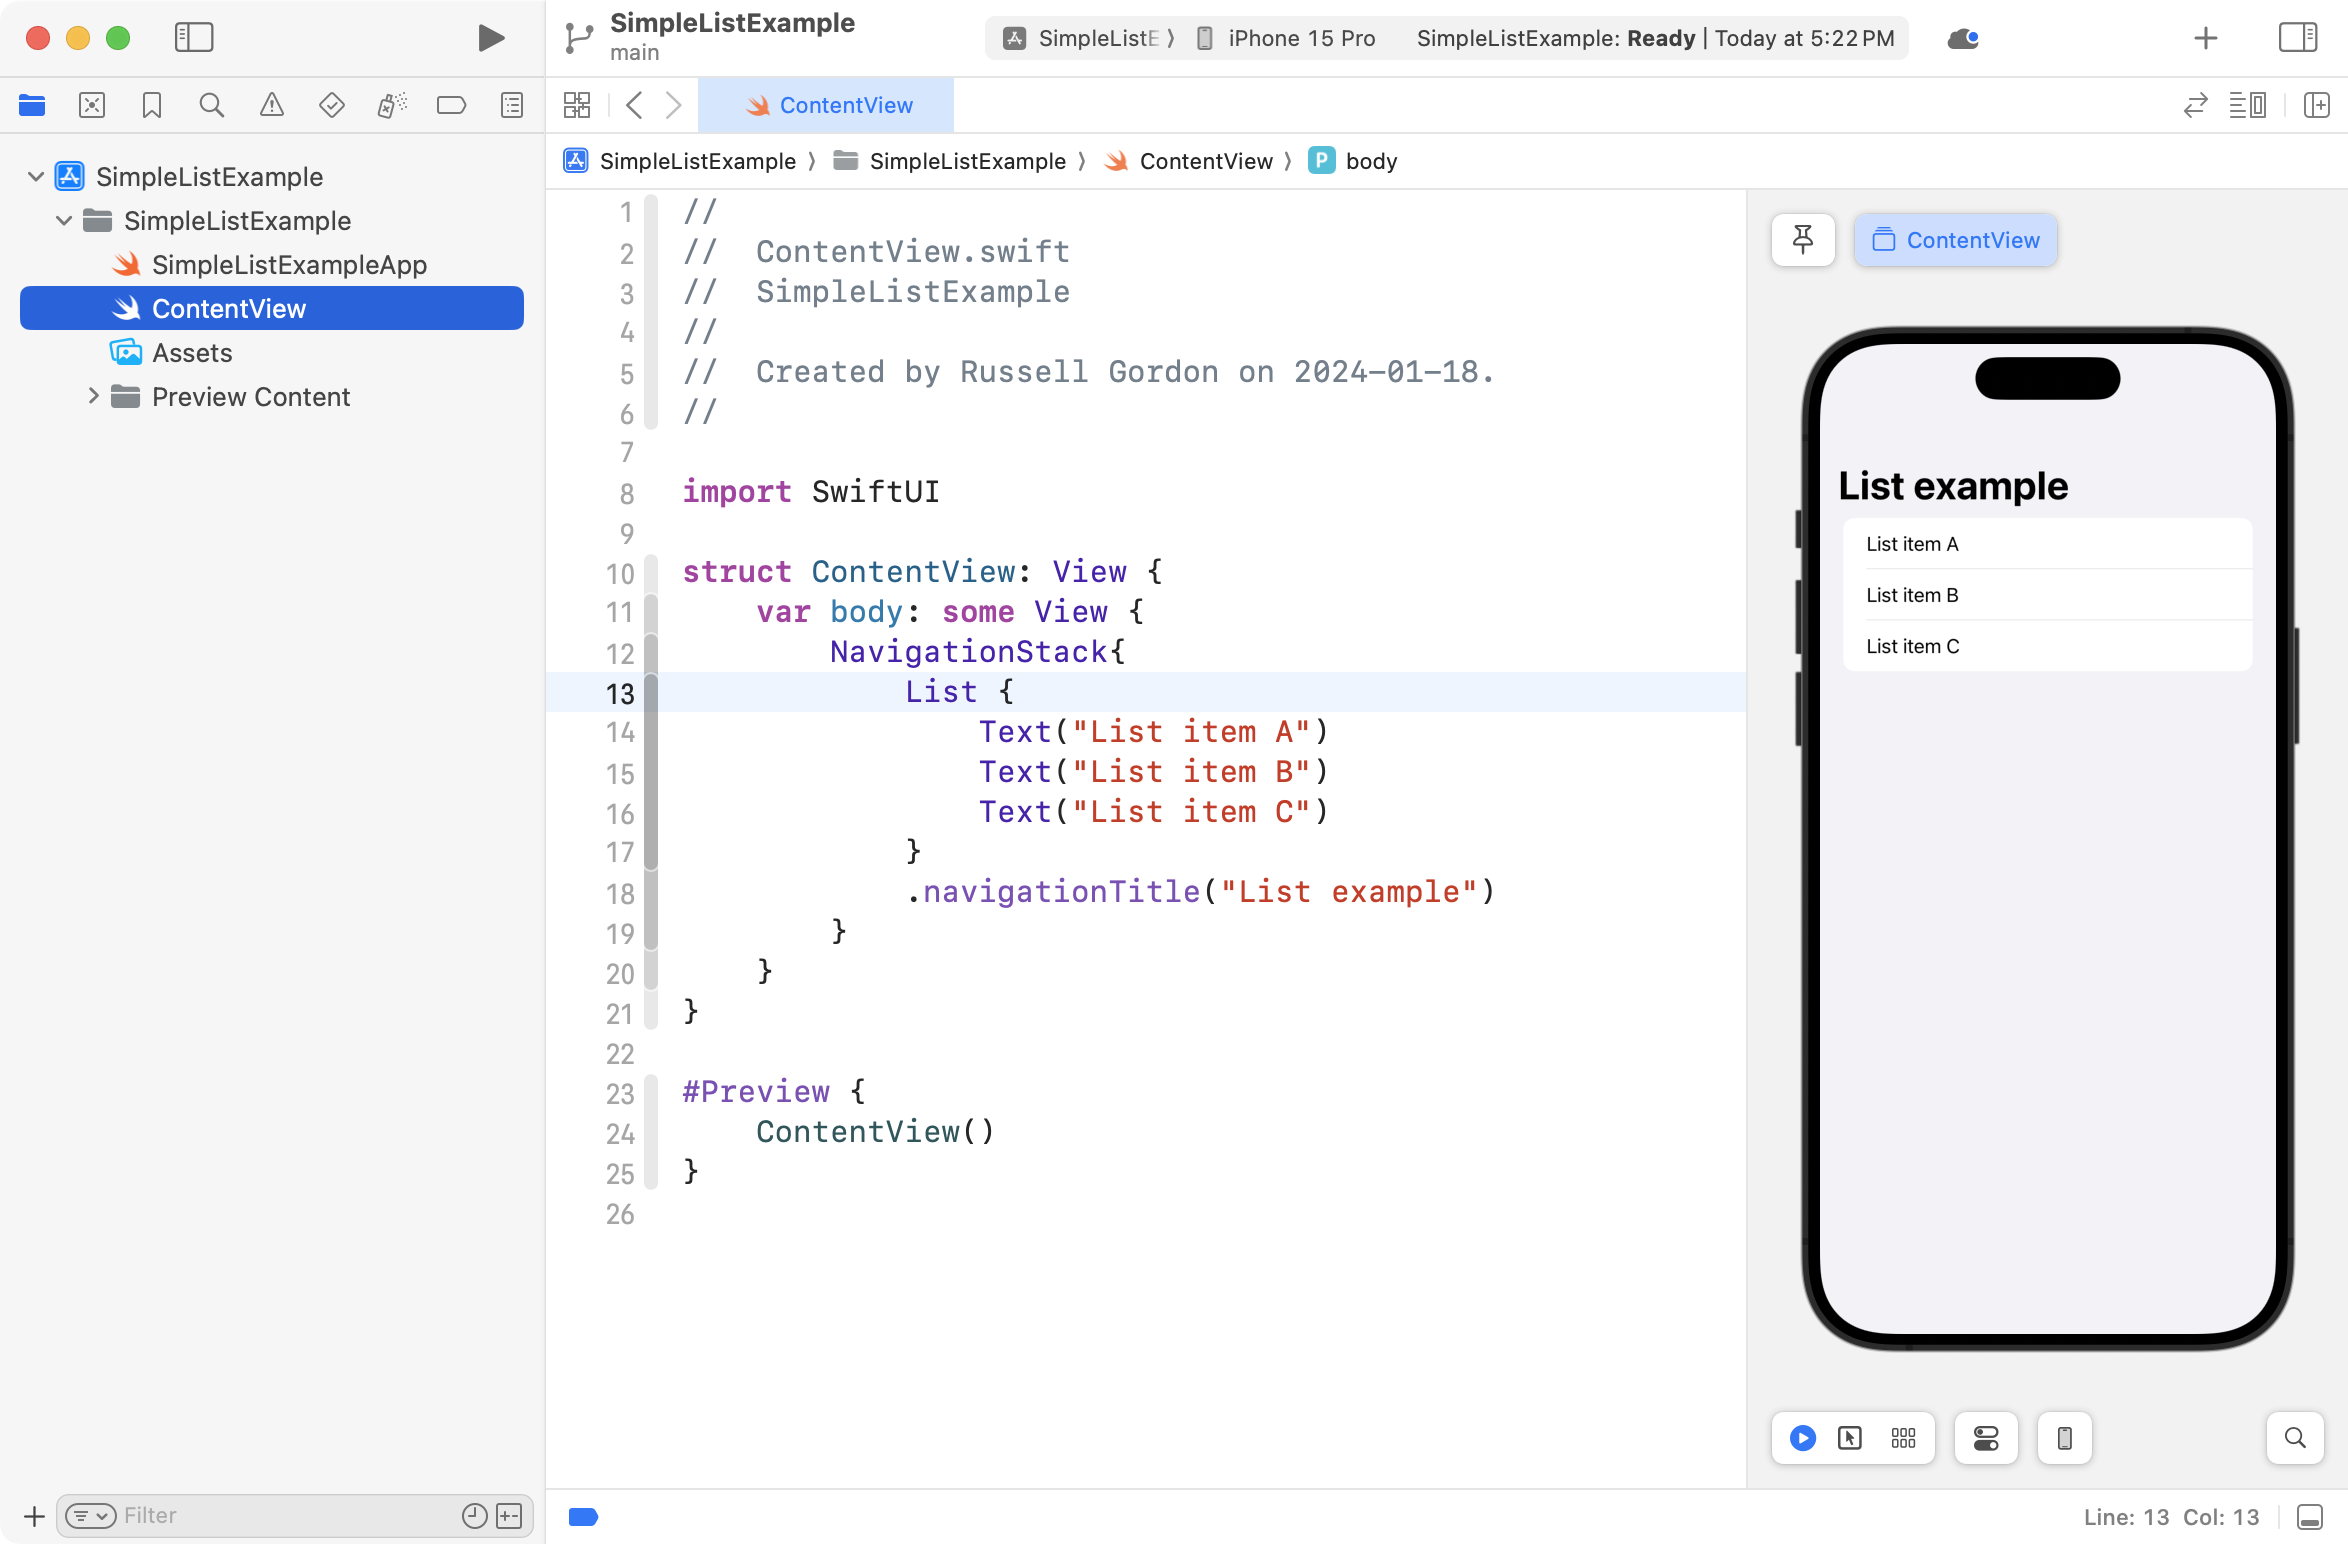
Of course, static values such as this cannot be deleted.
A ForEach structure only works on arrays of data.
Of course, arrays of data are dynamic, and so long as an array contains elements, those elements can be deleted.
This is why .onDelete only works on a ForEach structure.
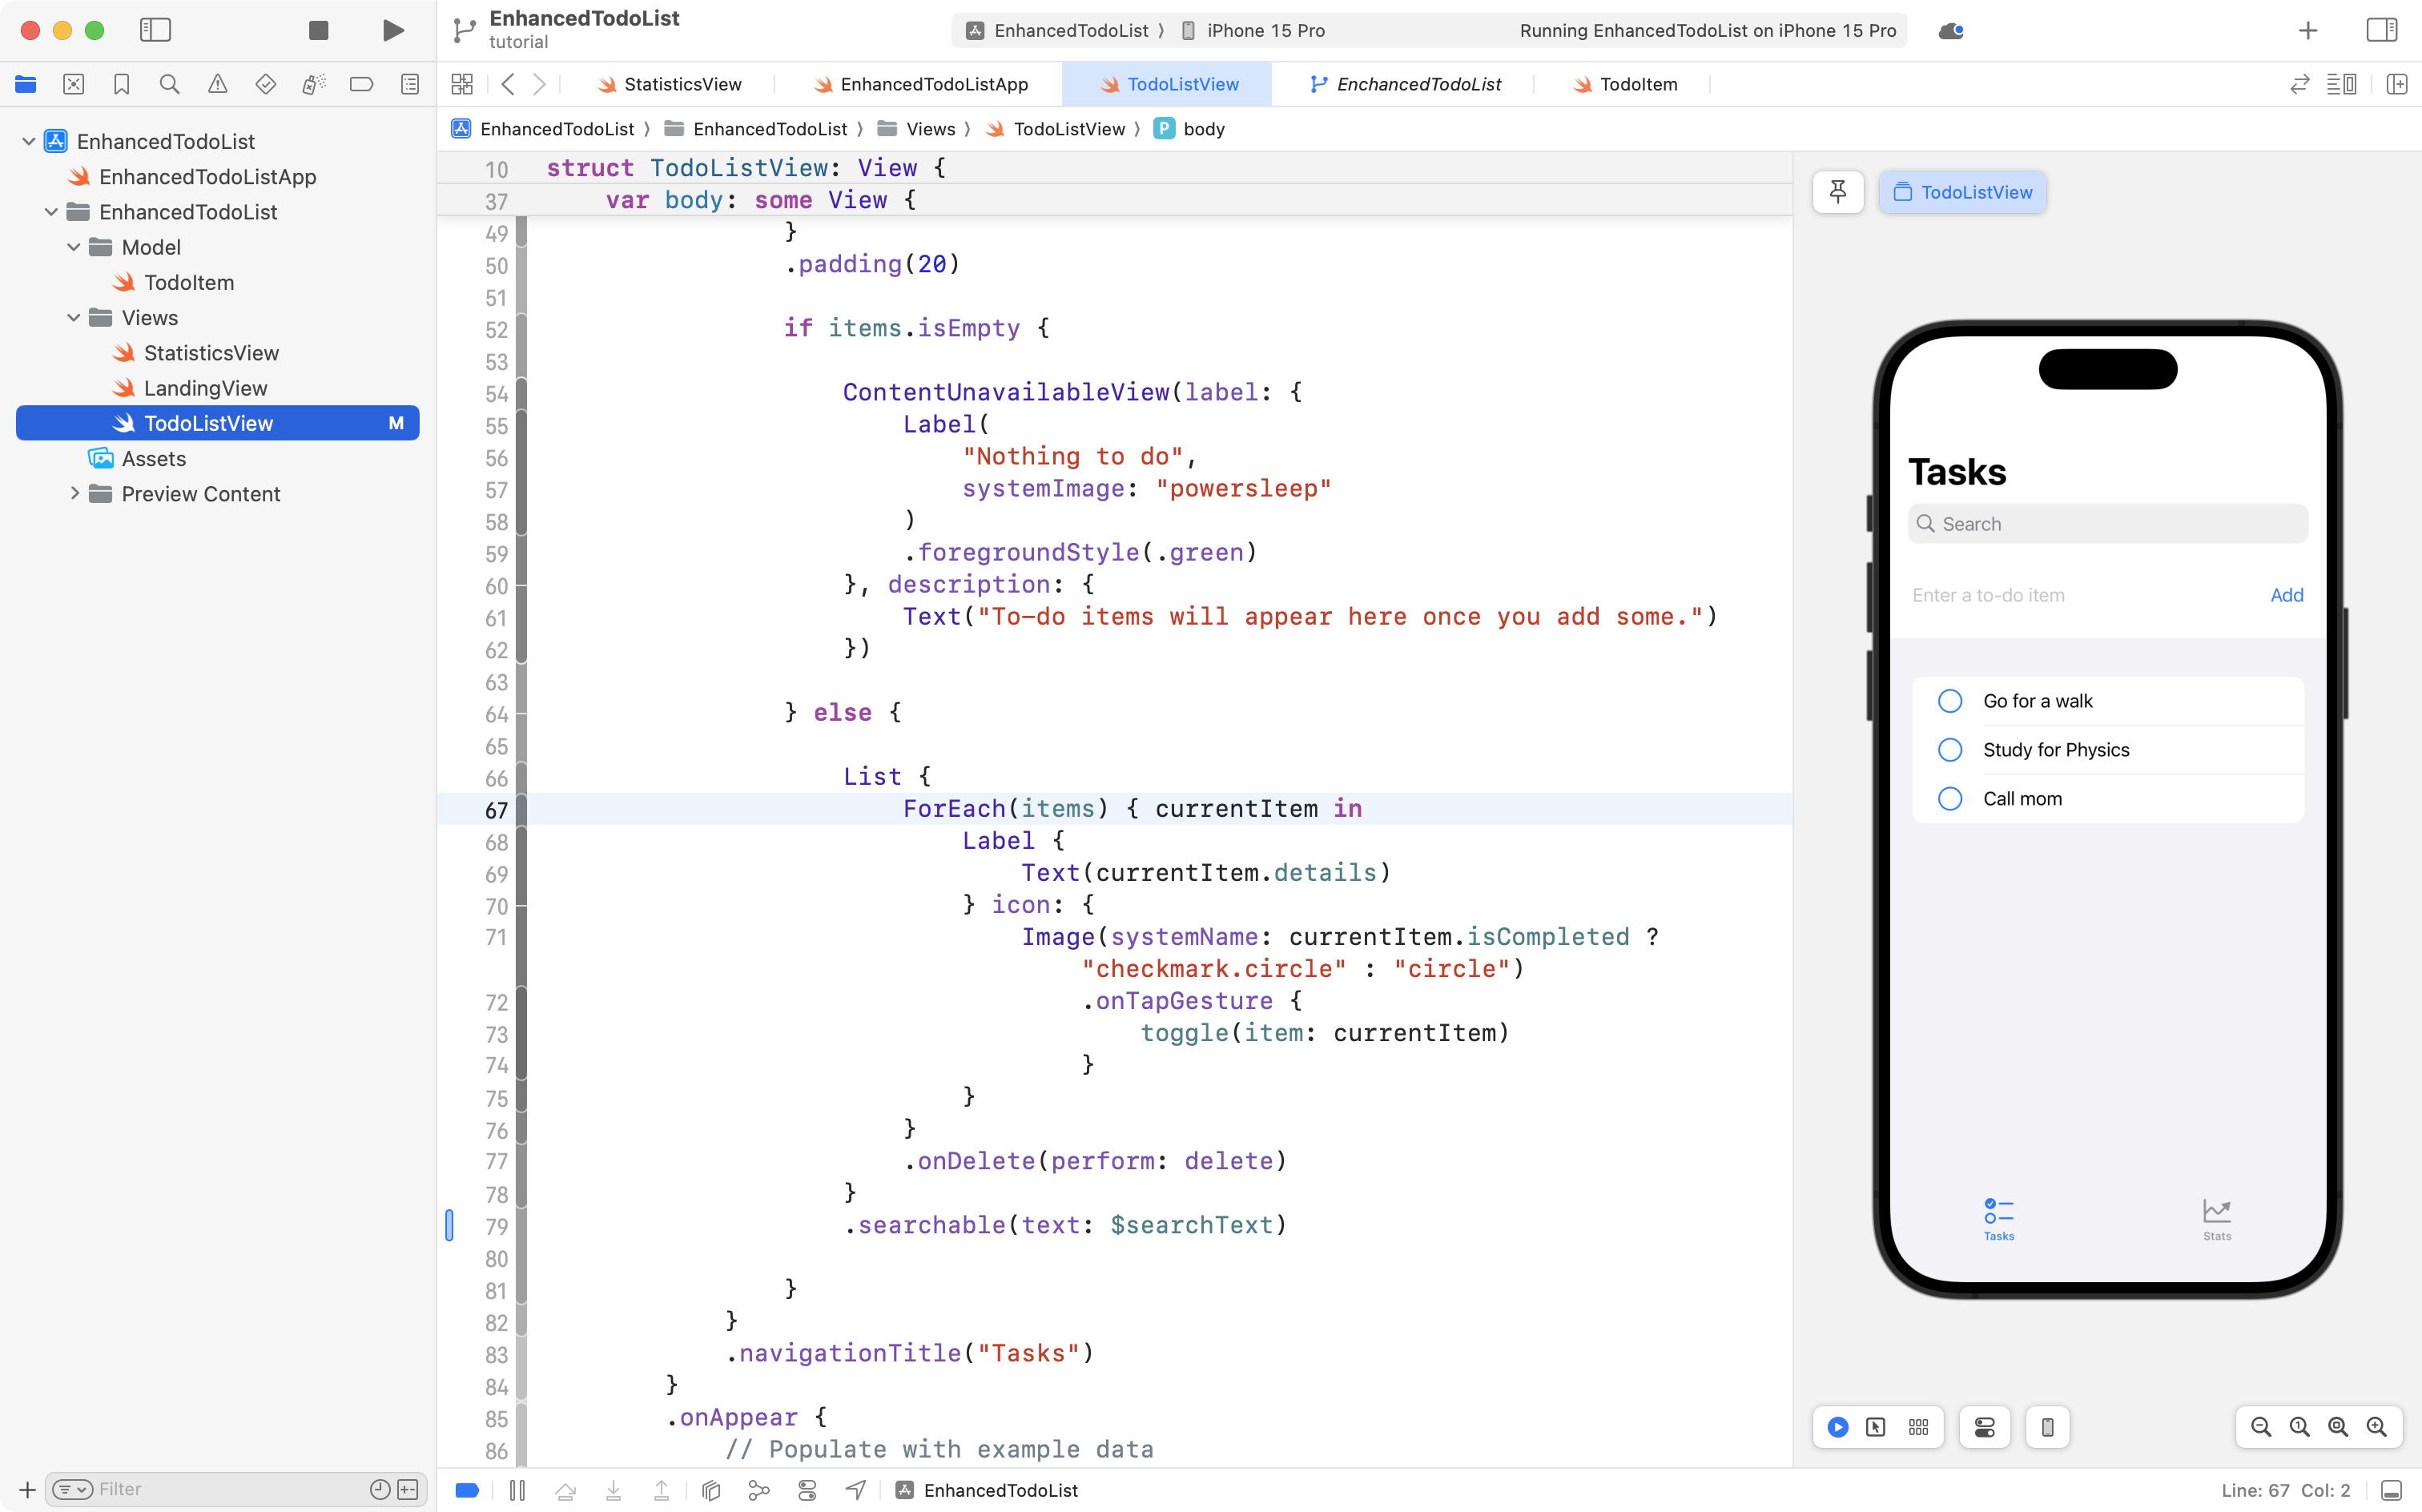
Locate the List structure in your TodoListView file:
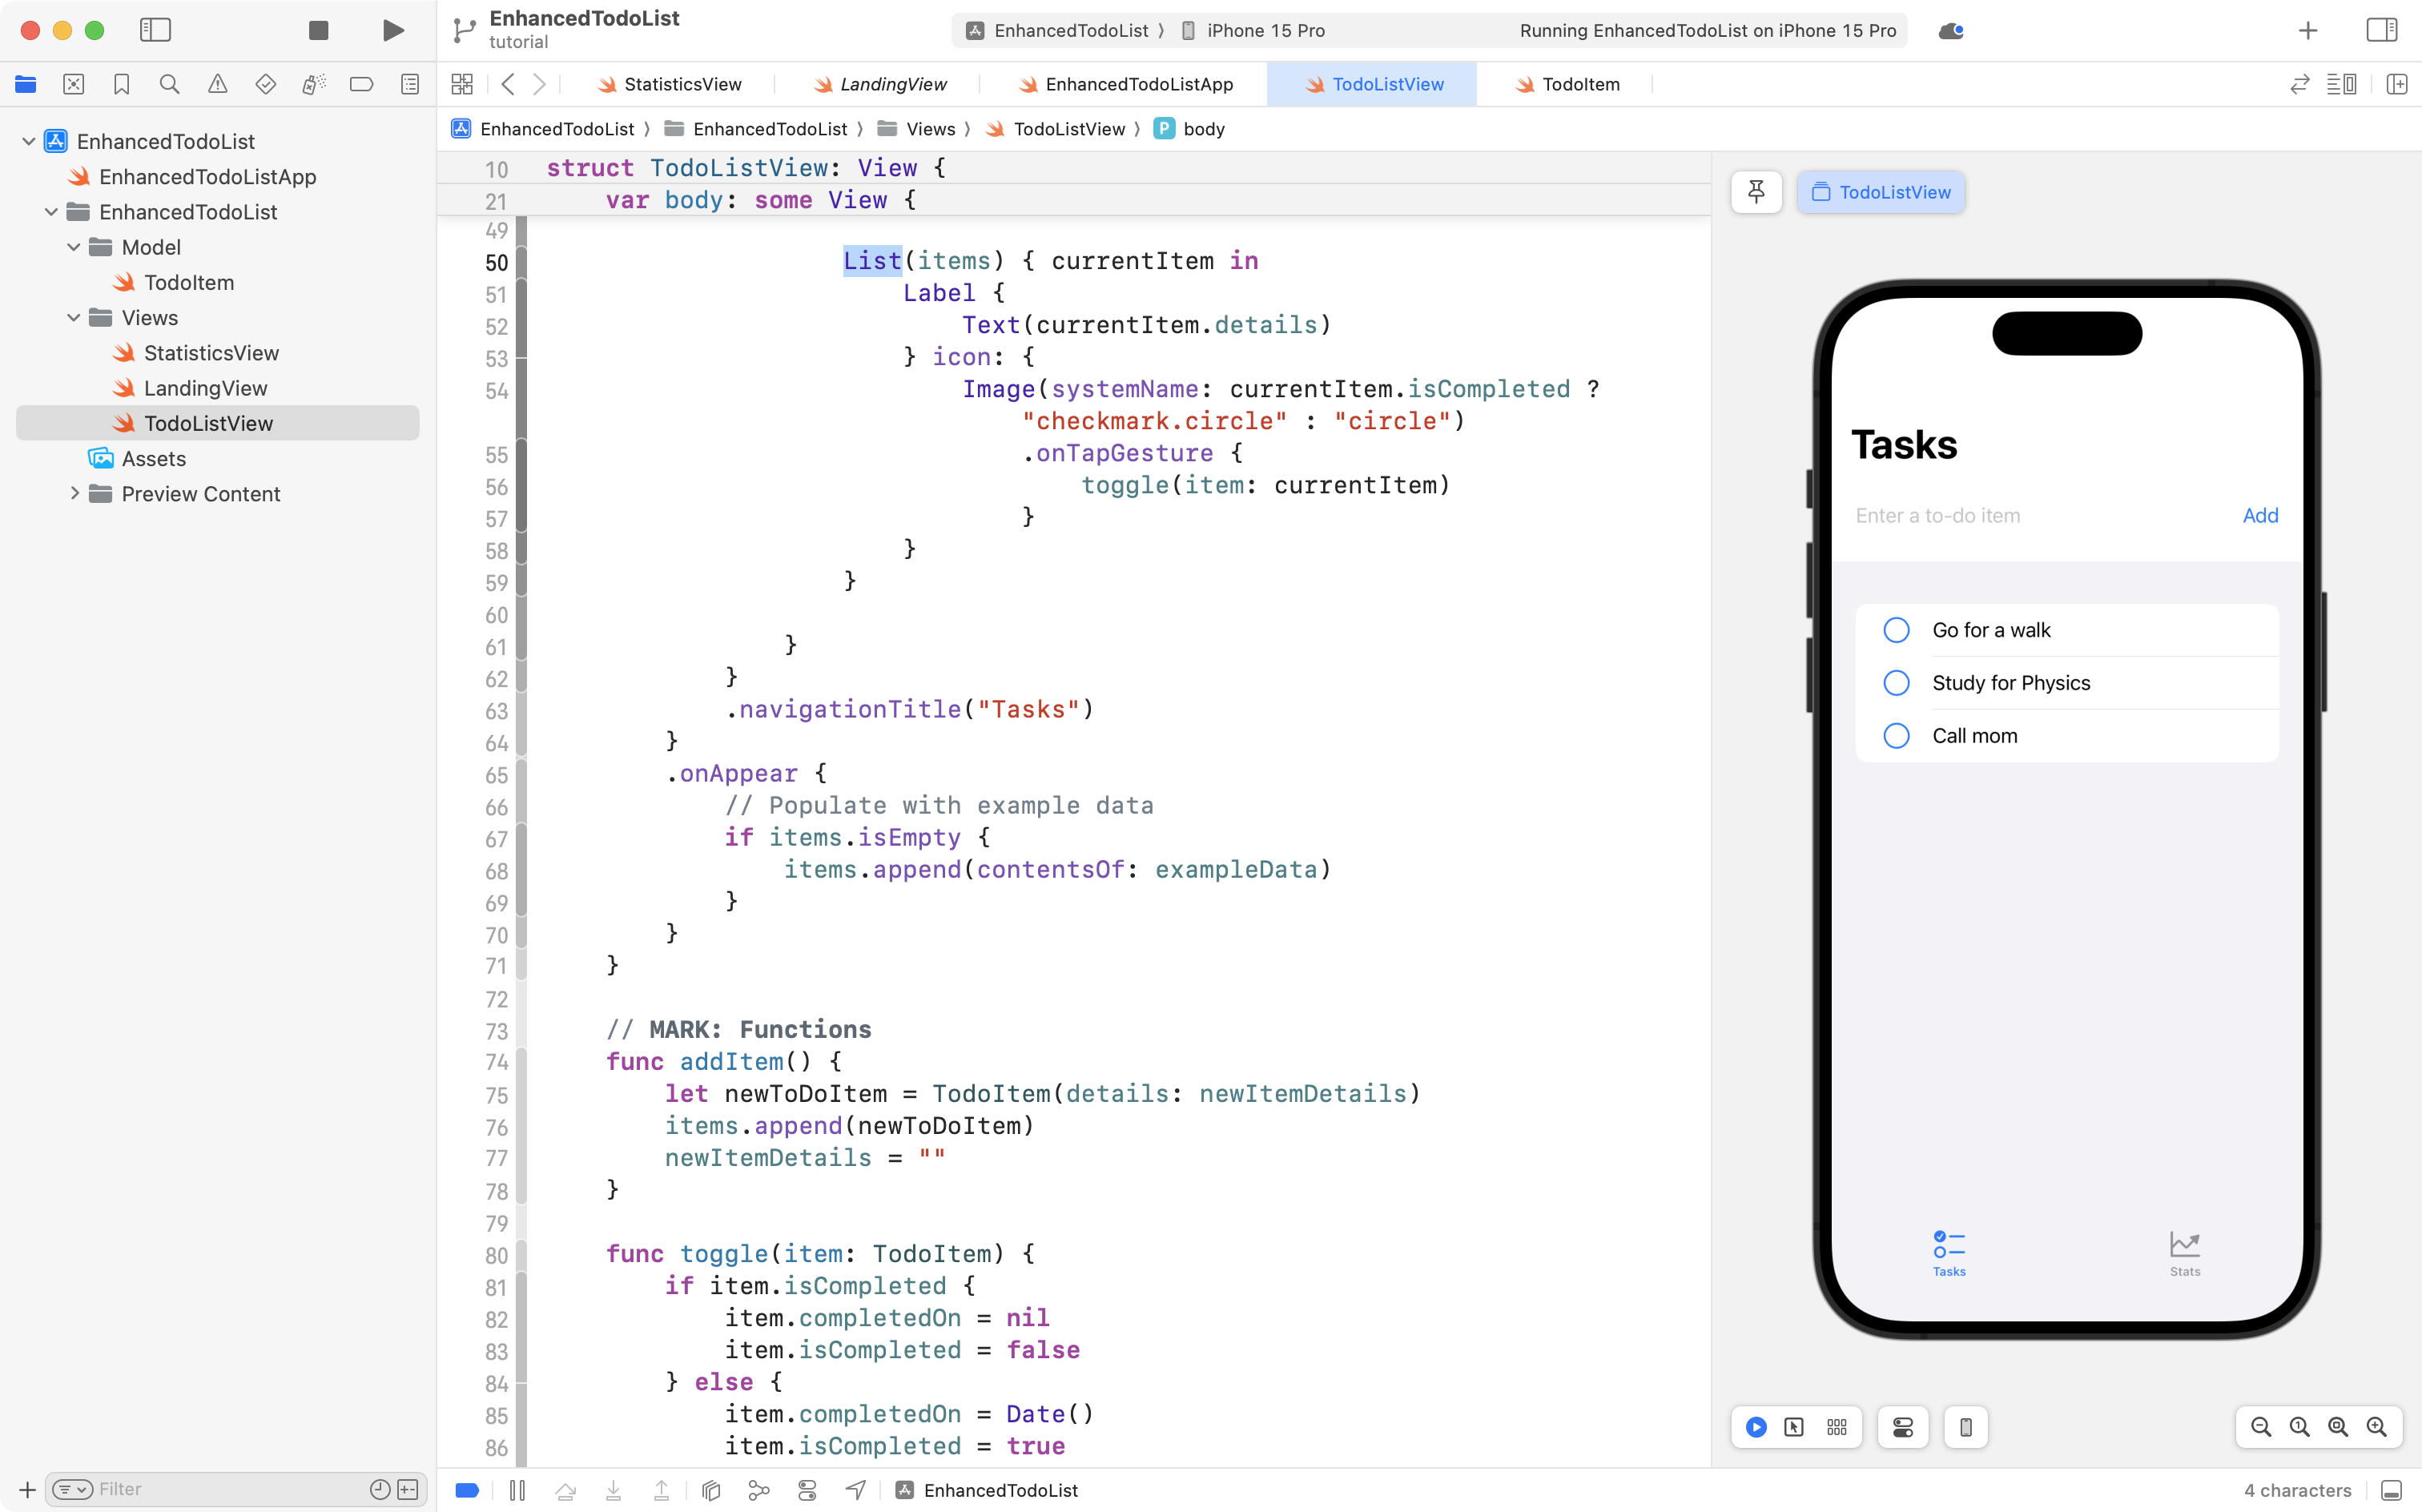
Now change that into a ForEach:
Your view will look odd momentarily, until you enclose the entire ForEach structure in a new List structure, like this:

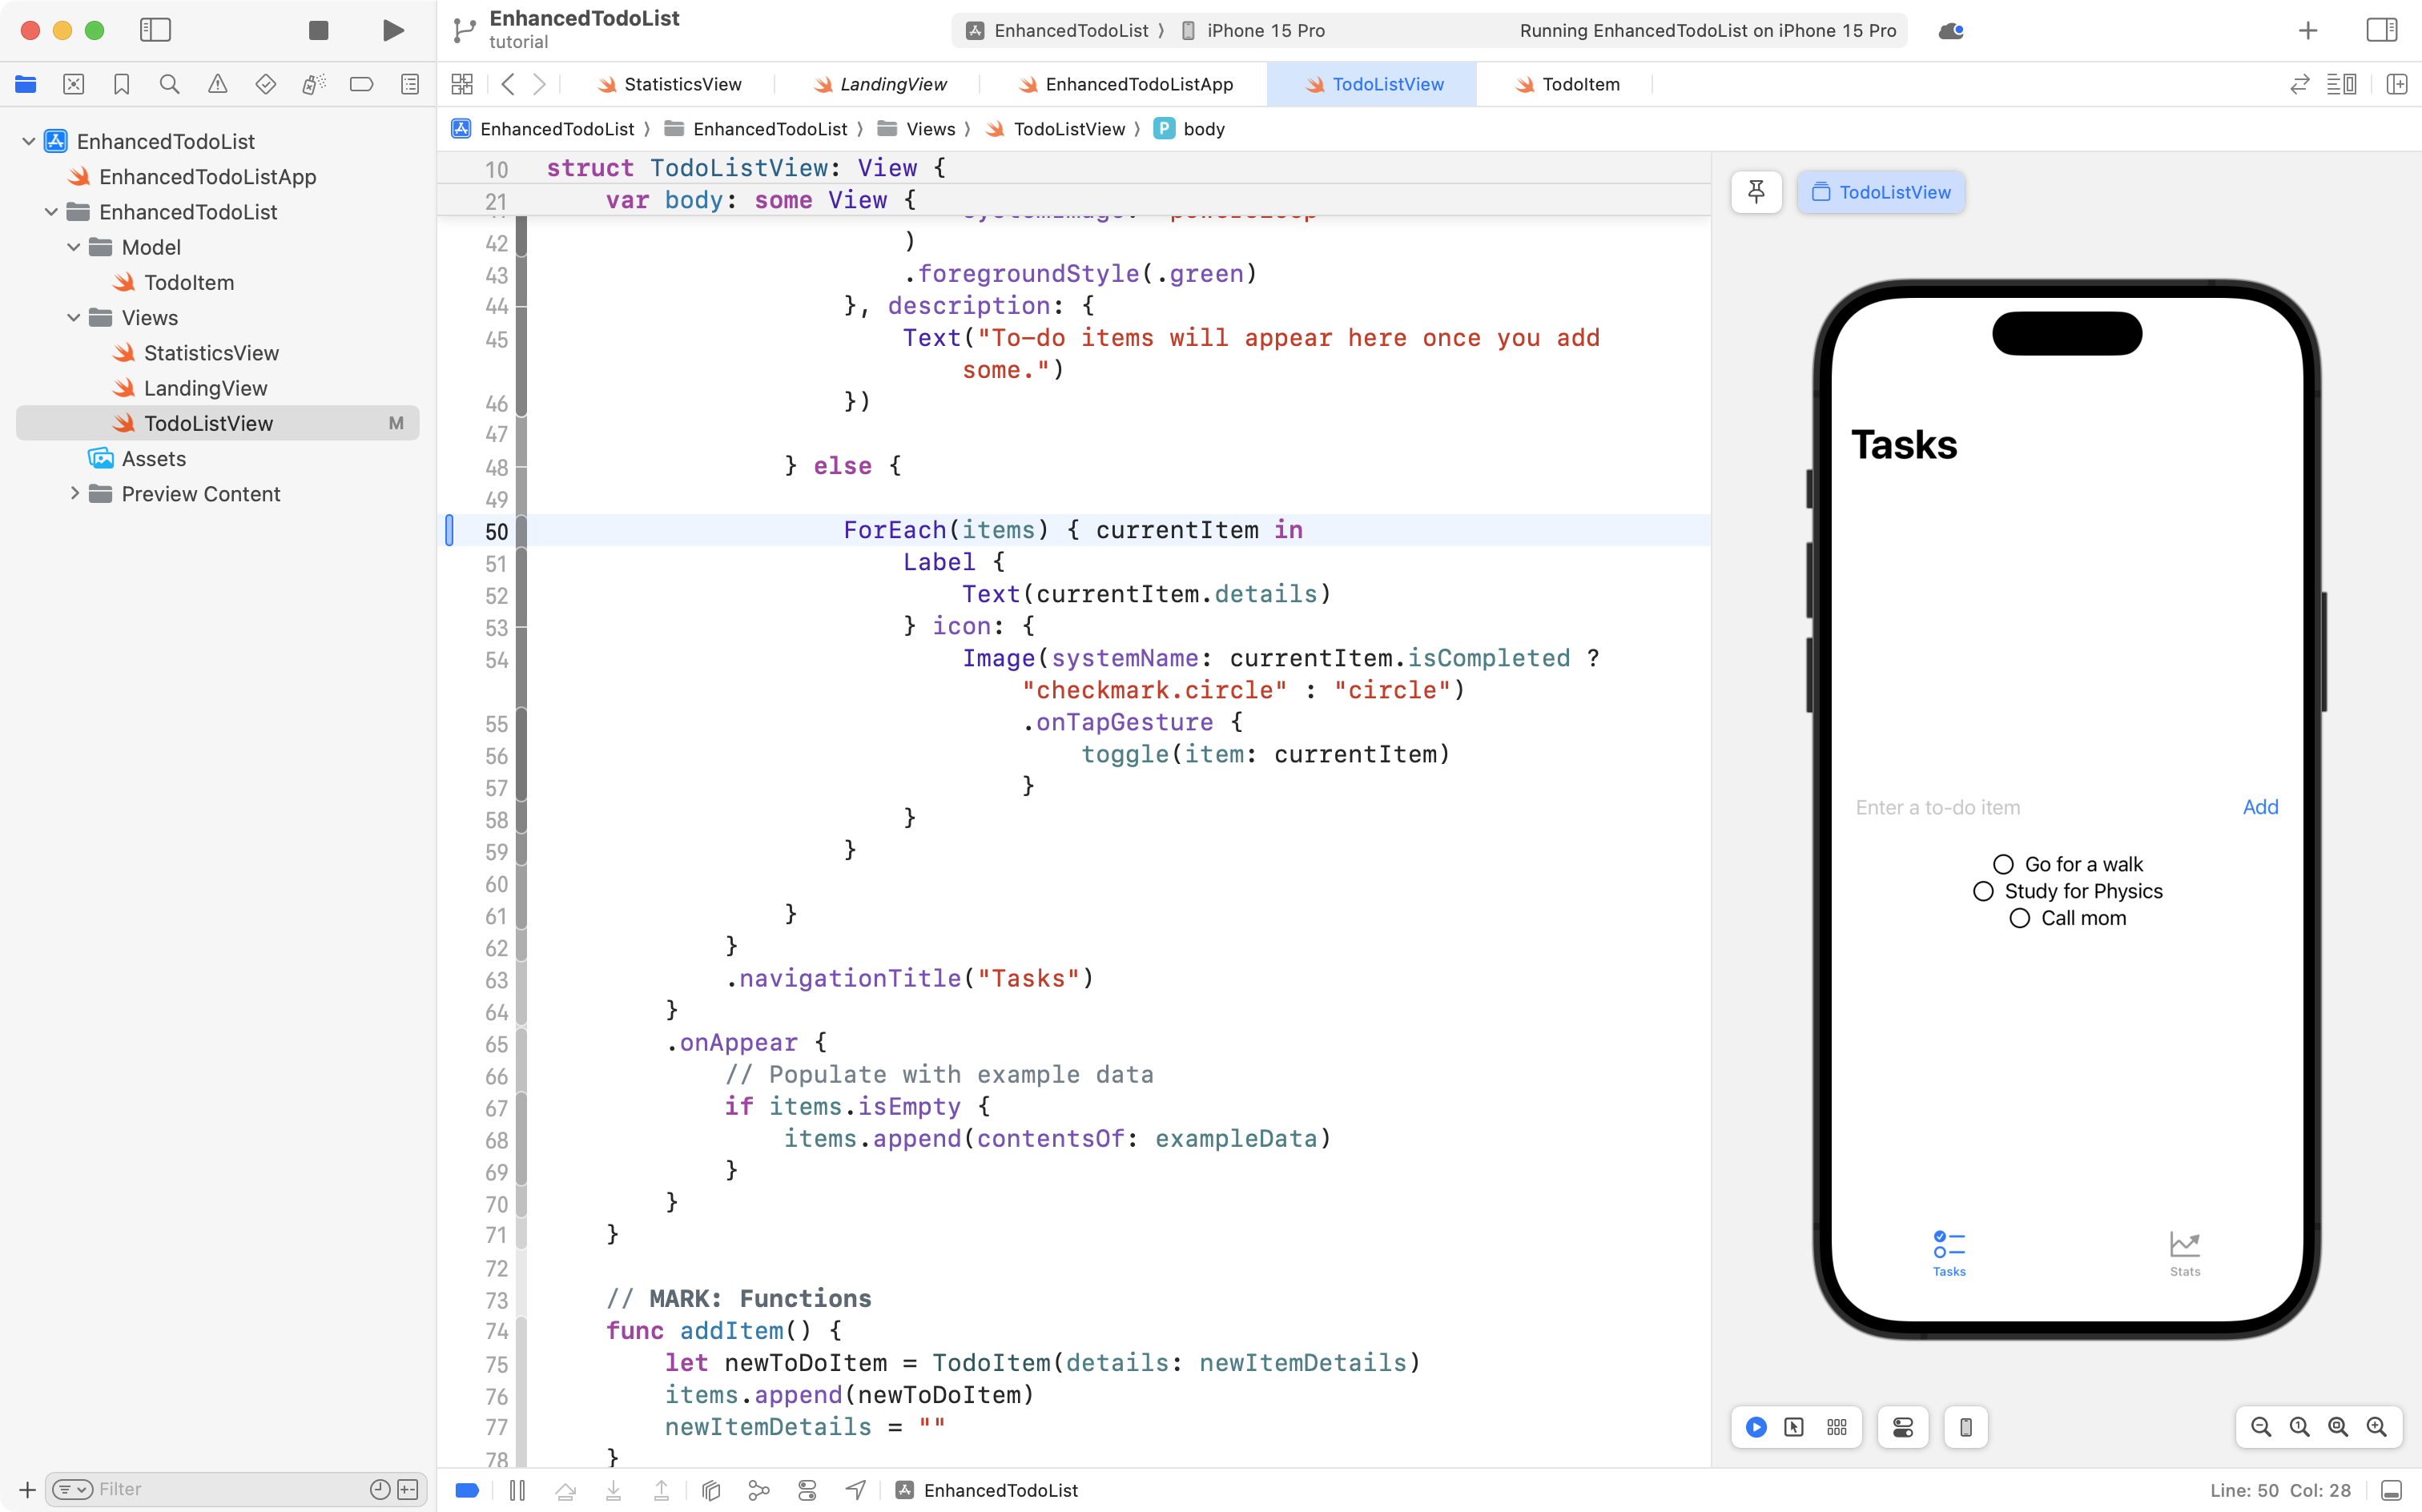
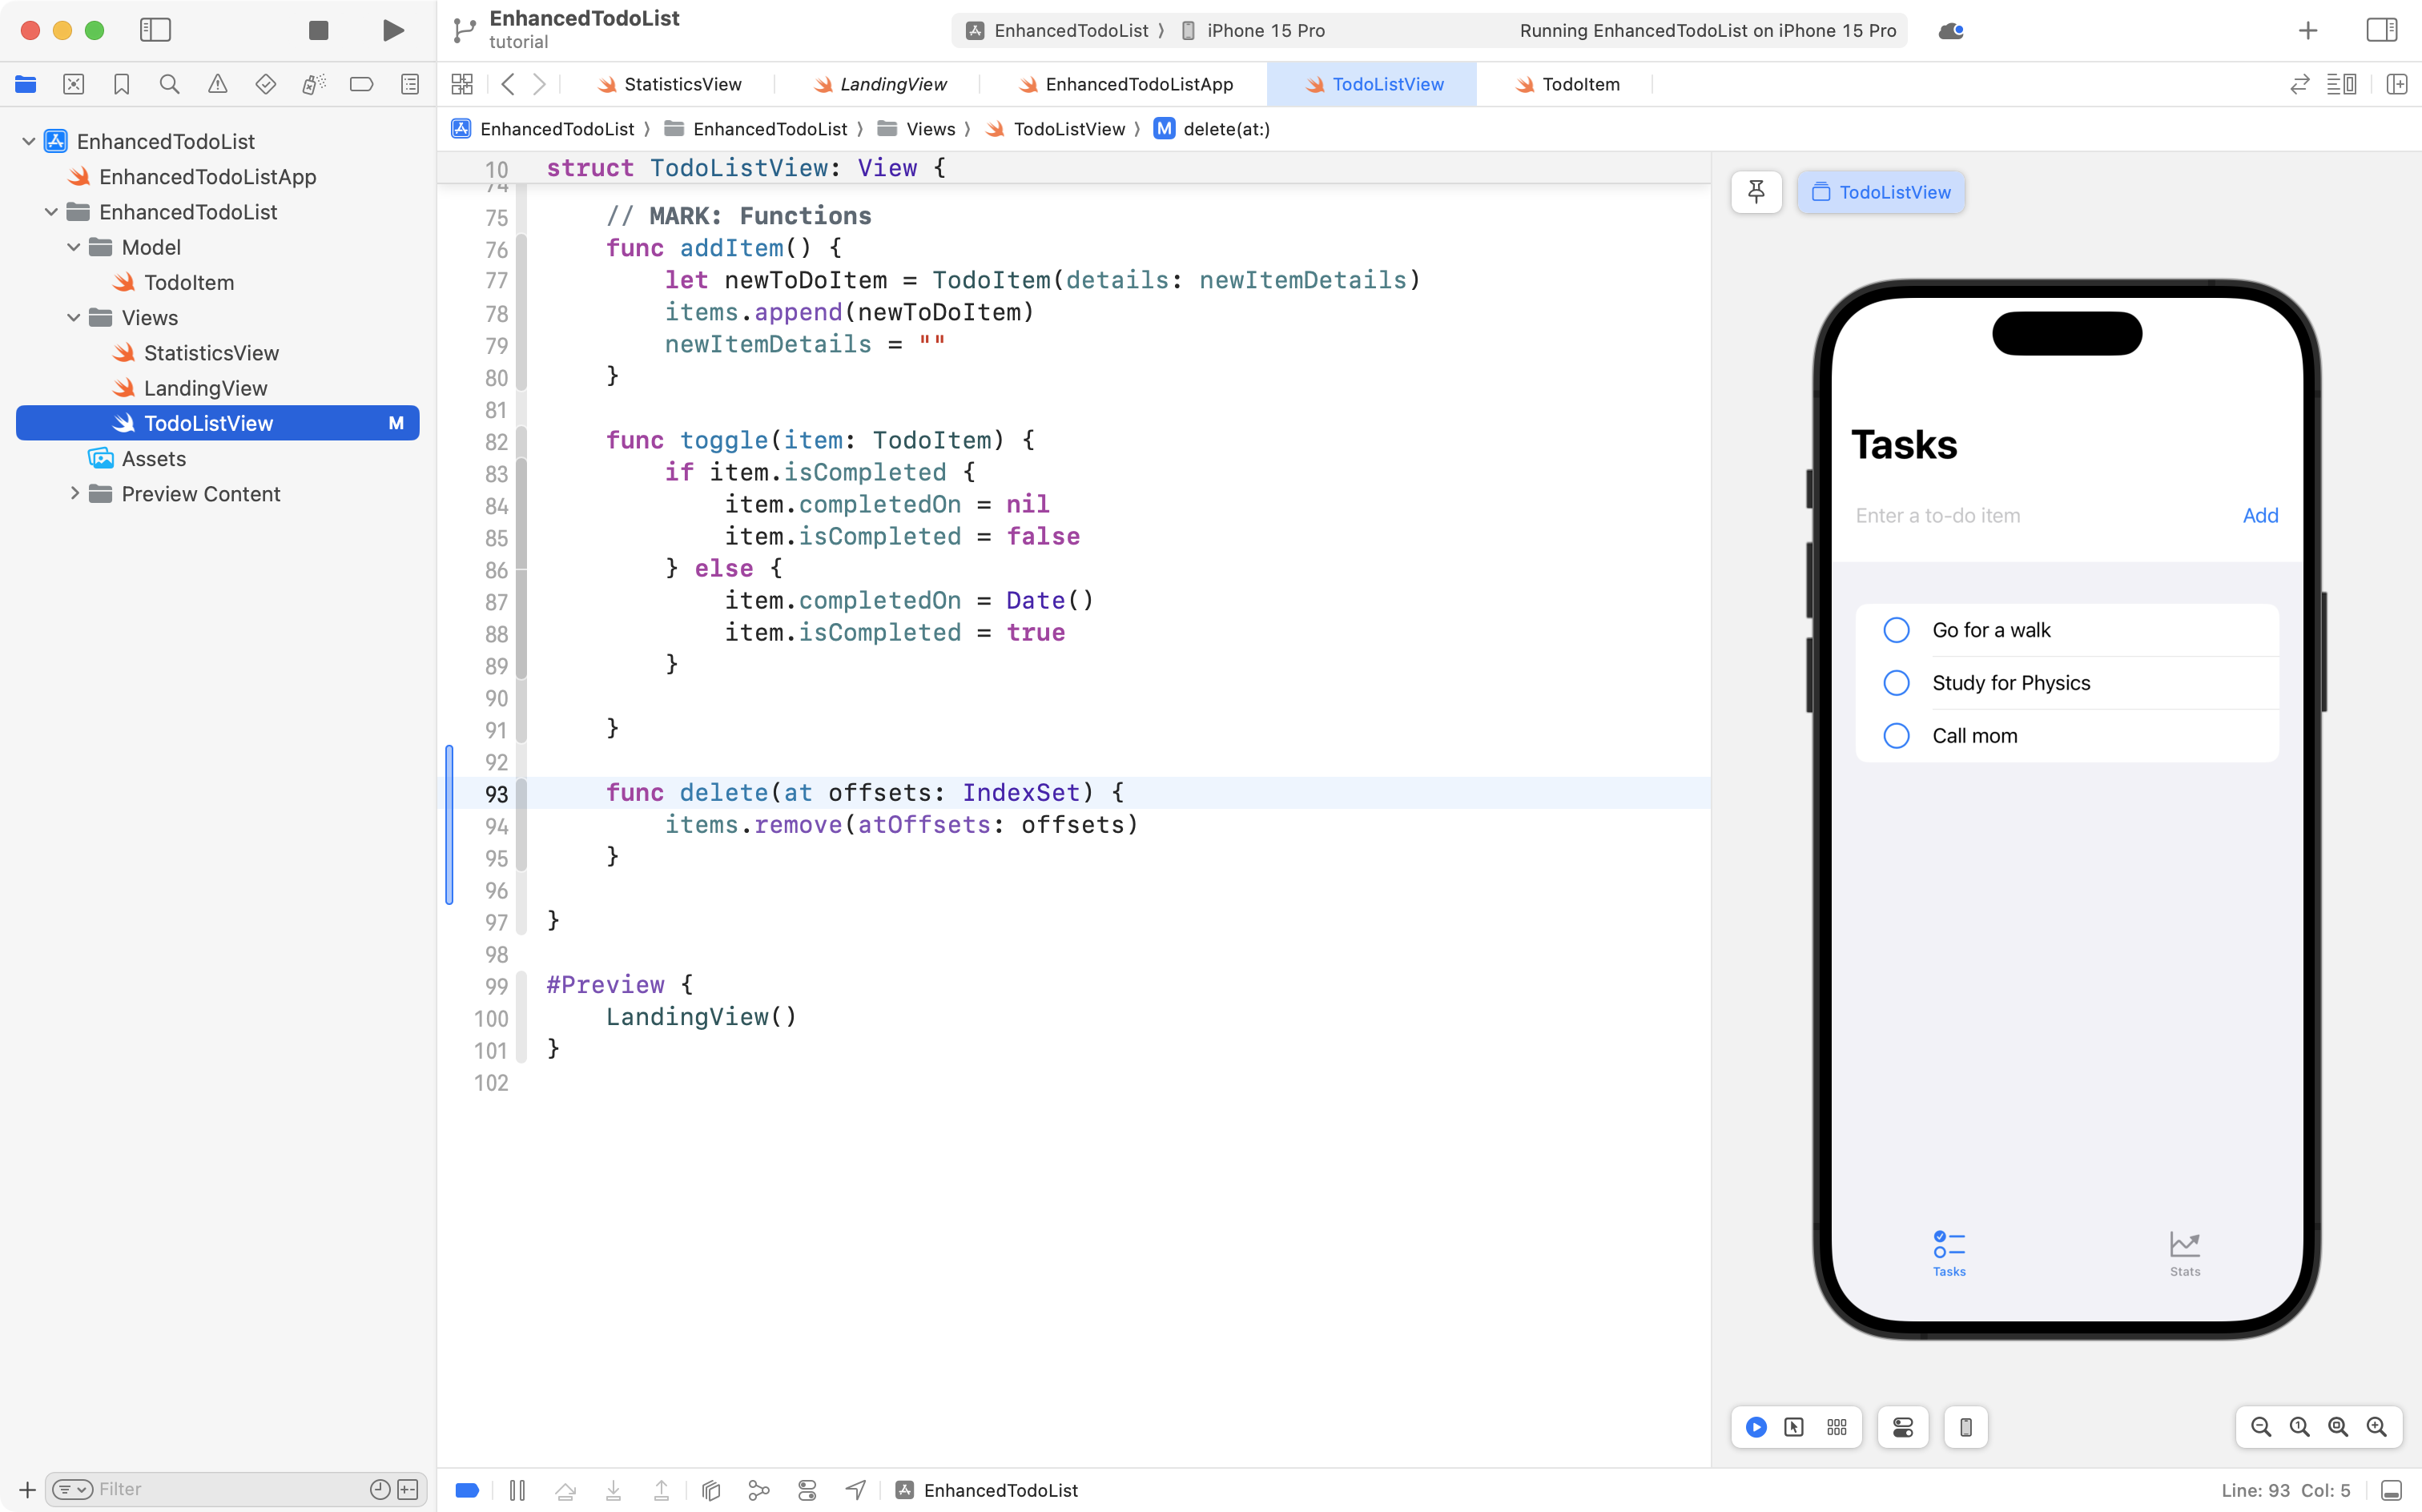
Scroll down below the toggle function and add the following code, taking care to add the function before the closing } of the TodoListView structure:
func delete(at offsets: IndexSet) {
	items.remove(atOffsets: offsets)
}
... like this:
Finally, move back up to the ForEach structure. Attach this code:
.onDelete(perform: delete)
... to the bottom of the ForEach structure, like this:
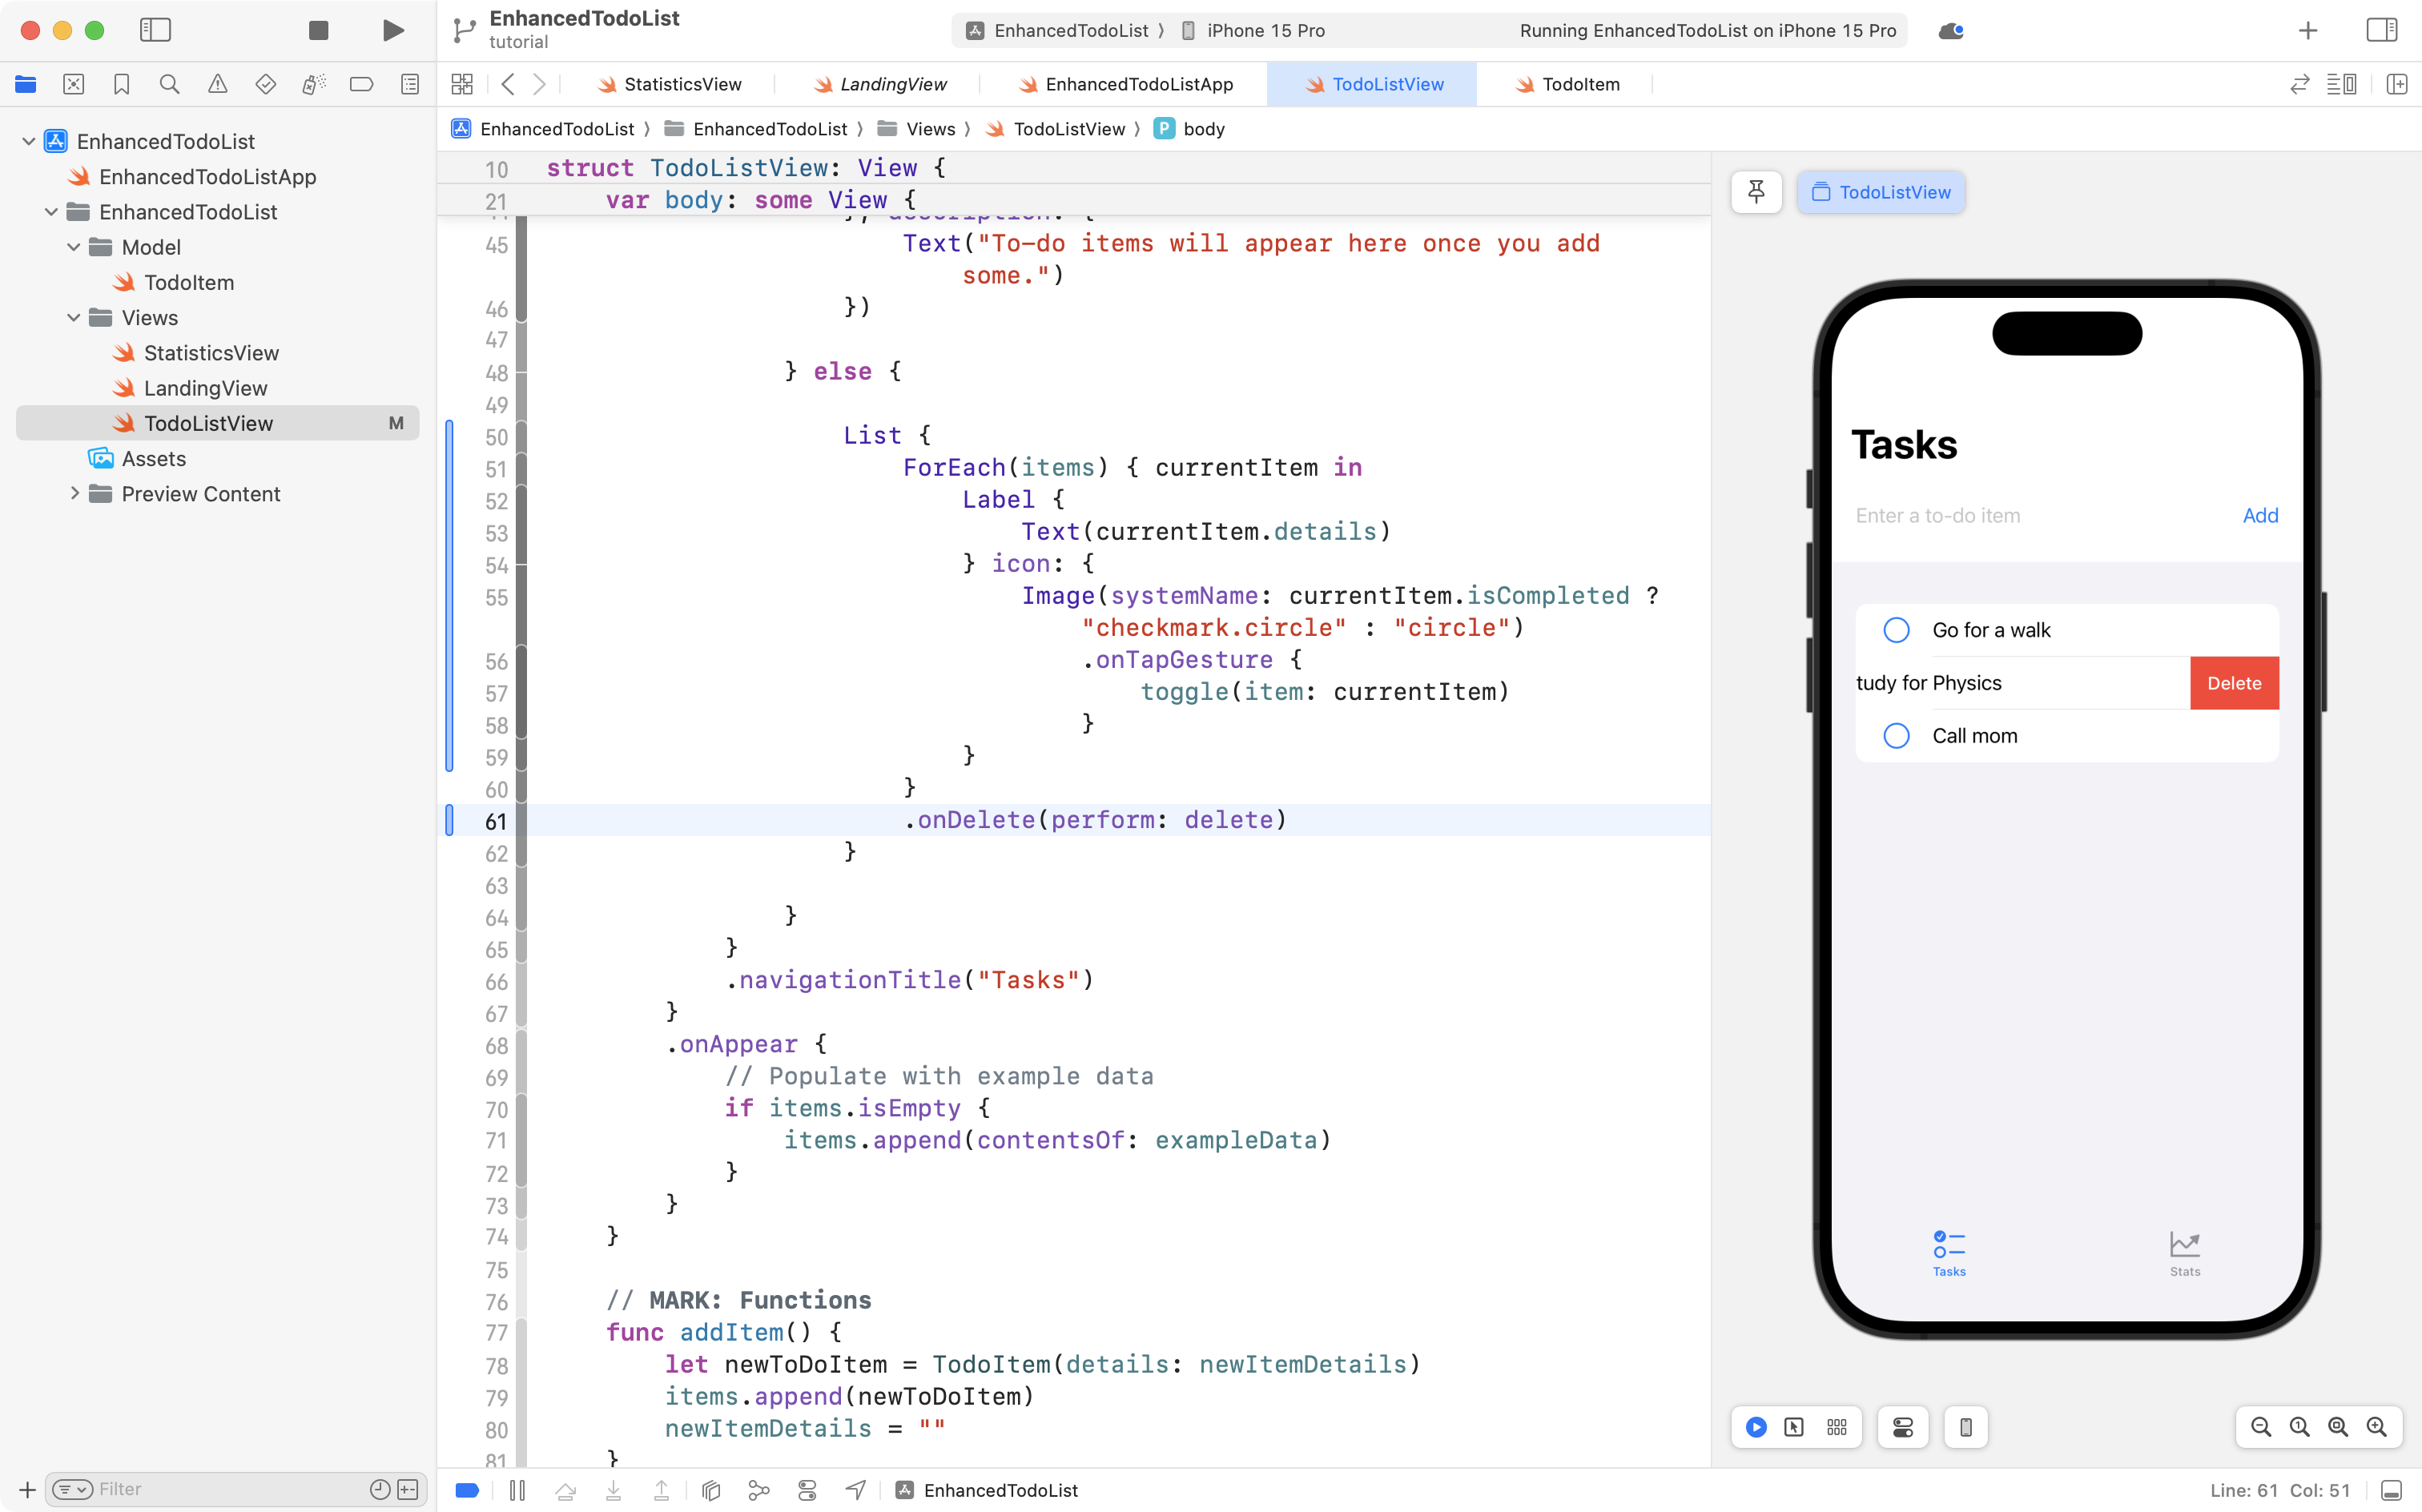
You can now swipe to delete items from your to-do list.
Please commit and push your work with this message:
Can now delete items from the list.
Add search
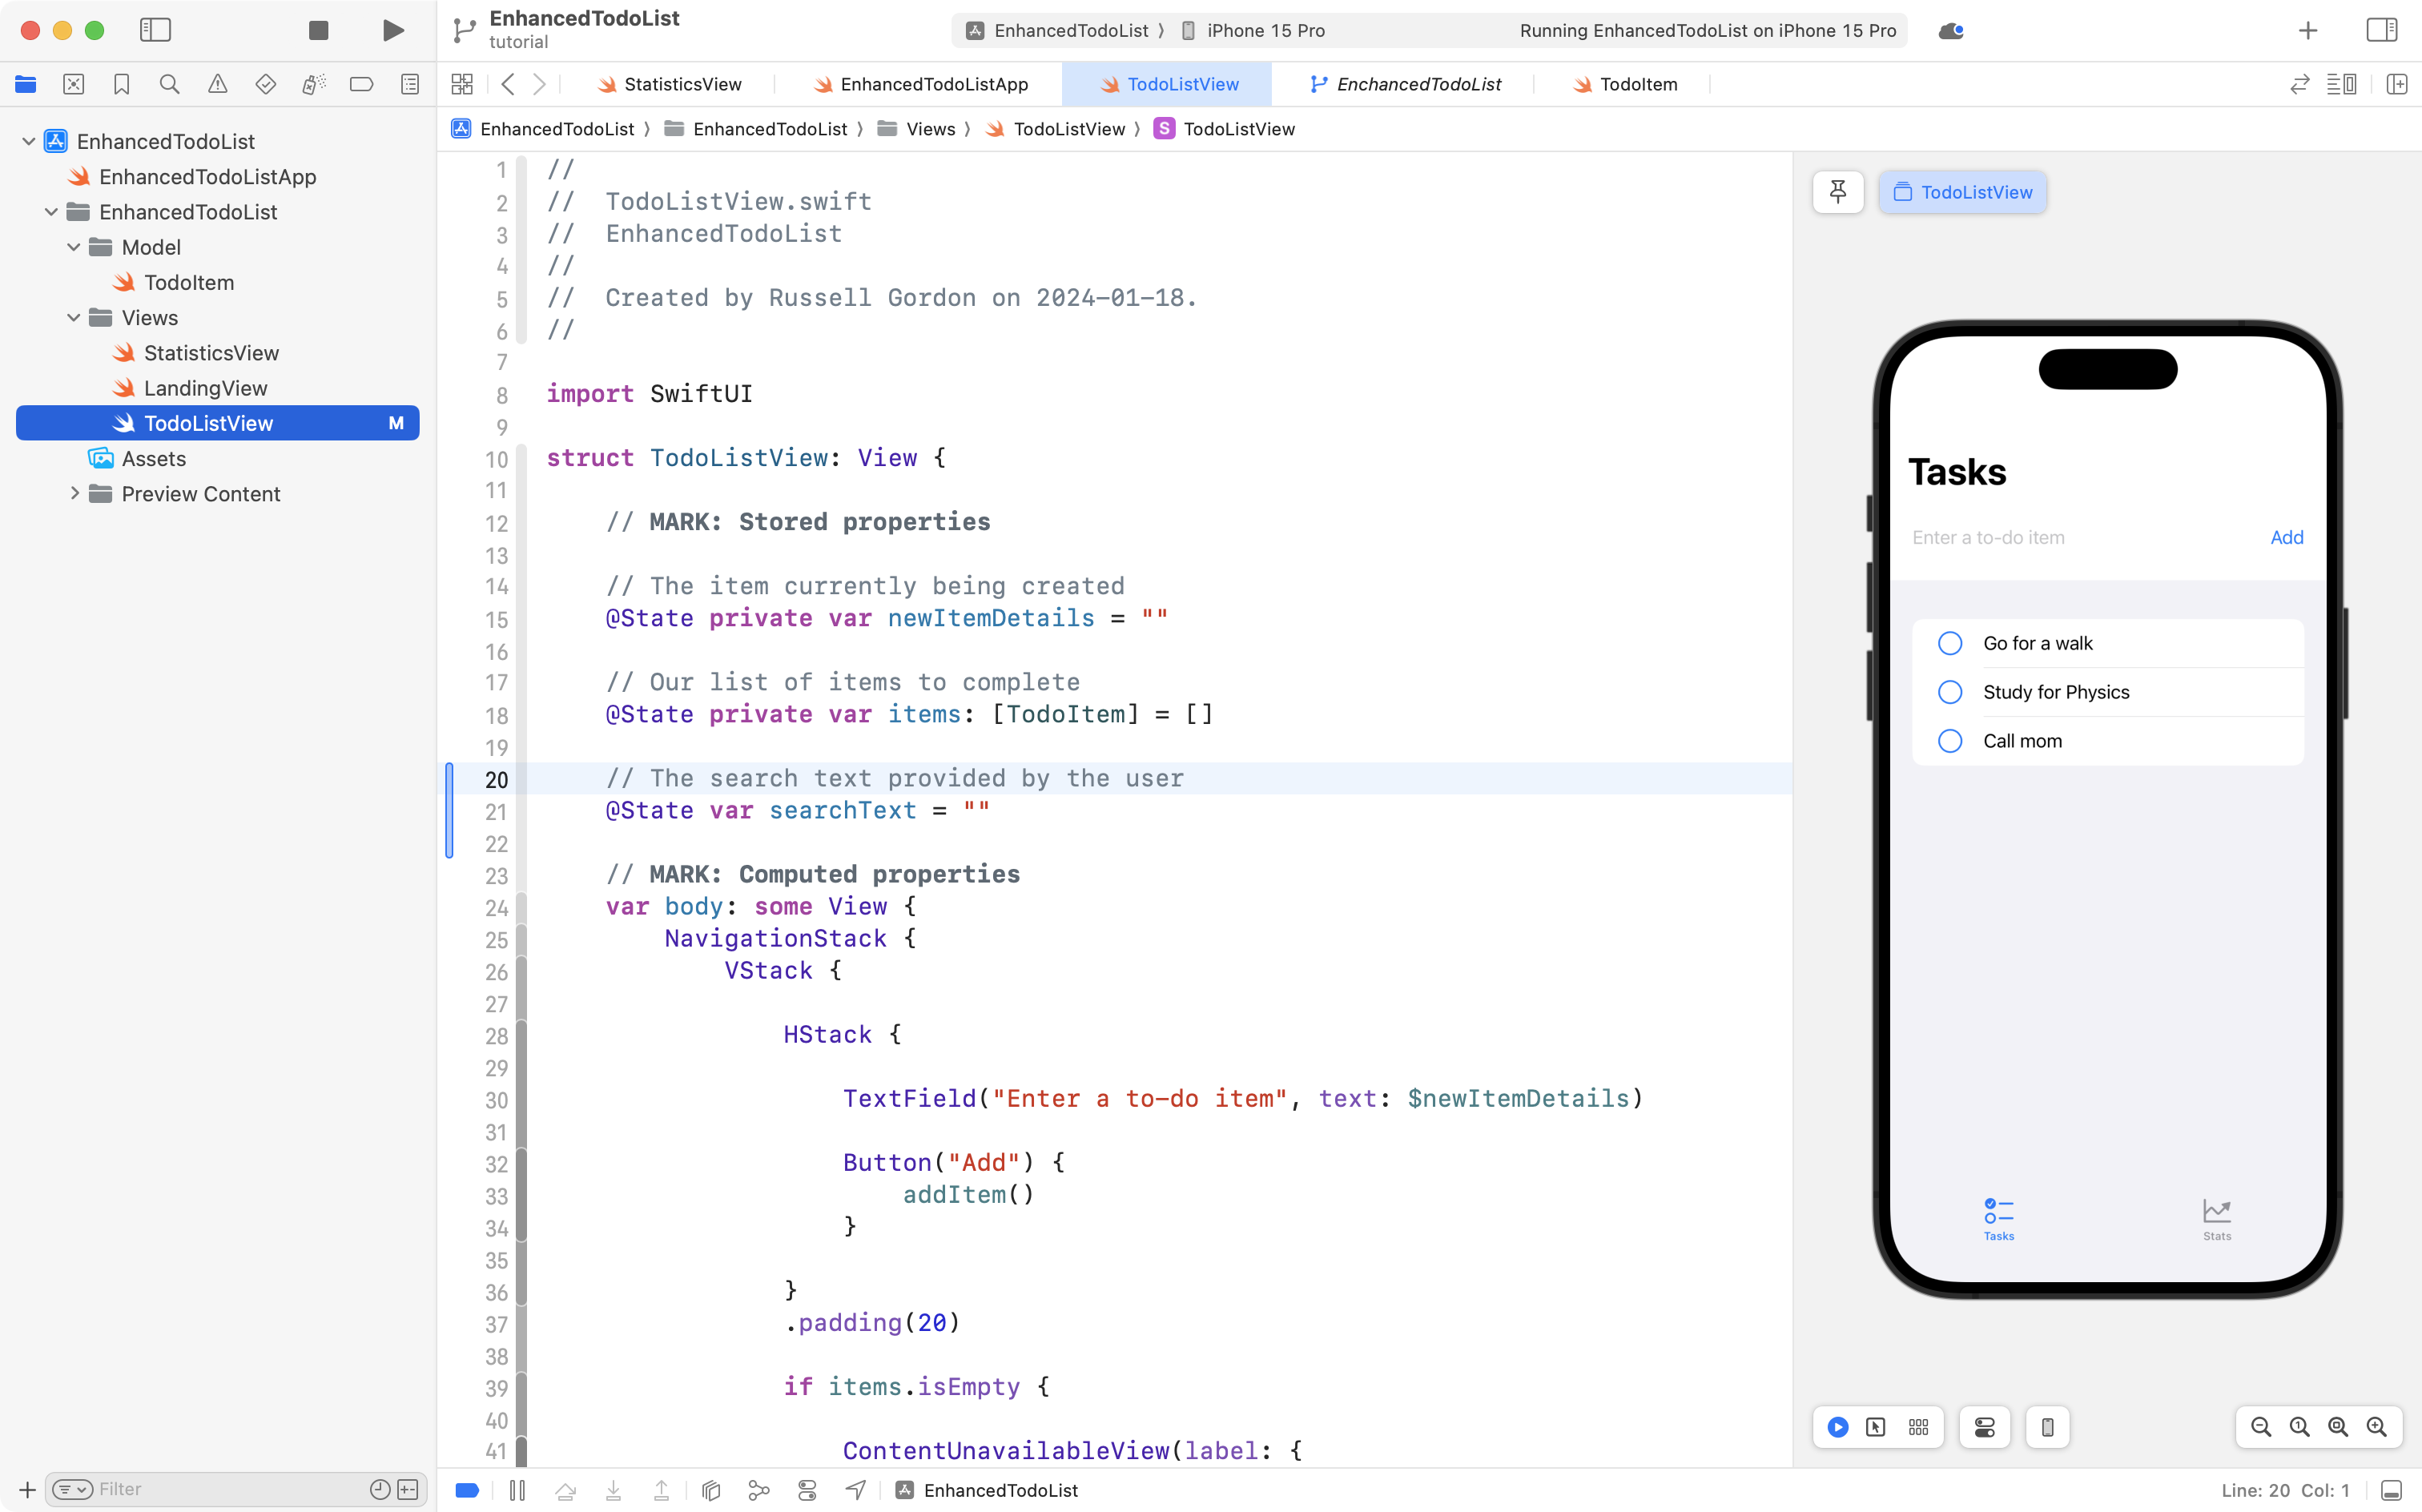
To begin adding search capability to the app, first add a stored property to hold the text the user will be using to conduct a search:
// The search text provided by the user
@State var searchText = ""
... like this:
Next, scroll down to the List stucture and add the following view modifier:
.searchable(text: $searchText)
...like this:
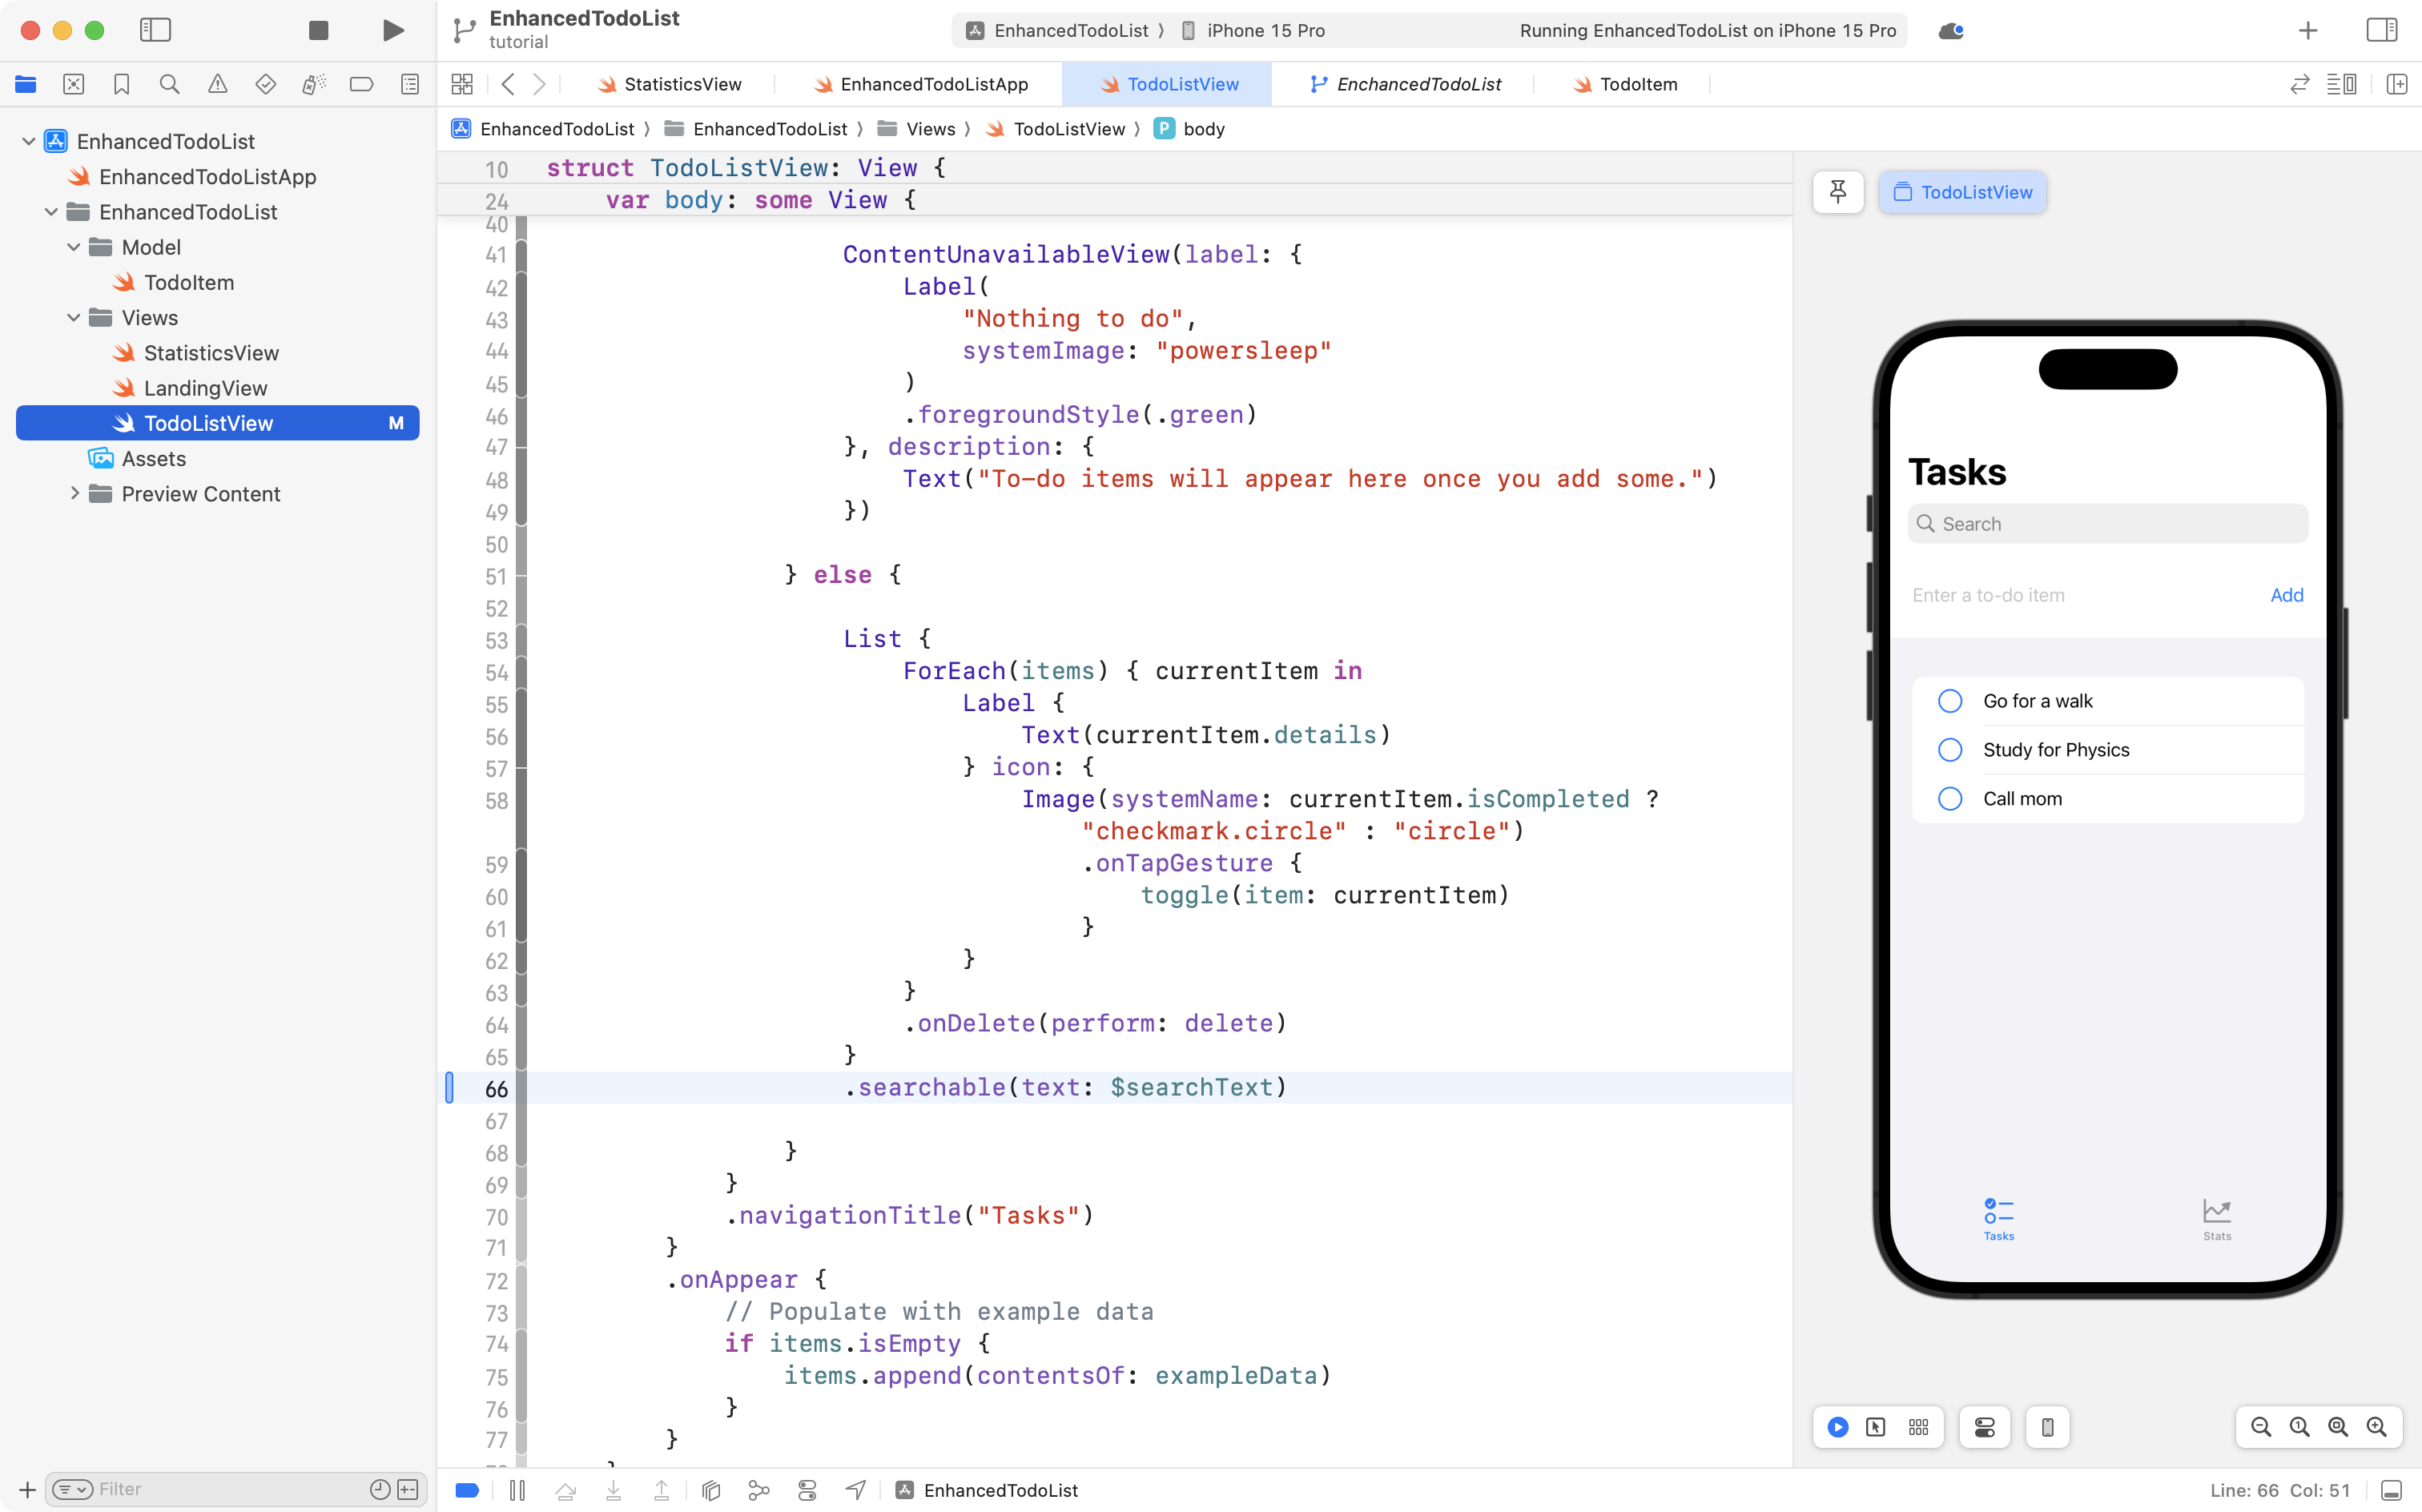
SwiftUI takes care of adding the user interface elements. You can now type in the search field, and what you type will be placed in the searchText stored property. However, nothing happens. To fix that, we need to make two more small edits.
First, we need to add a computed property that will take care of filtering our list of to-do items.
Place this code:
// Provide list of to-do items filtered based on the search text
var filteredItems: [TodoItem] {
	if searchText.isEmpty {
		return items
	} else {
		return items.filter { item in
			item.details.lowercased().contains(searchText.lowercased())
		}
	}
}

// The user interface
... above the body property but after the stored properties, like this:
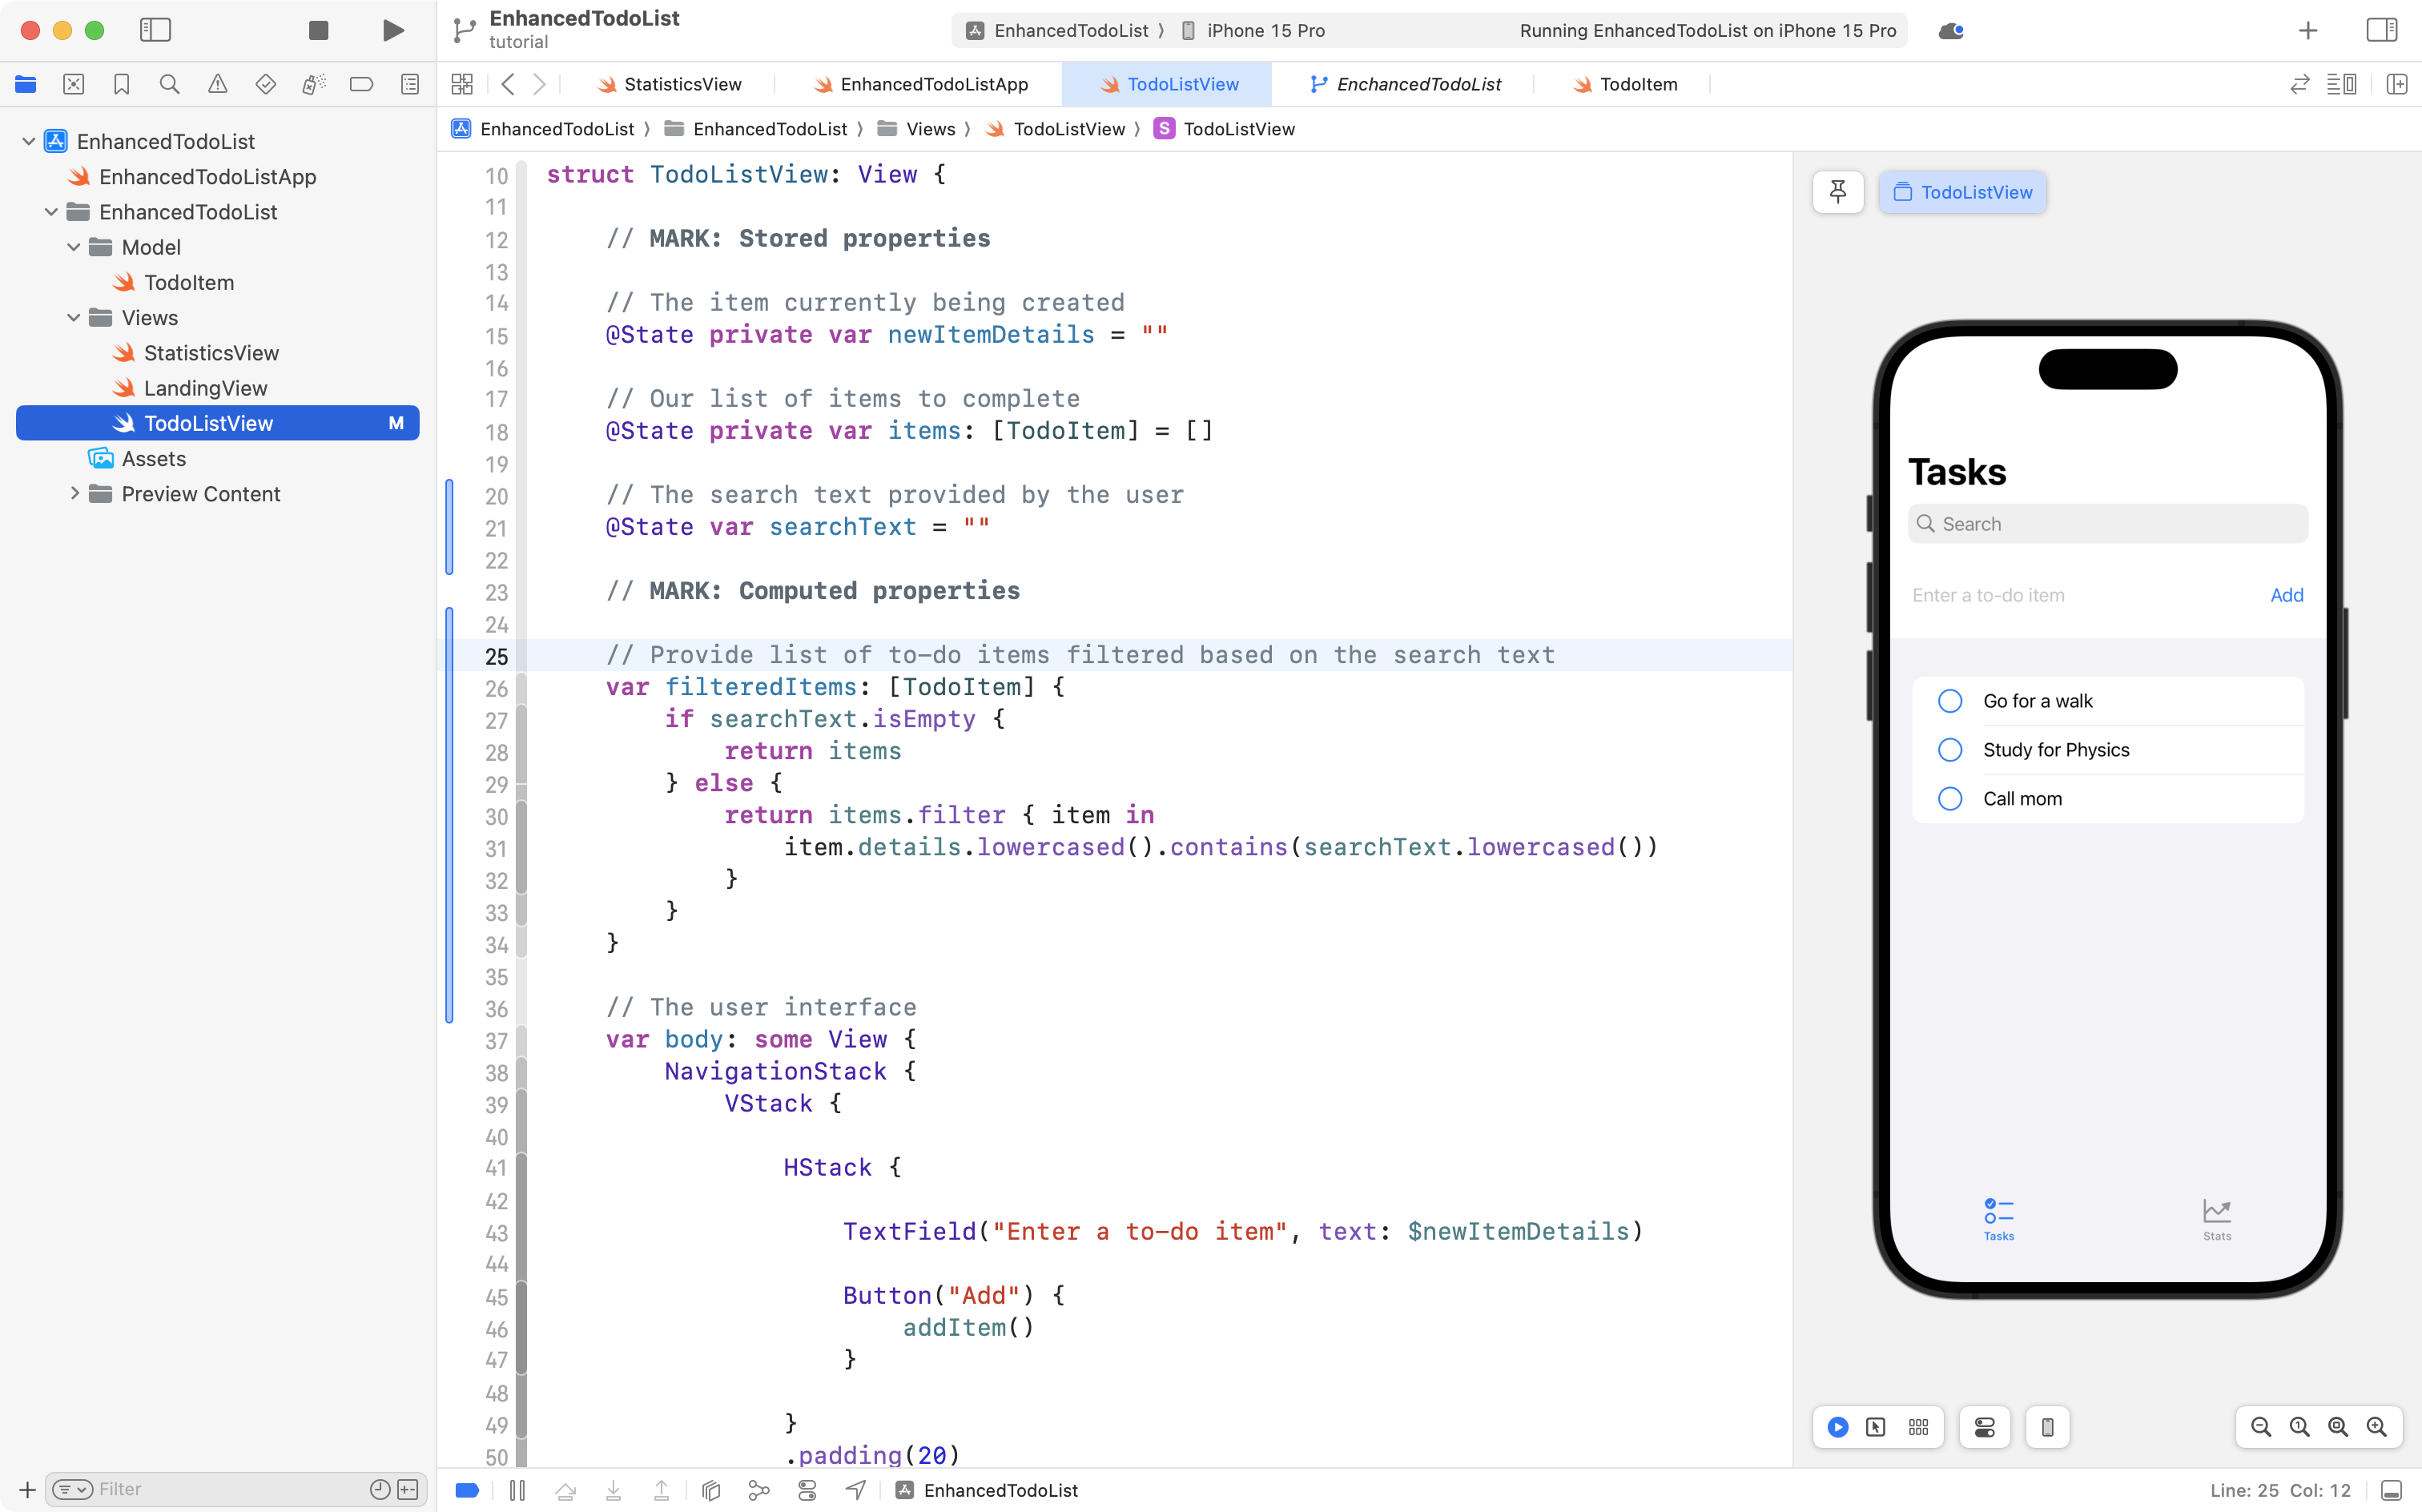
Now, as searchText updates when the user types something in the search field, the computed property filters the list of to-do items.
However – still, it seems that nothing happens!
Can you guess what the final edit is?
We must make the ForEach structure iterate over the filtered list of items – not the original list of to-do items.
Navigate to the ForEach stucture:
Then make the following edit, changing items and replacing it with the computed property filteredItems:

Now, when you type in the search field, the to-do list is filtered as expected.
Commit and push your work with this message:
Made it possible to search the list of to-do items.
Persist changes
We've gotten far enough along with this to-do app that it's starting to become obvious – it's not useful unless data is saved.
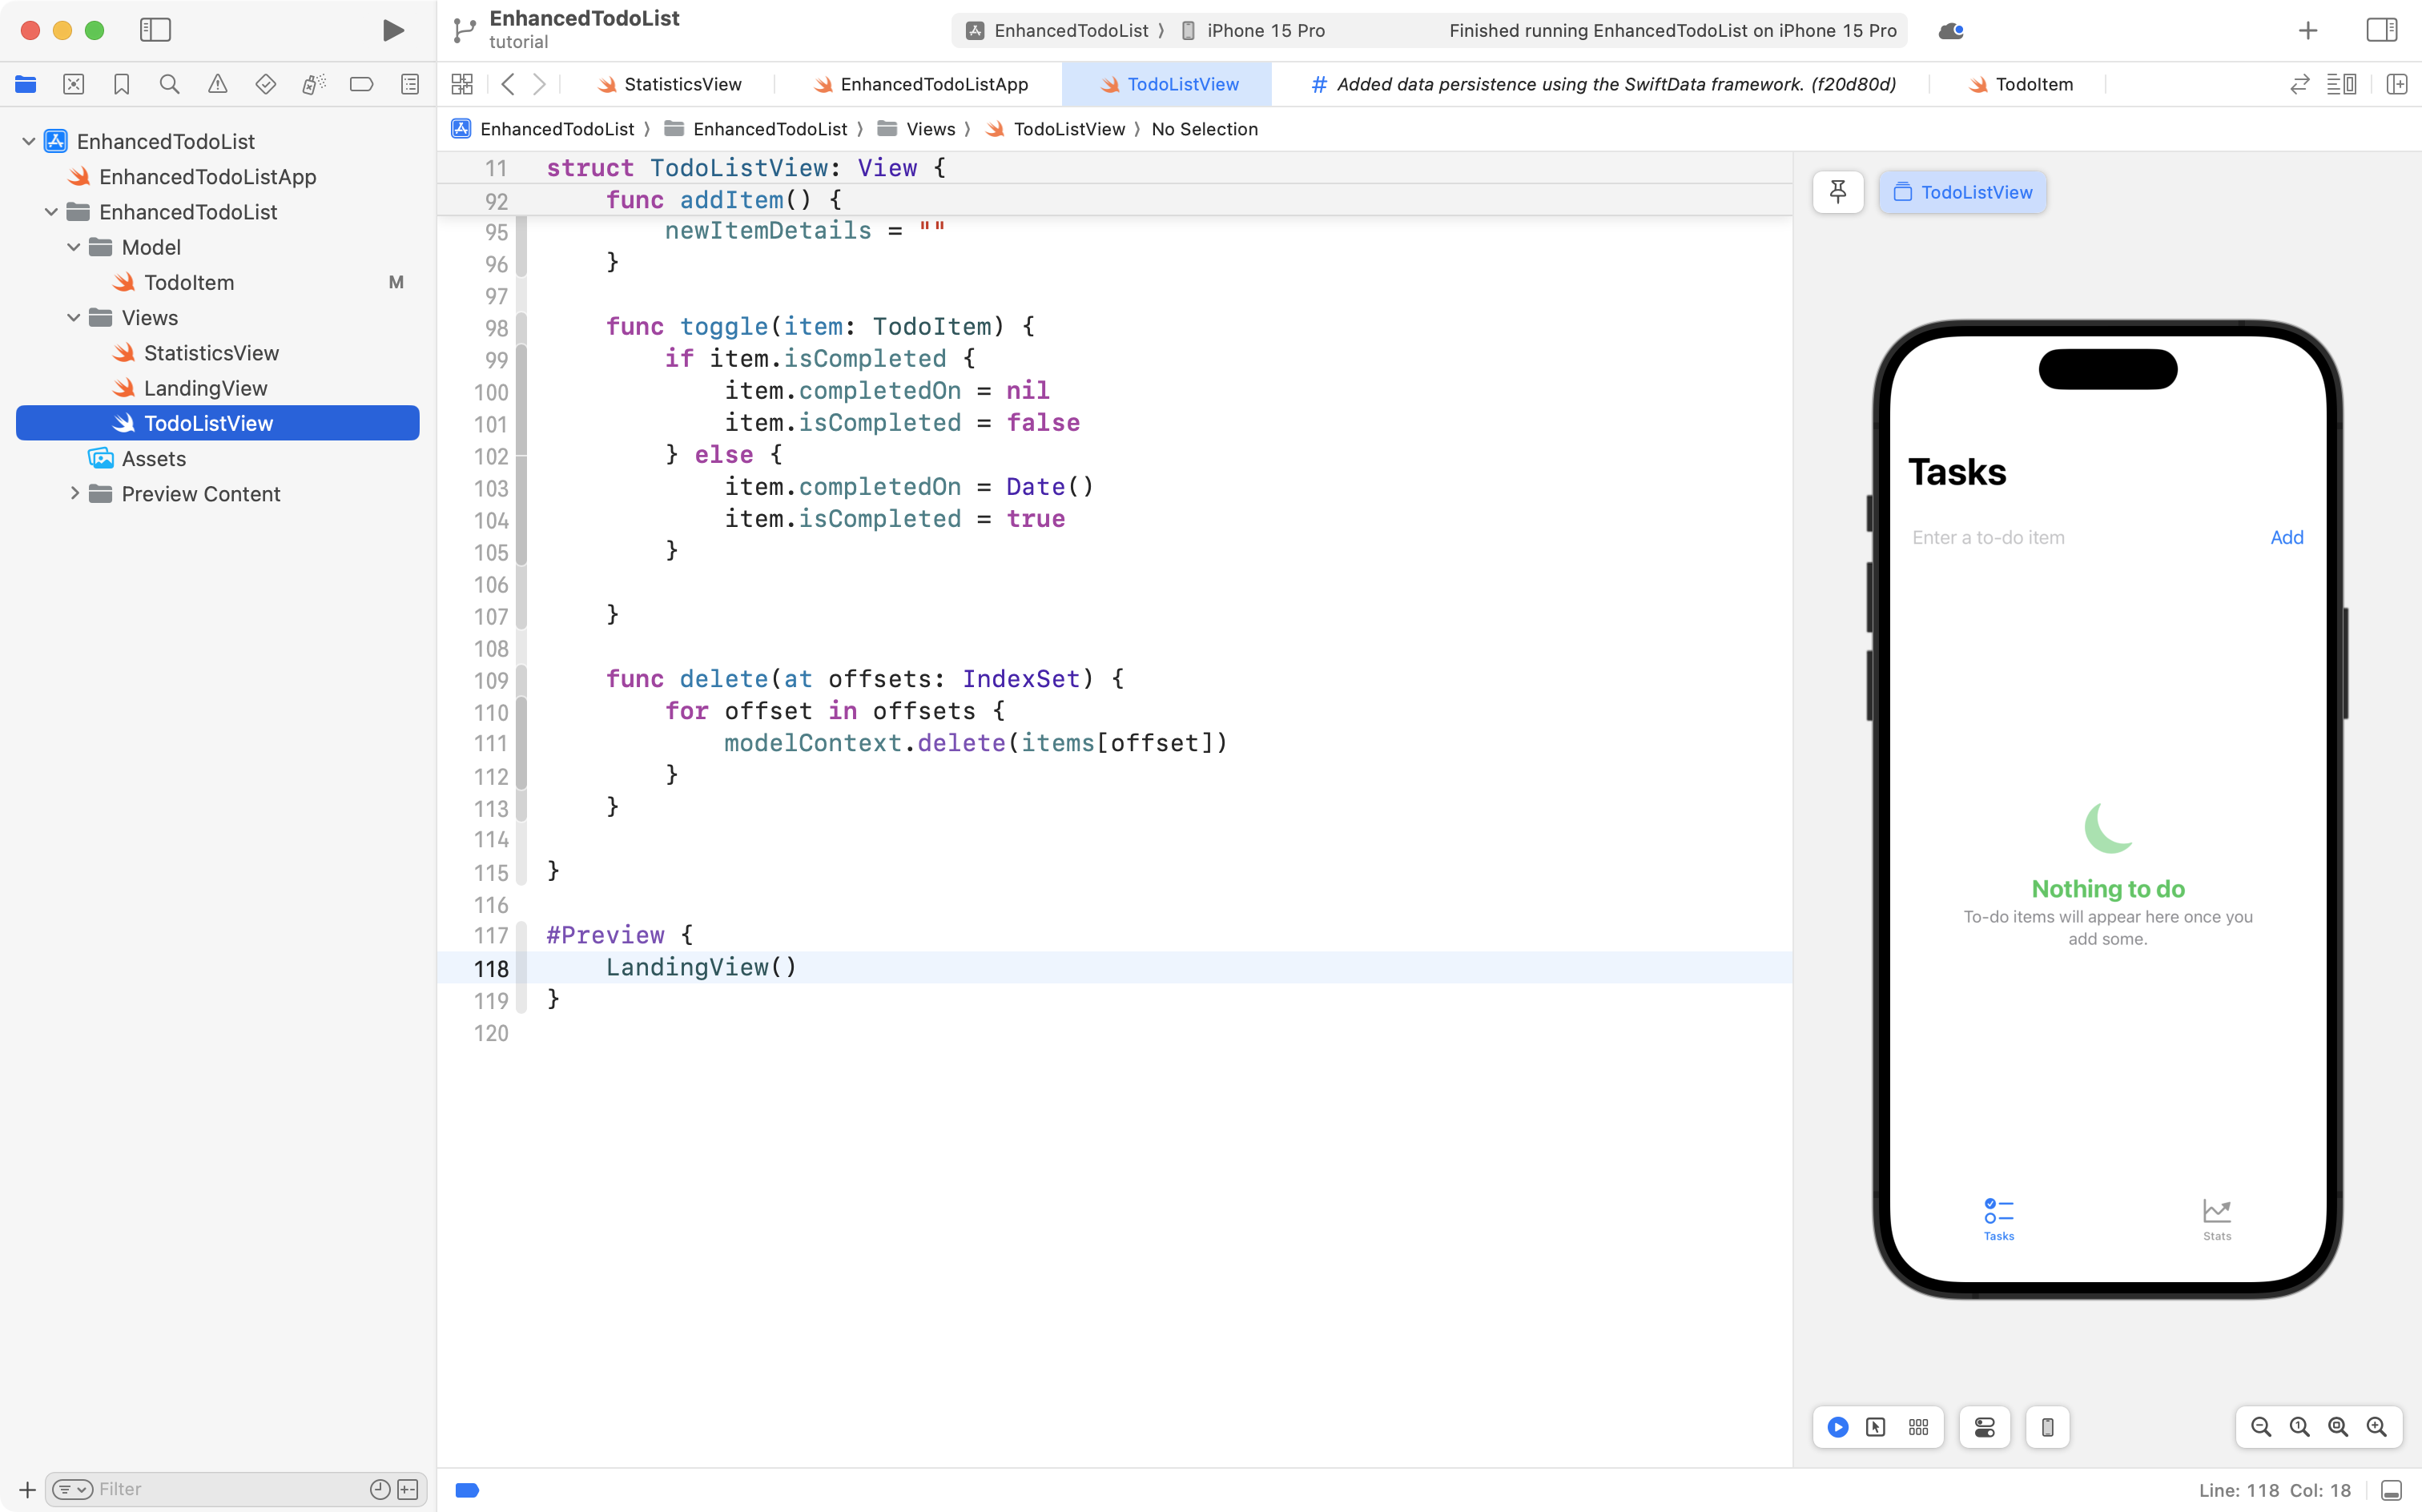
To test data persistence, as a general rule, it is best to run the entire app in the Simulator or on a real device.
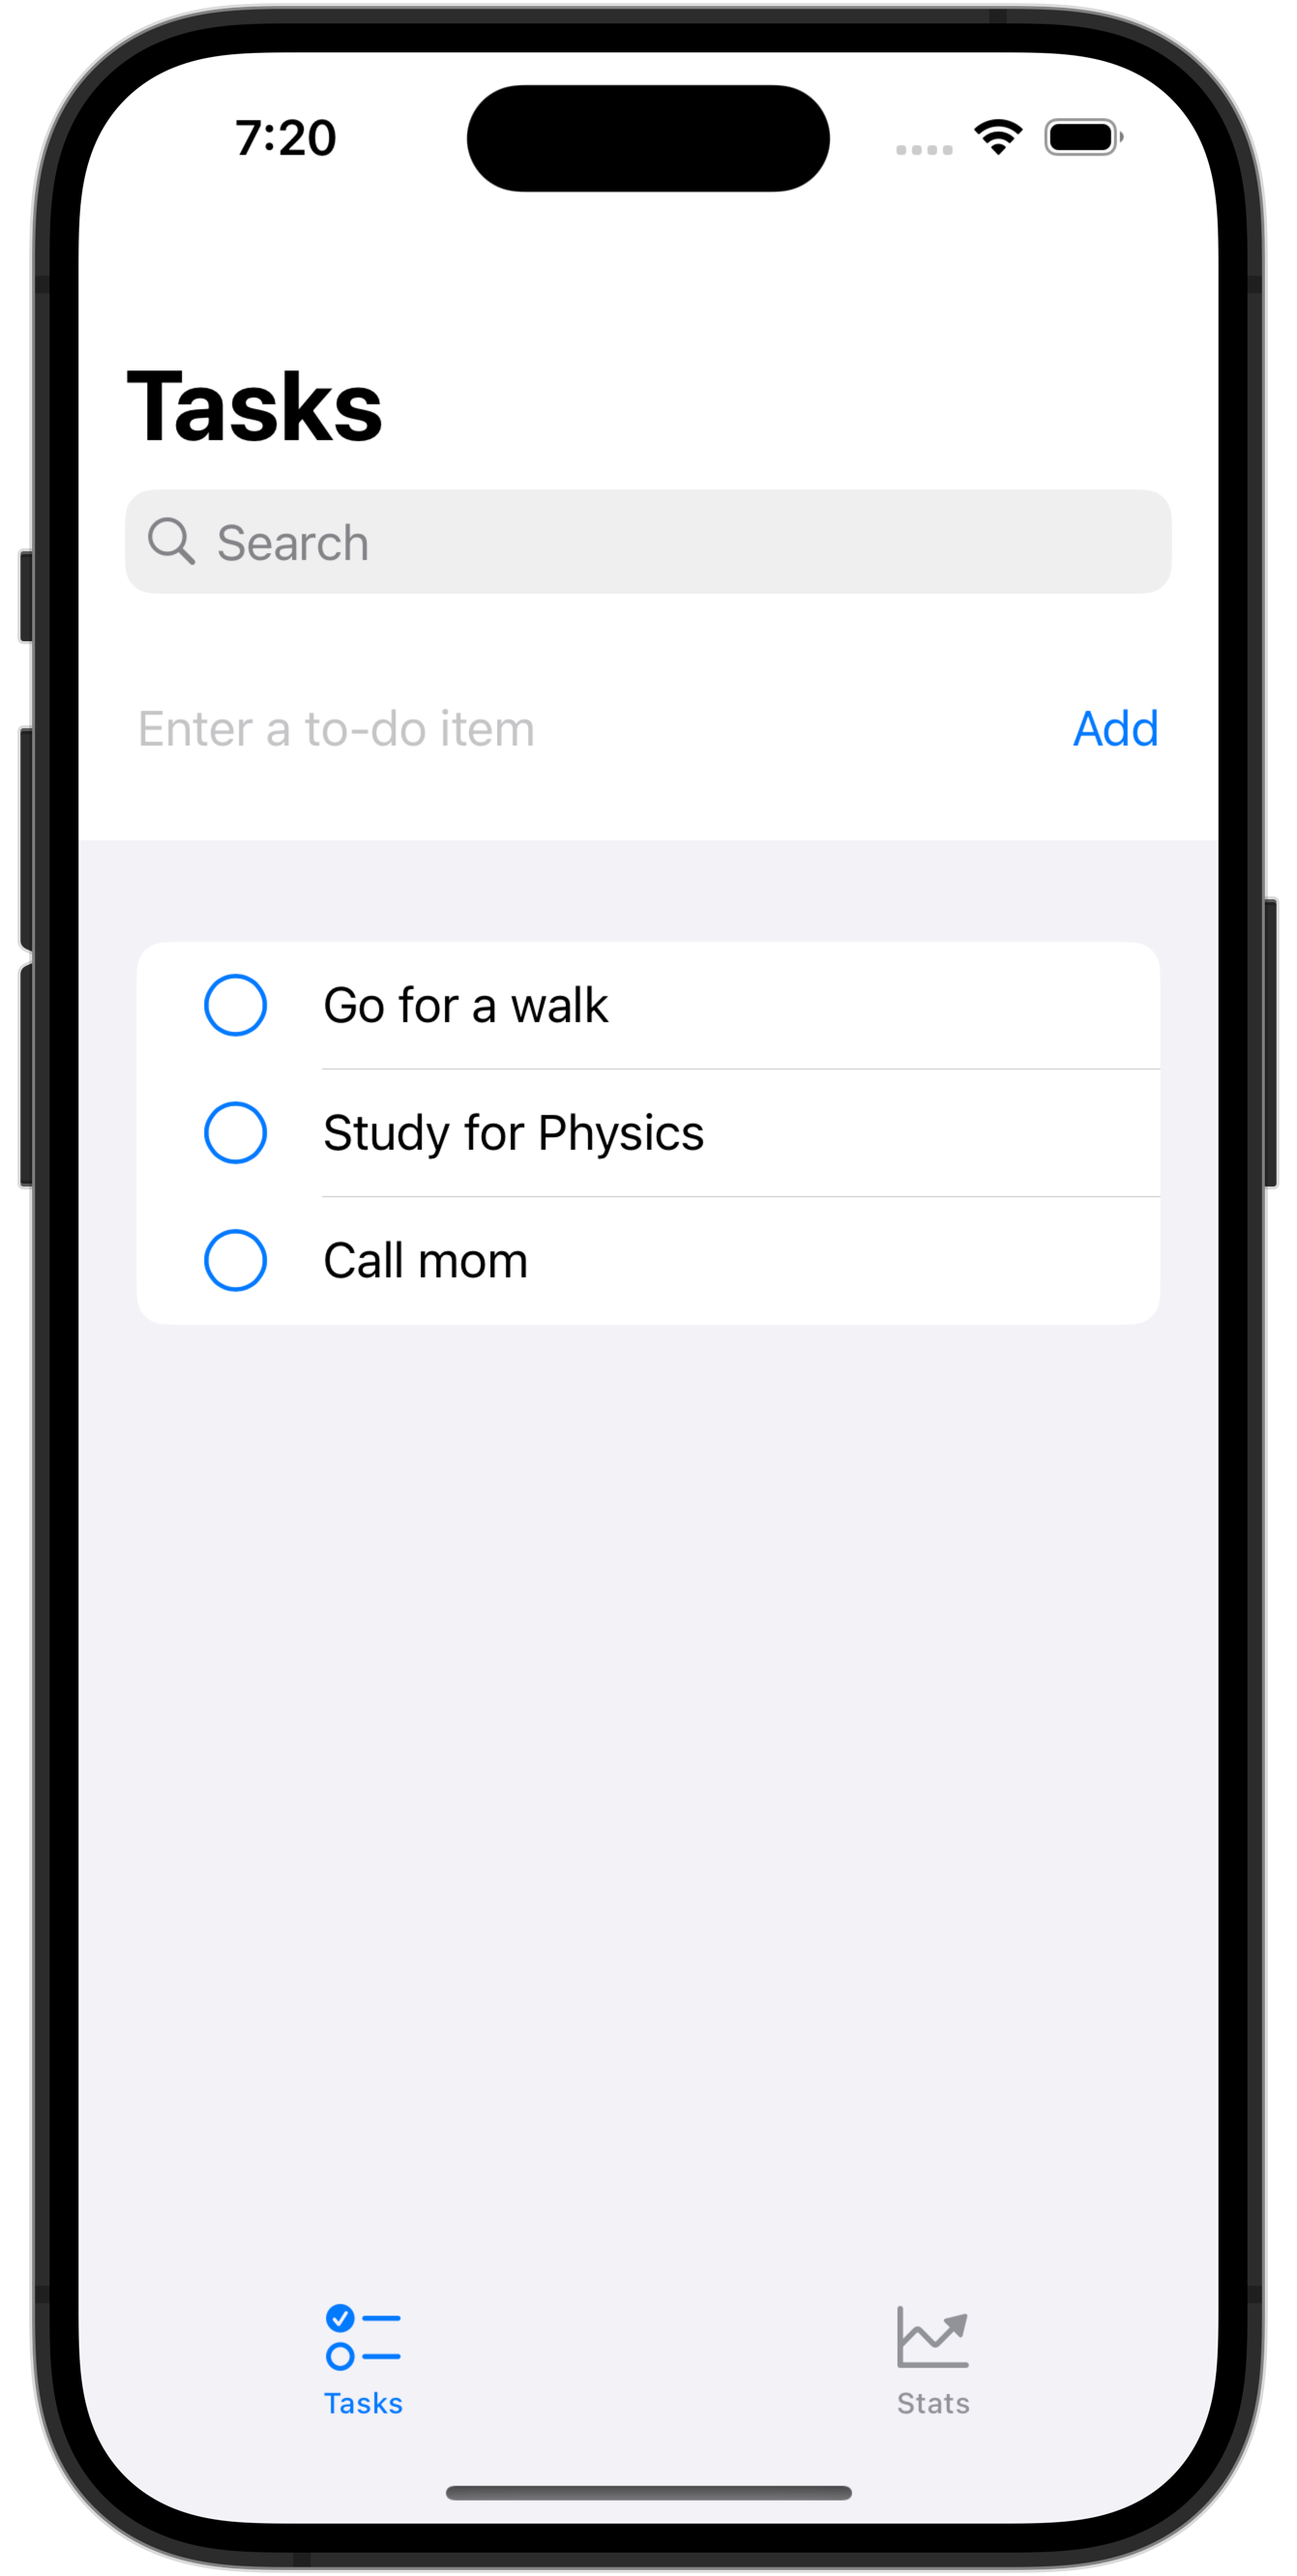
Here's what happens right now, as shown from the Simulator:

When the app is force-quit and re-opened, the changes made to the to-do list are not persisted.
If your computer does not work well when running the Simulator as well as Xcode, now is a good time to configure your iPhone or iPad to run apps you build.
Here are the steps you need to take to run apps you write on a physical device.
By running apps on a physical device, you use the computing power of the iPhone or iPad and save your Mac's computing power for running Xcode.
If you do not own an iPhone or iPad, Mr. Gordon has a development iPhone that you can borrow while in class.
To persist changes, we are going to use the SwiftData framework.
This is a new framework that makes it much easier to store data in a SQLite database using pure Swift code – no need to work with a third-party database abstraction layer like Blackbird or to manually create your own database.
Theory
There are four main components that are always used when working with SwiftData in SwiftUI.
Borrowing from Mark Moeyken's very recently published book on this topic, those four components are:
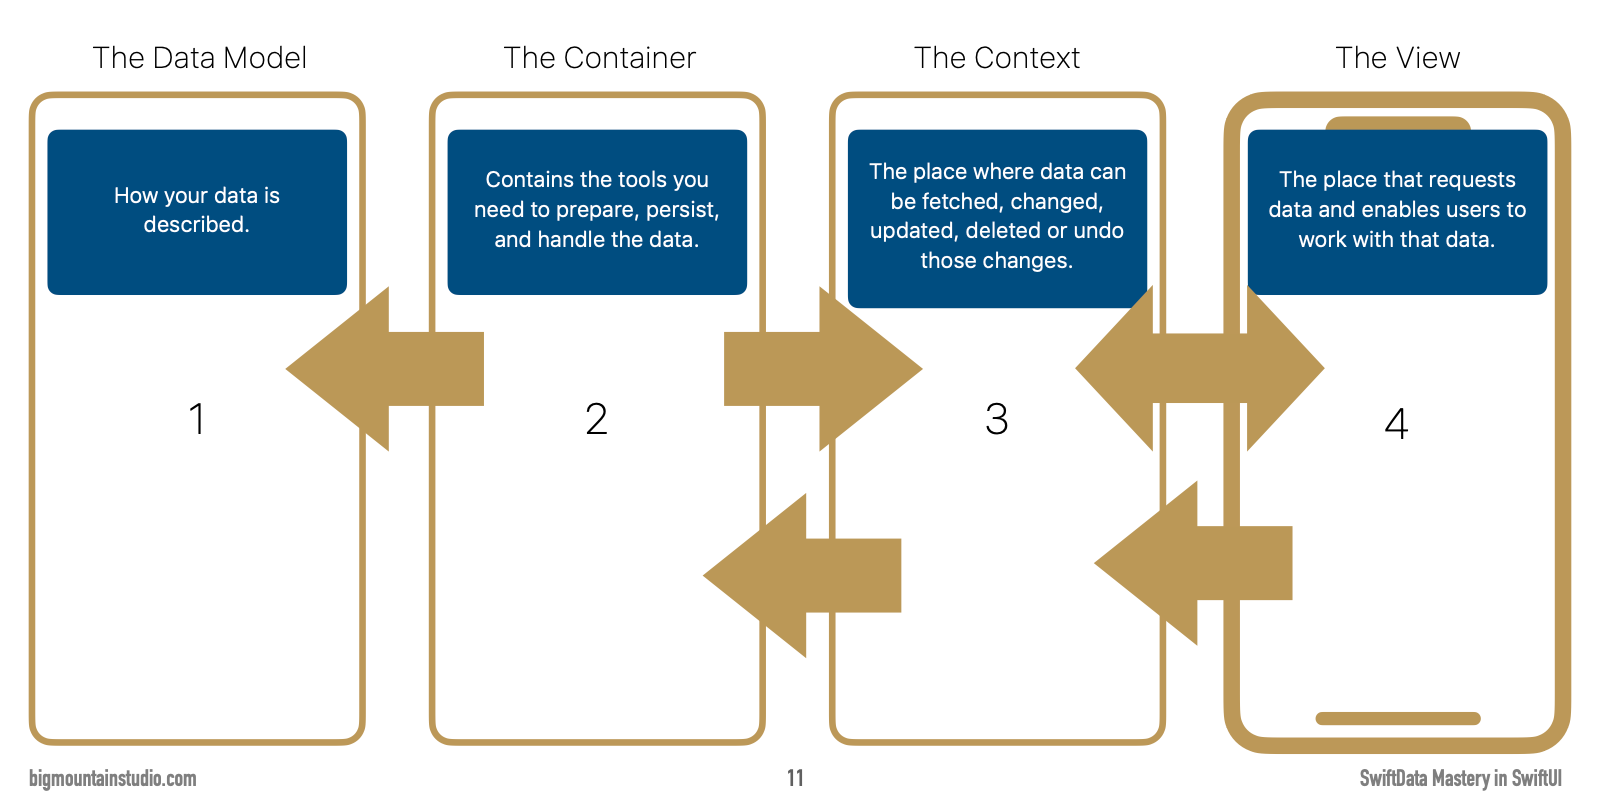
You are already familiar with a model and a view.
The role of those parts of an app do not change.
A container takes care of storing the data so it persists on a device. SwiftData is backed by a SQLite database. Behind the scenes, a SwiftData container reads and writes information to that database.
The context sits between the container and our app. It fetches data, and allows us to insert, change, and delete data. A SwiftData context even has built-in support for undo/redo actions. The SwiftData context is roughly equivalent to what the Blackbird database layer did for us in last year's course.
Let's look at each of these four components just a bit more closely.
The model
The model of an app is the definition of all the information that it can store – how it will be structured and organized.
For example:
class Dog {
	let name: String
	let massInKG: Double
}
A data model is not the same thing as a data object.
An object is an instance of a model that is actually populated with real data.
For example:
let myDog = Dog(name: "Piper", massInKG: 31.2)
The container
A SQLite database provides an organized way for storing and retrieving information.
The SwiftData framework is an abstraction that keeps the messy details of how this works hidden, so we can focus on the unique logic of making our apps, without having to do more tedious work – like manually defining database tables or writing raw SQL queries that join tables together.
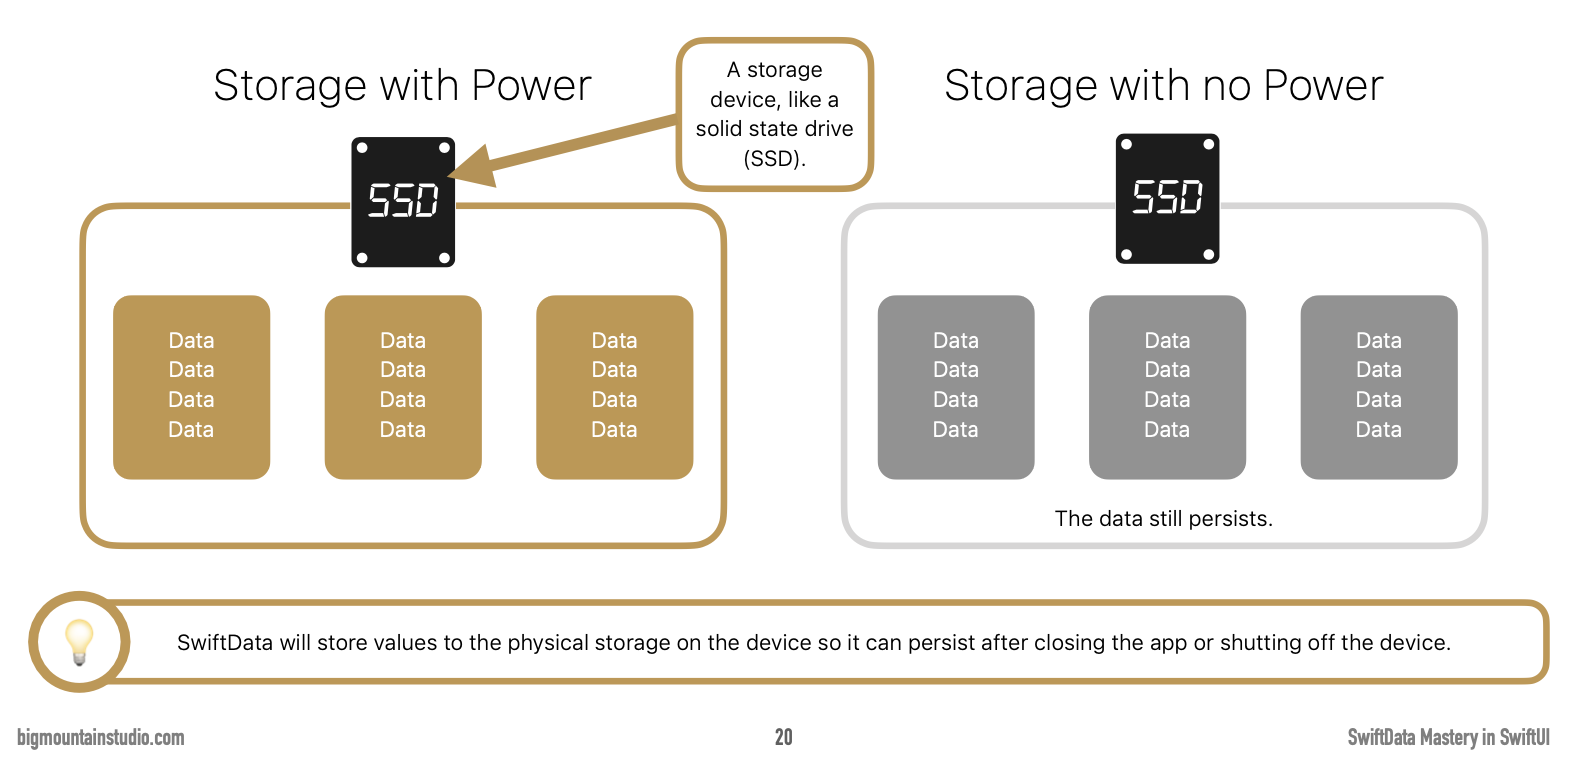
When you hear the word persist that means keep data around – even when power to a device is lost. An iPhone uses a solid state drive or SSD to persist data.
The context
This is a place in memory to work with data while your app is running.
An SSD is fast, but memory – random access memory or RAM – is much, much faster:
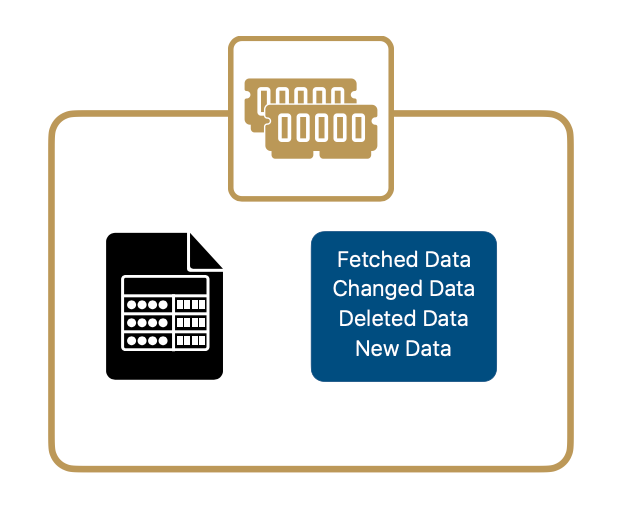
As indicated before, the context takes care of fetching, changing, deleting, and adding new data.
All of this happens in memory, and usually, we let SwiftData decide when to write that data to the container and on to permanent storage. SwiftData ensures that if your app is quit or backgrounded, your data will be persisted.
The view
As you know, the view is what we see in an app, and how we interact with data.
At a very literal level, app design is all about identifying a way to uniquely present data to users – and allowing them to interact with that data easily.
If the convenience and utility of using your app to interact with data outweighs the price you attach when you choose to sell software – well, that is how you make money as an app developer. 💵
Putting it all together
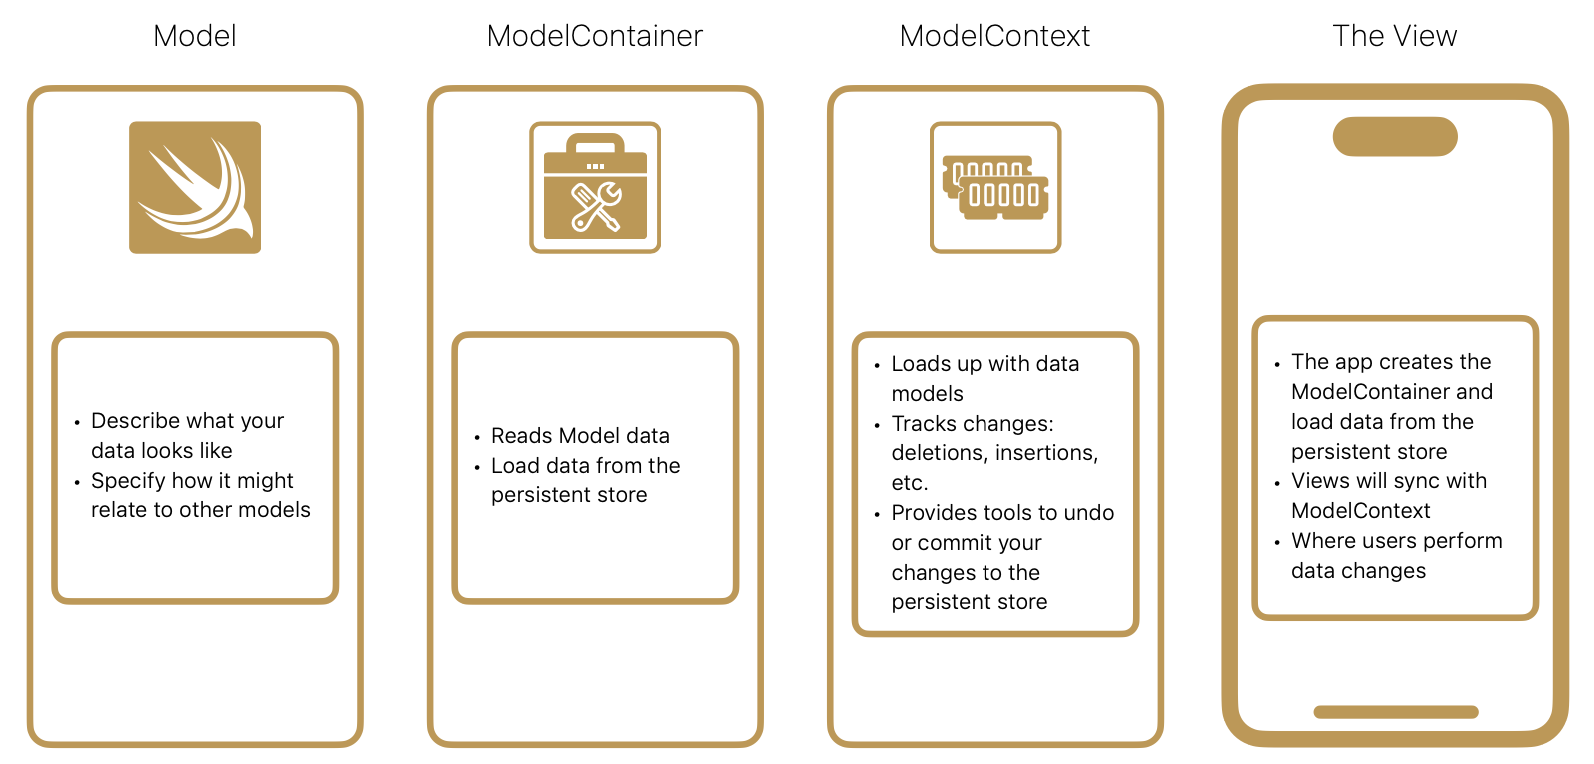
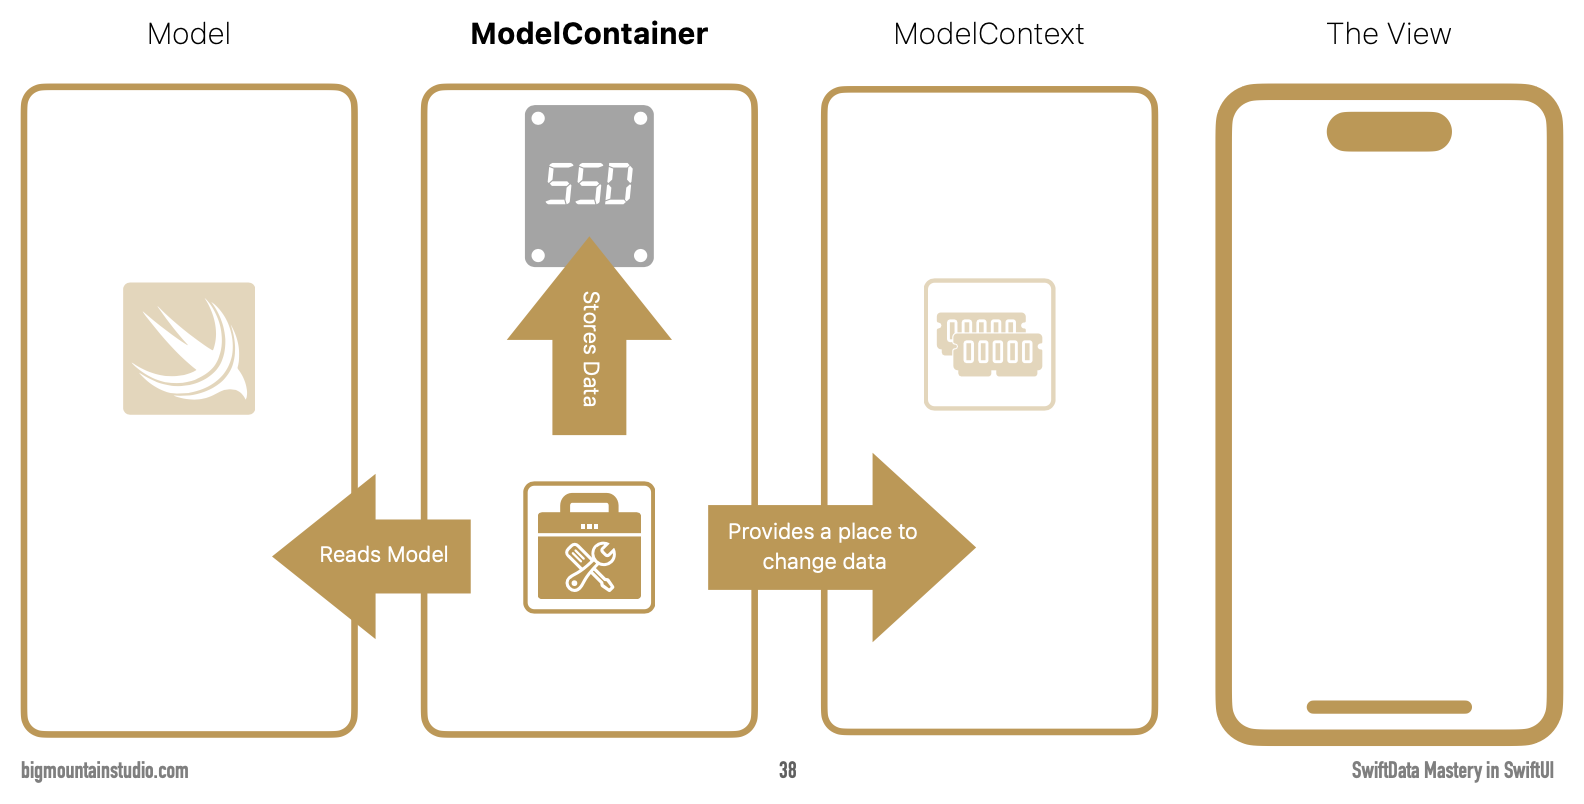
To remind us that the container and context draw their information from the model, Apple has designed the SwiftData framework so that the word model is always present.
The four main parts of SwiftData are formally named:
- Model
- ModelContainer
- ModelContext
- The View
Here is a summary:
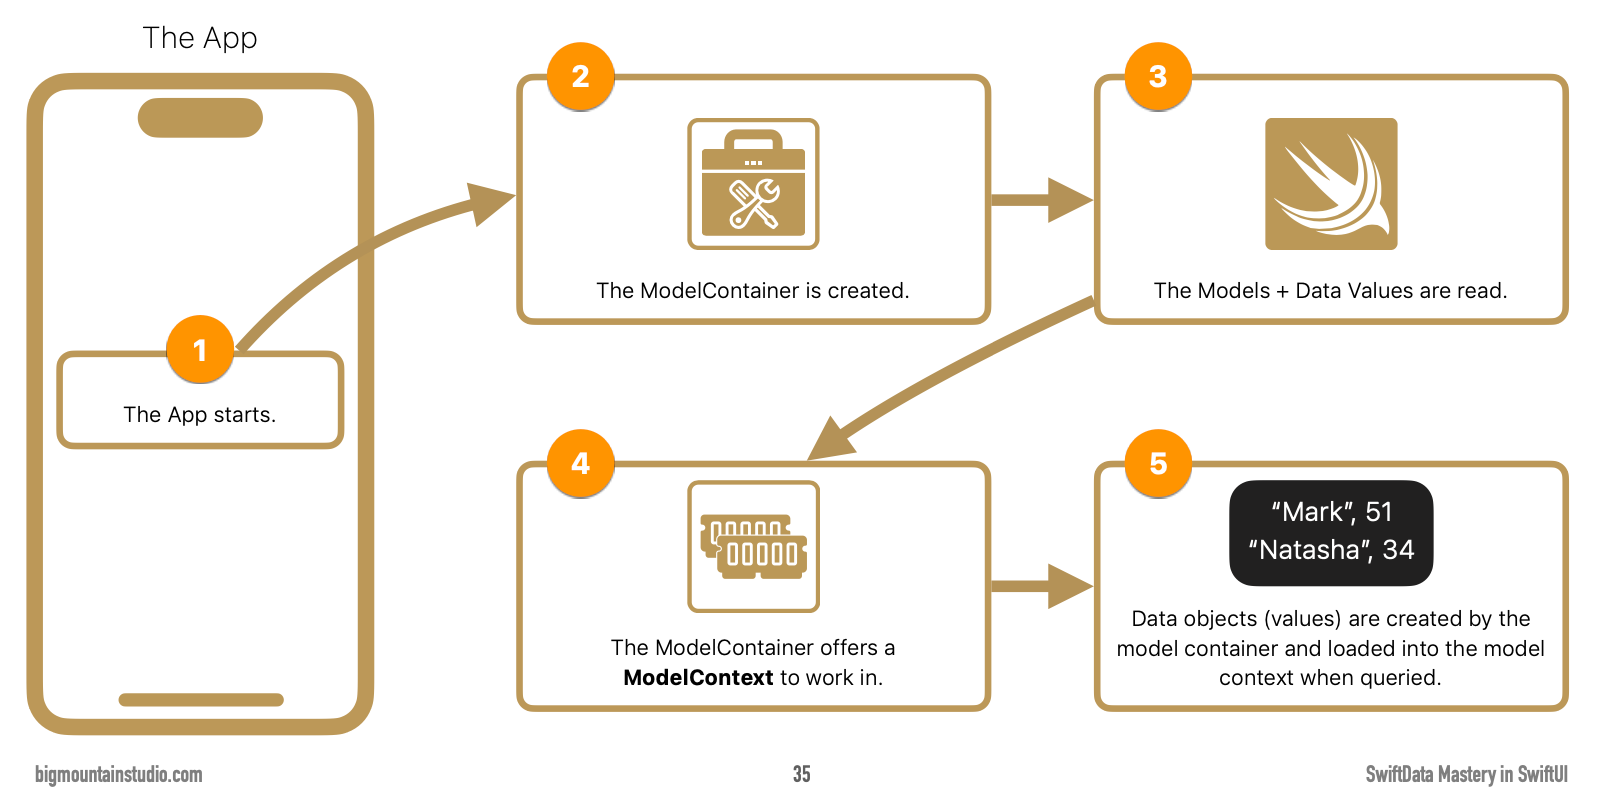
Here is a somewhat simplified look at what happens when an app using SwiftData is opened:
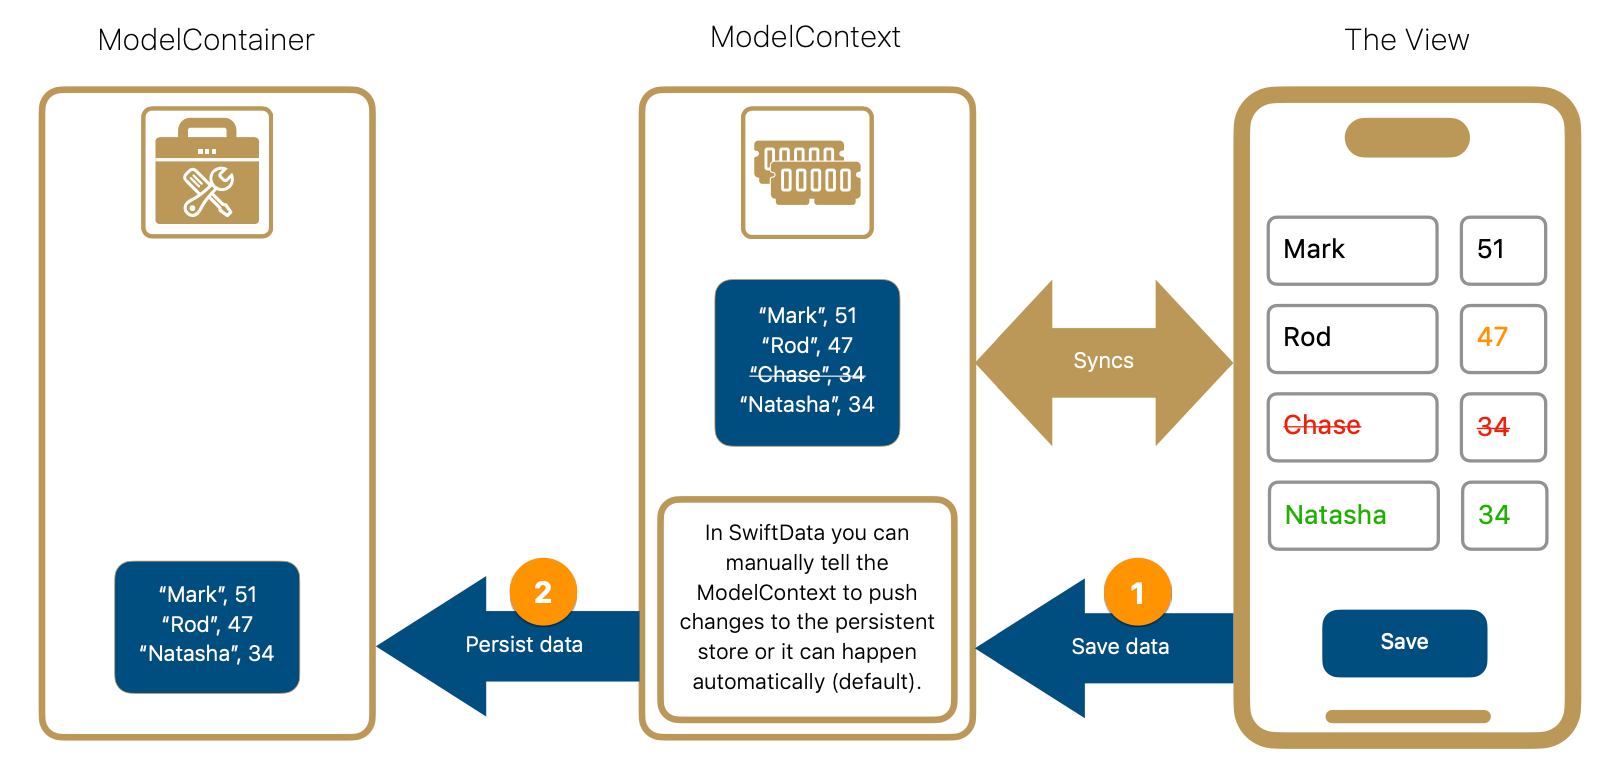
When it's time to save data, here is what happens:
I agree with Mark Moeykens, who states his belief that the ModelContainer is the most important part of SwiftData.
Application
Let's apply everything you just learned about.
You'll be pleasantly surprised to see how few code changes are required.
It's important to understand what's happening behind the scenes, though – so – ask questions if you have them regarding the theory of SwiftData.
1 – Adjust the model
At present, the model in our app looks like this:
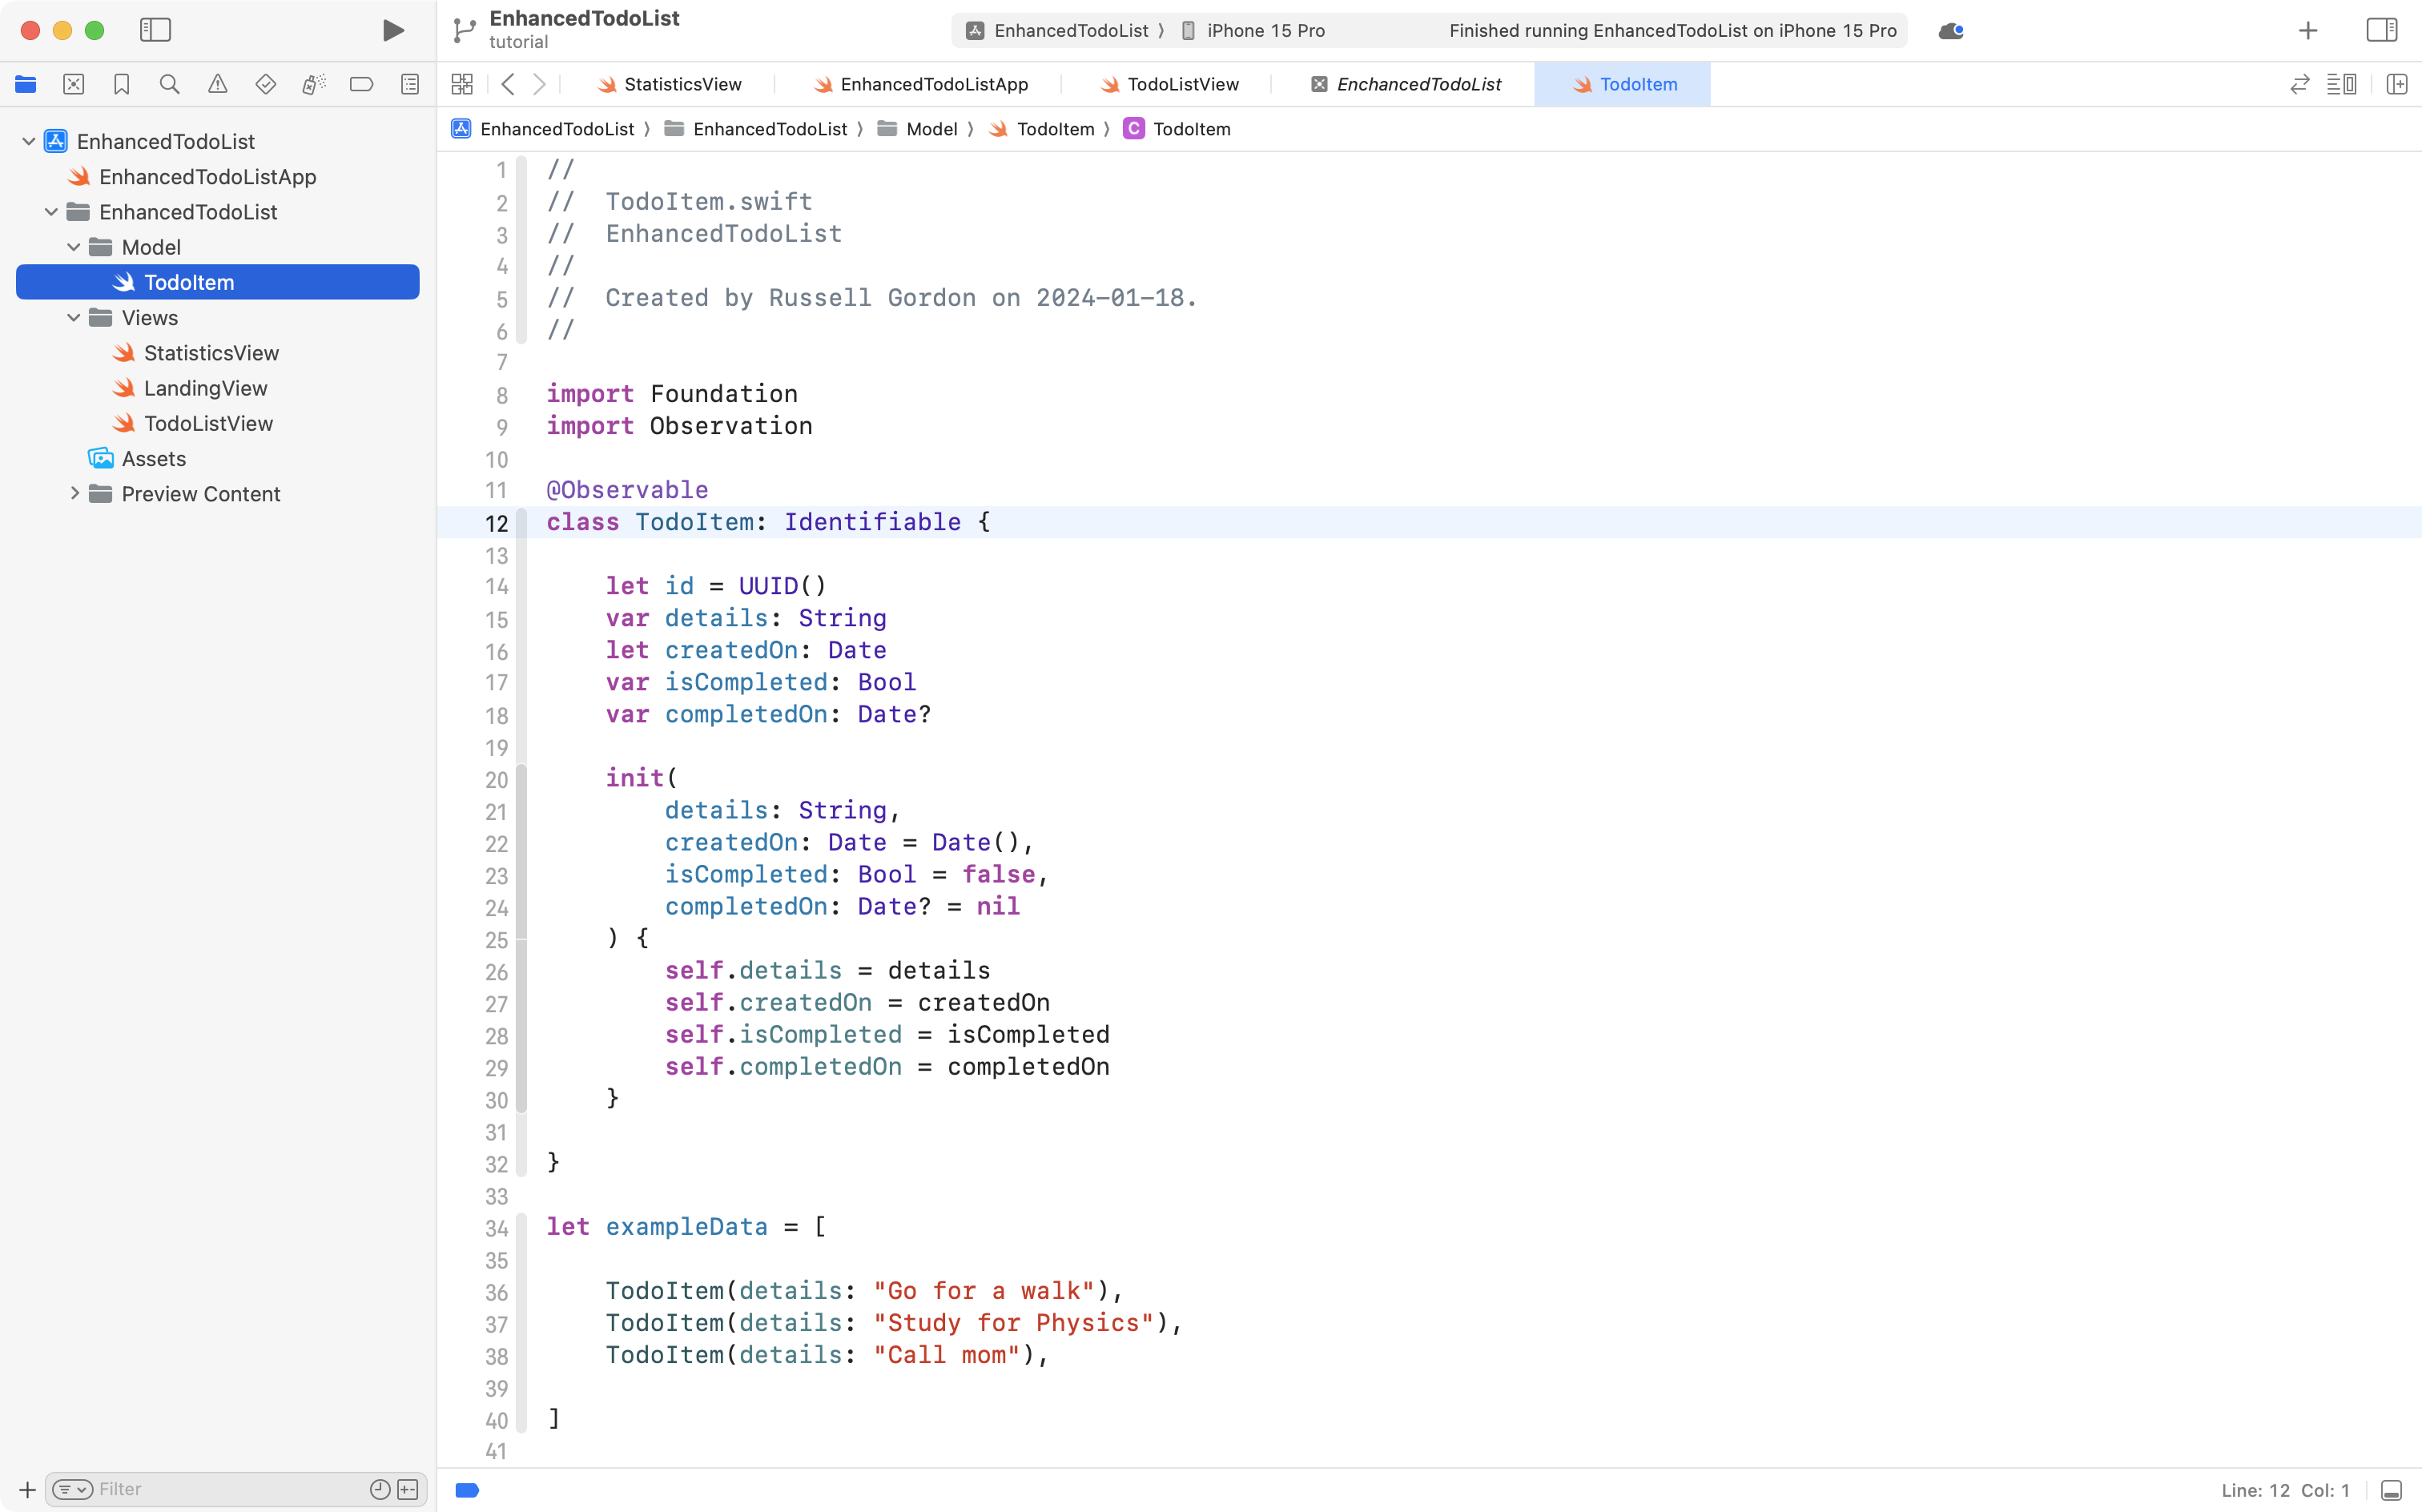
The SwiftData framework includes the Observation framework.
This means that as changes to data occur – including to individual properties – our user interface will automatically update.
SwiftData also automatically makes models conform to the Identifiable protocol.
So we no longer need to manually add an id property!
To indicate that we want TodoItem to be part of our SwiftData model, we just need to add the @Model keyword in front of the class definition.
Make edits to the TodoItem file so that it looks like this instead:
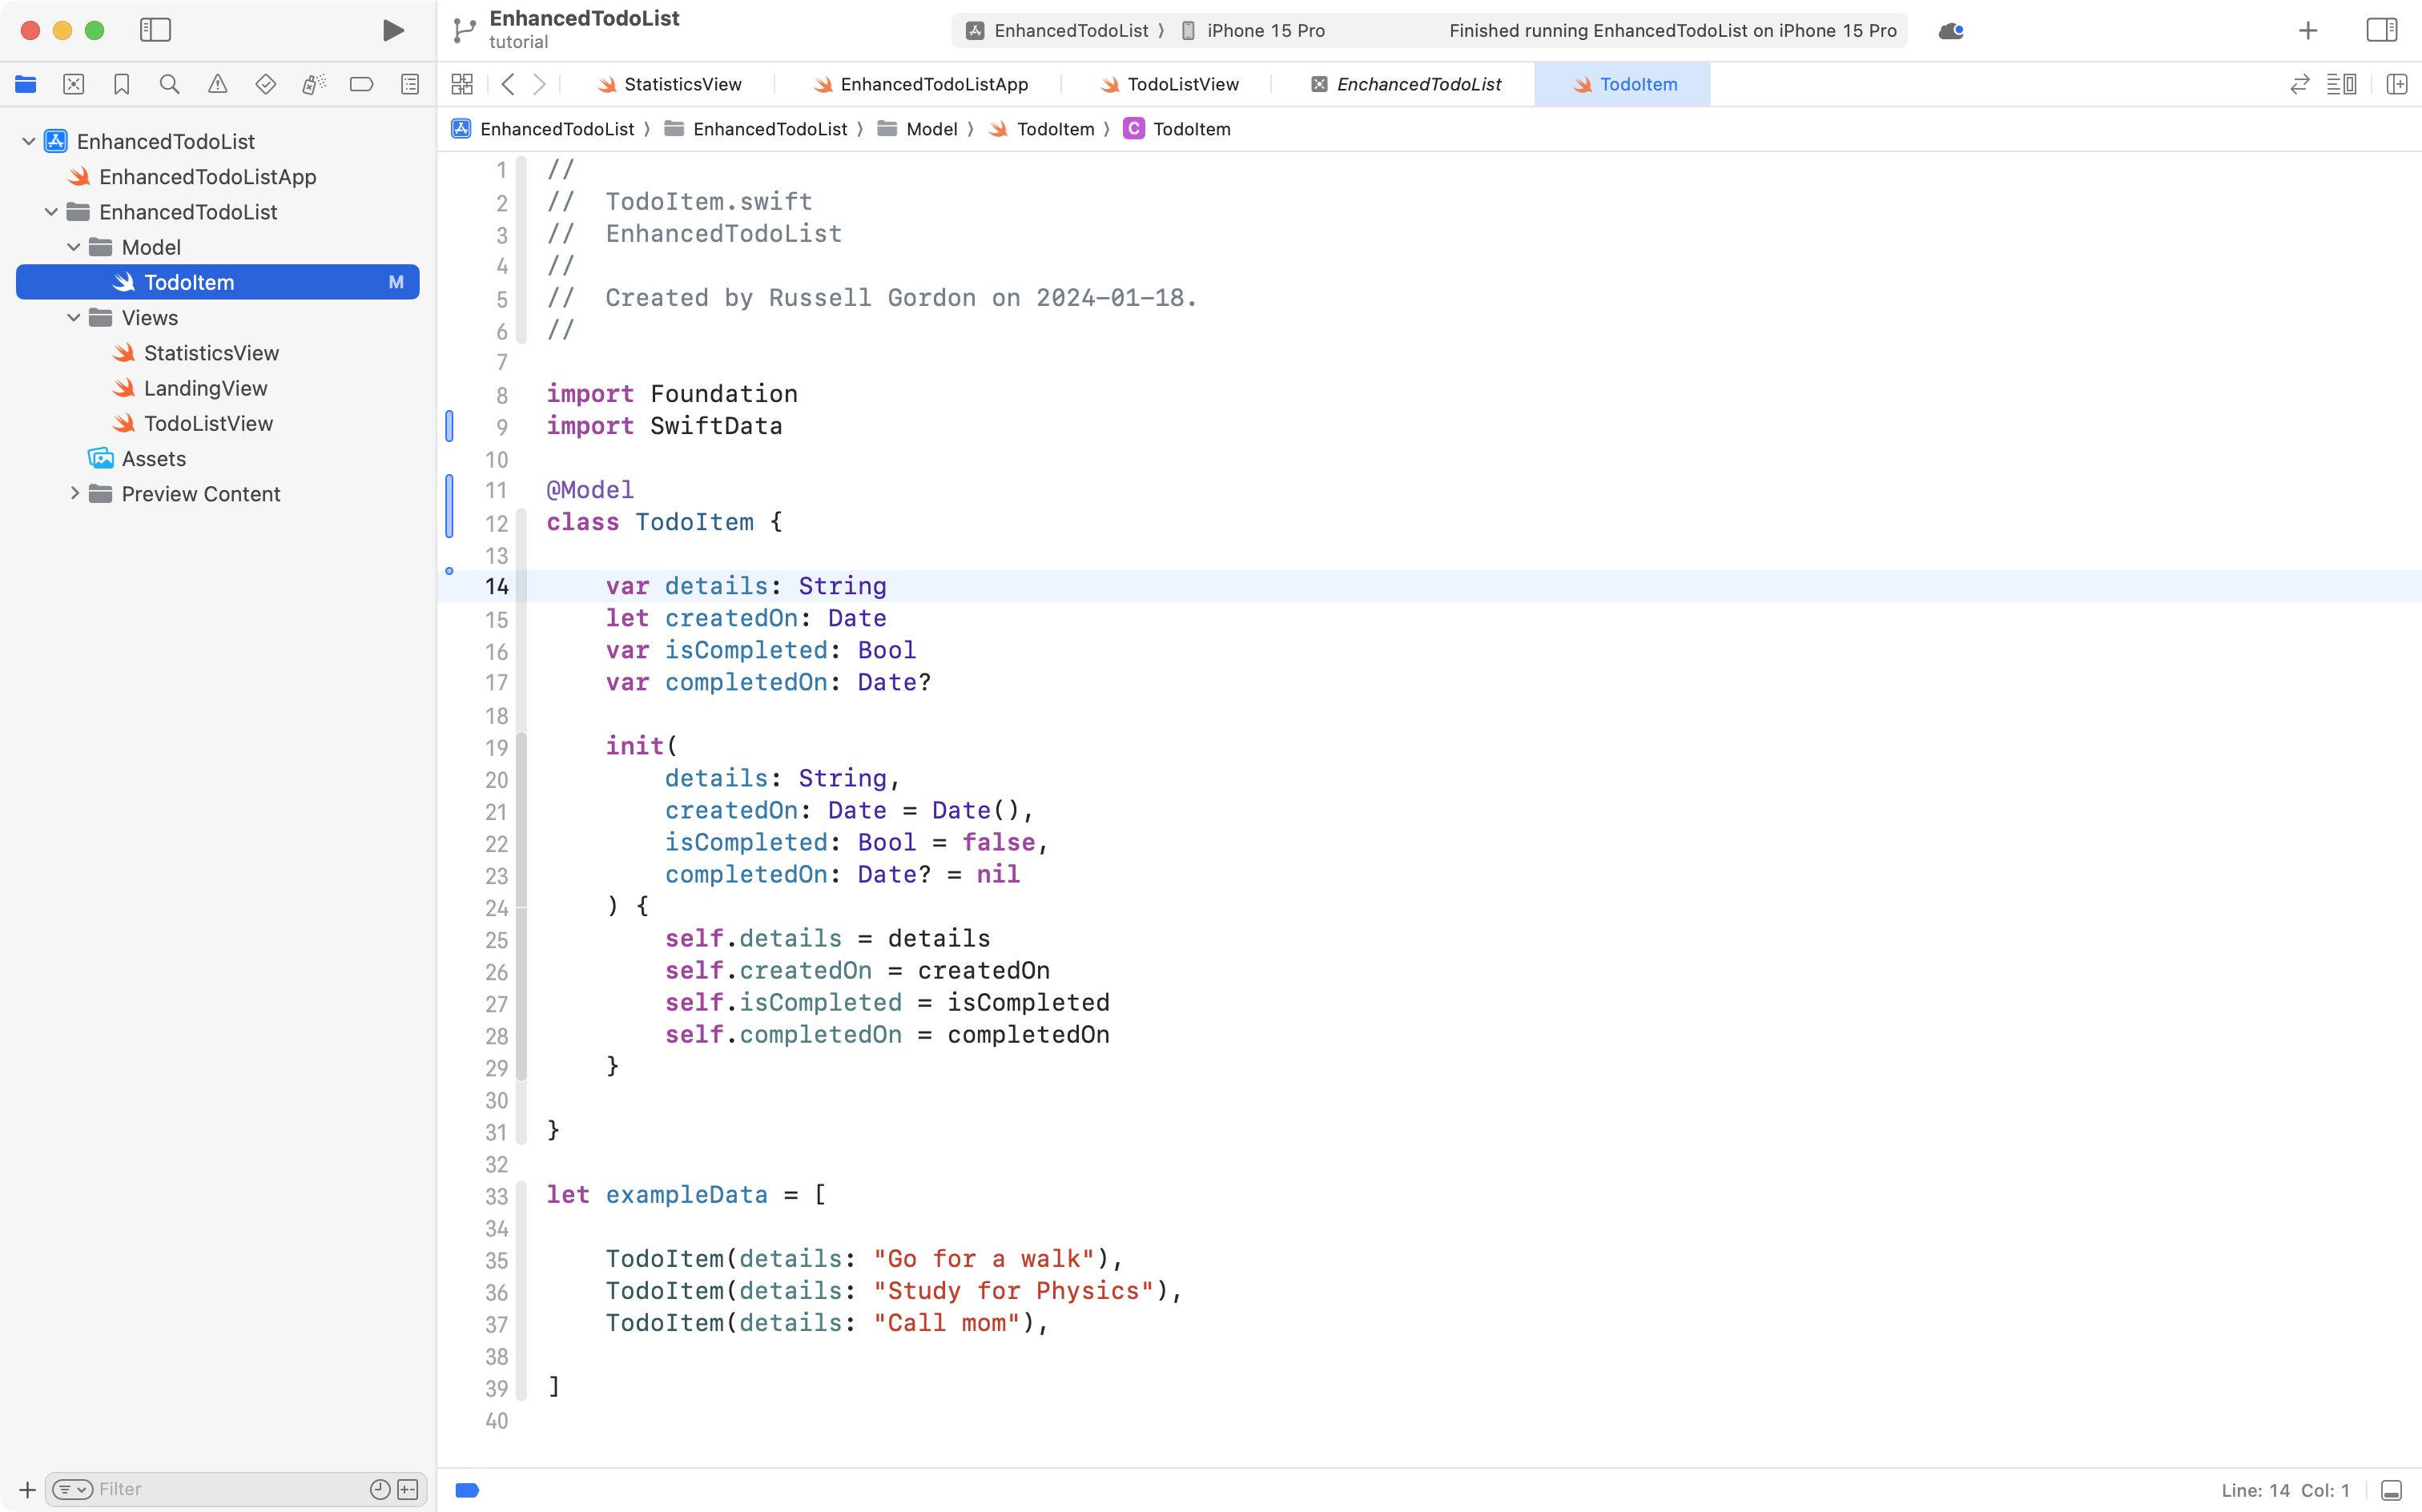
It is always pretty great when you remove code but gain functionality!
2 – Add the container
Switch to the app entry point file:
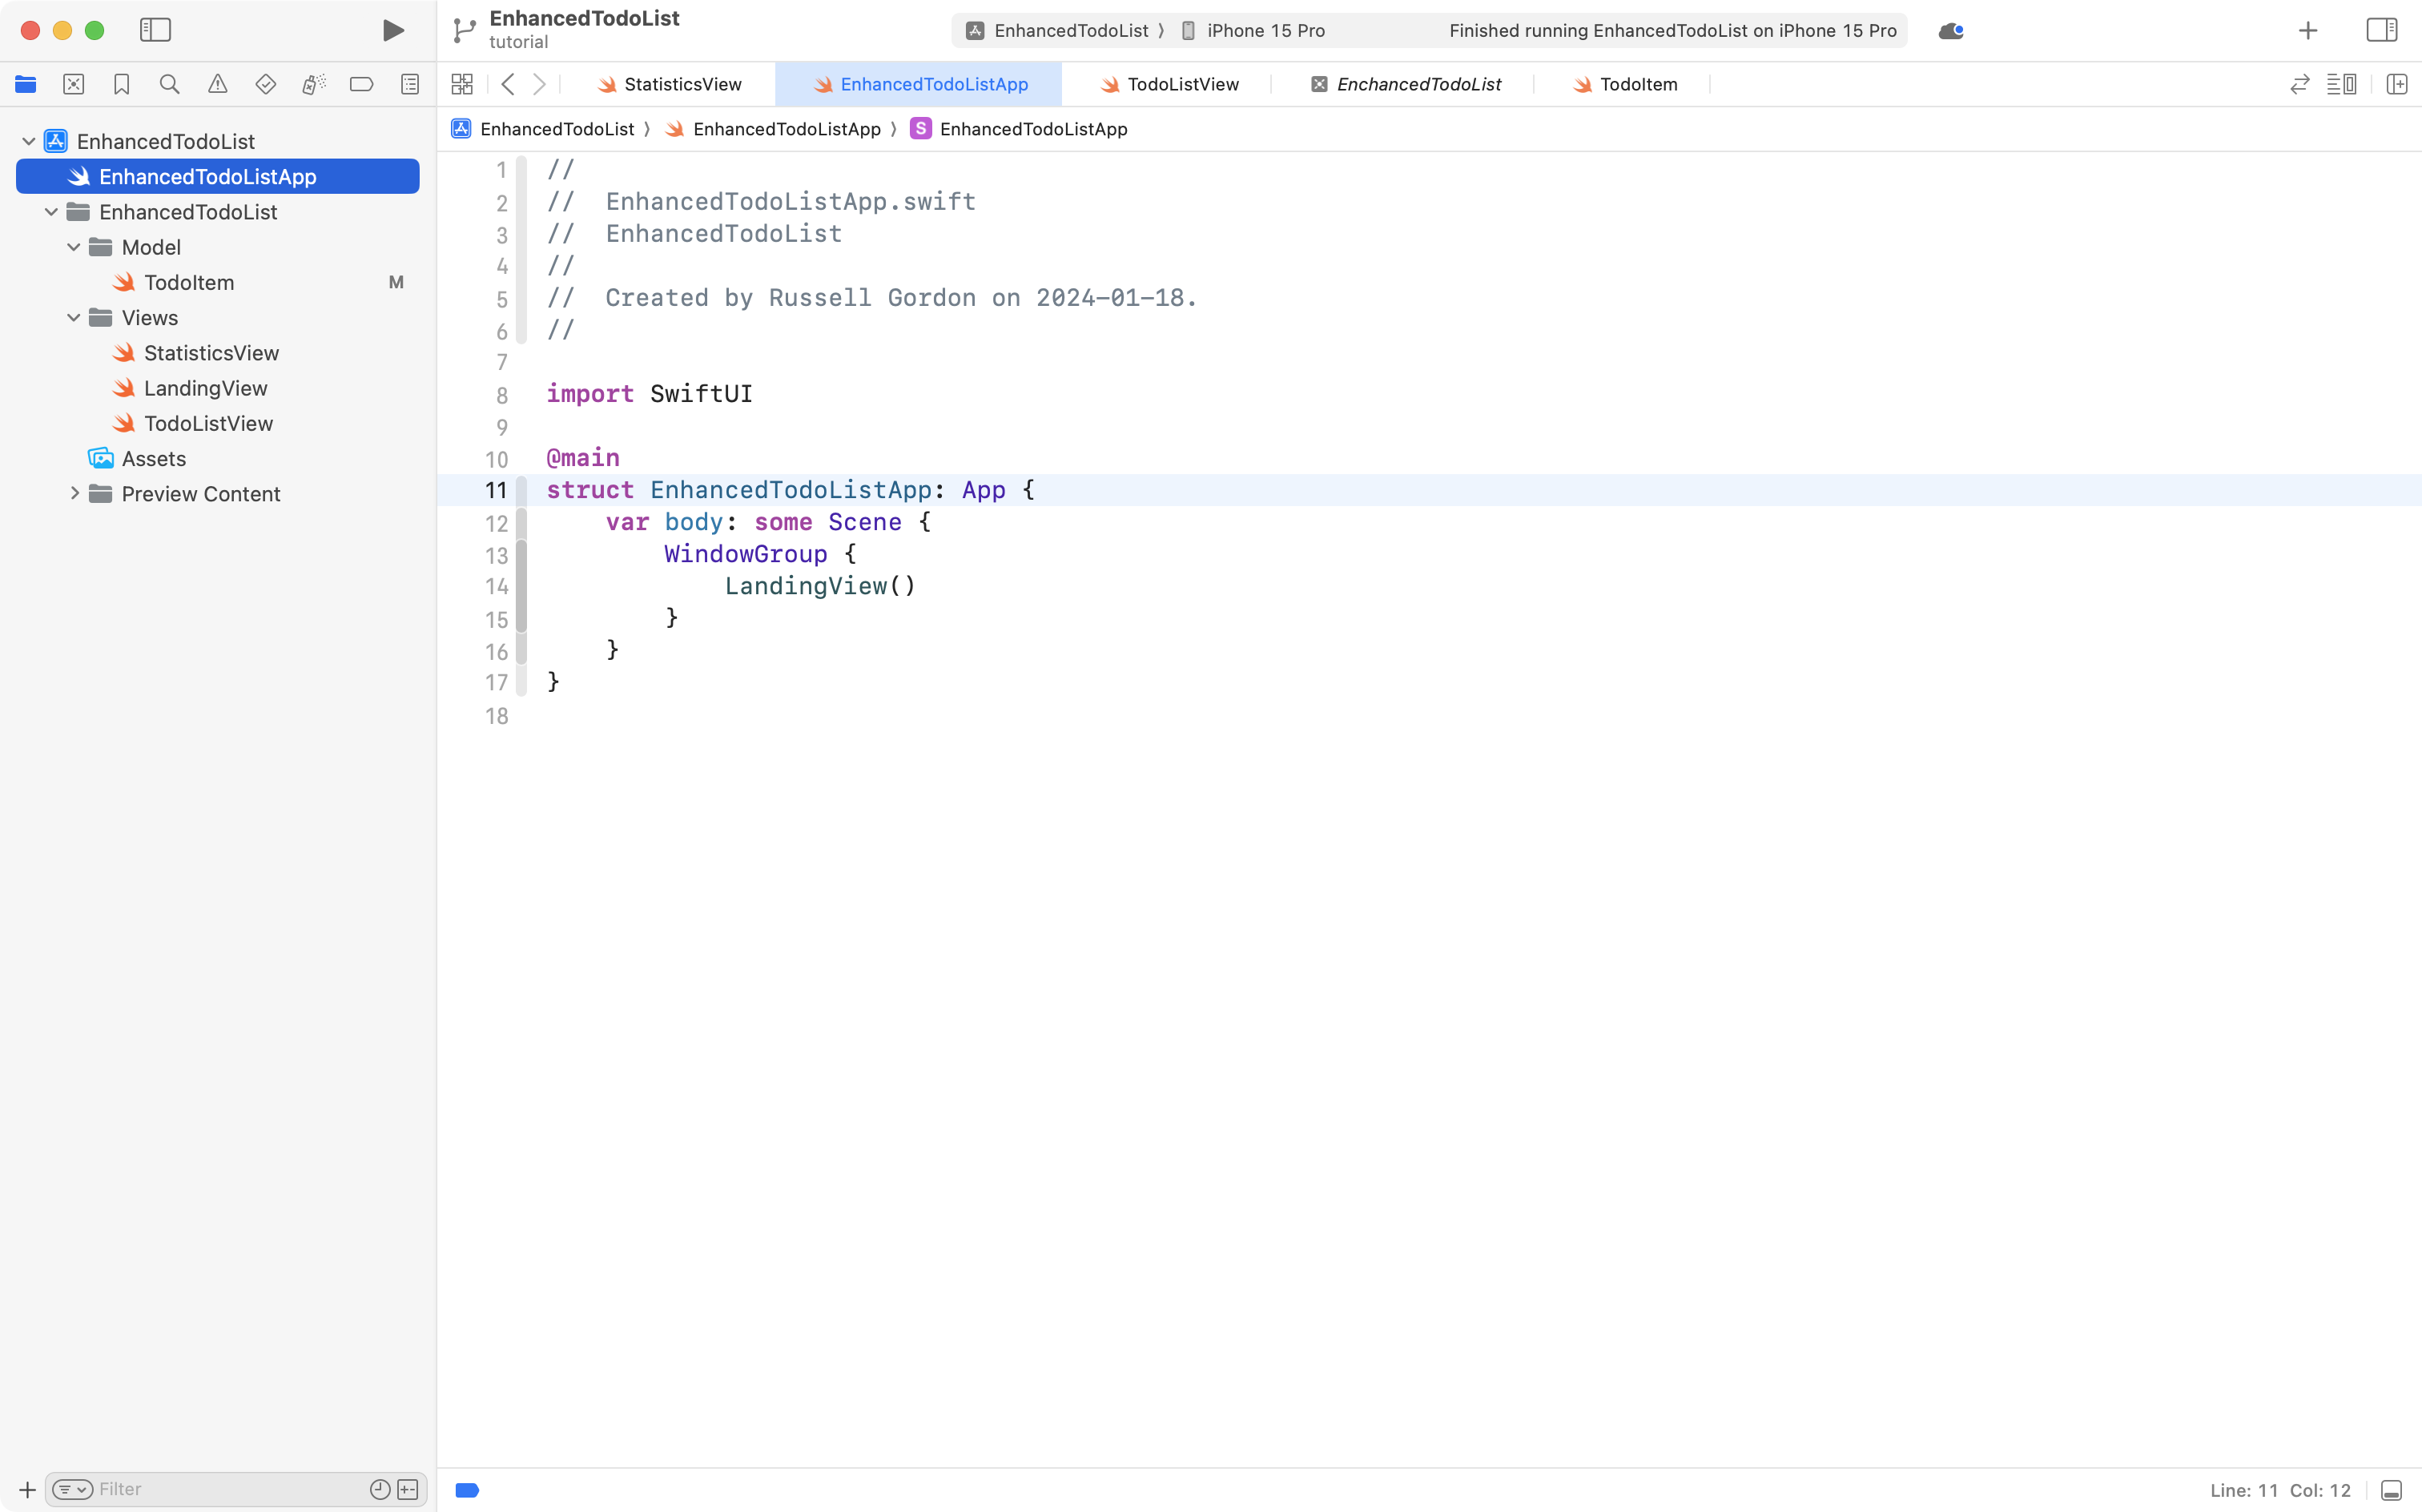
Create a container for the TodoItem model by adding this code:
.modelContainer(for: TodoItem.self)
... just below the WindowGroup structure:
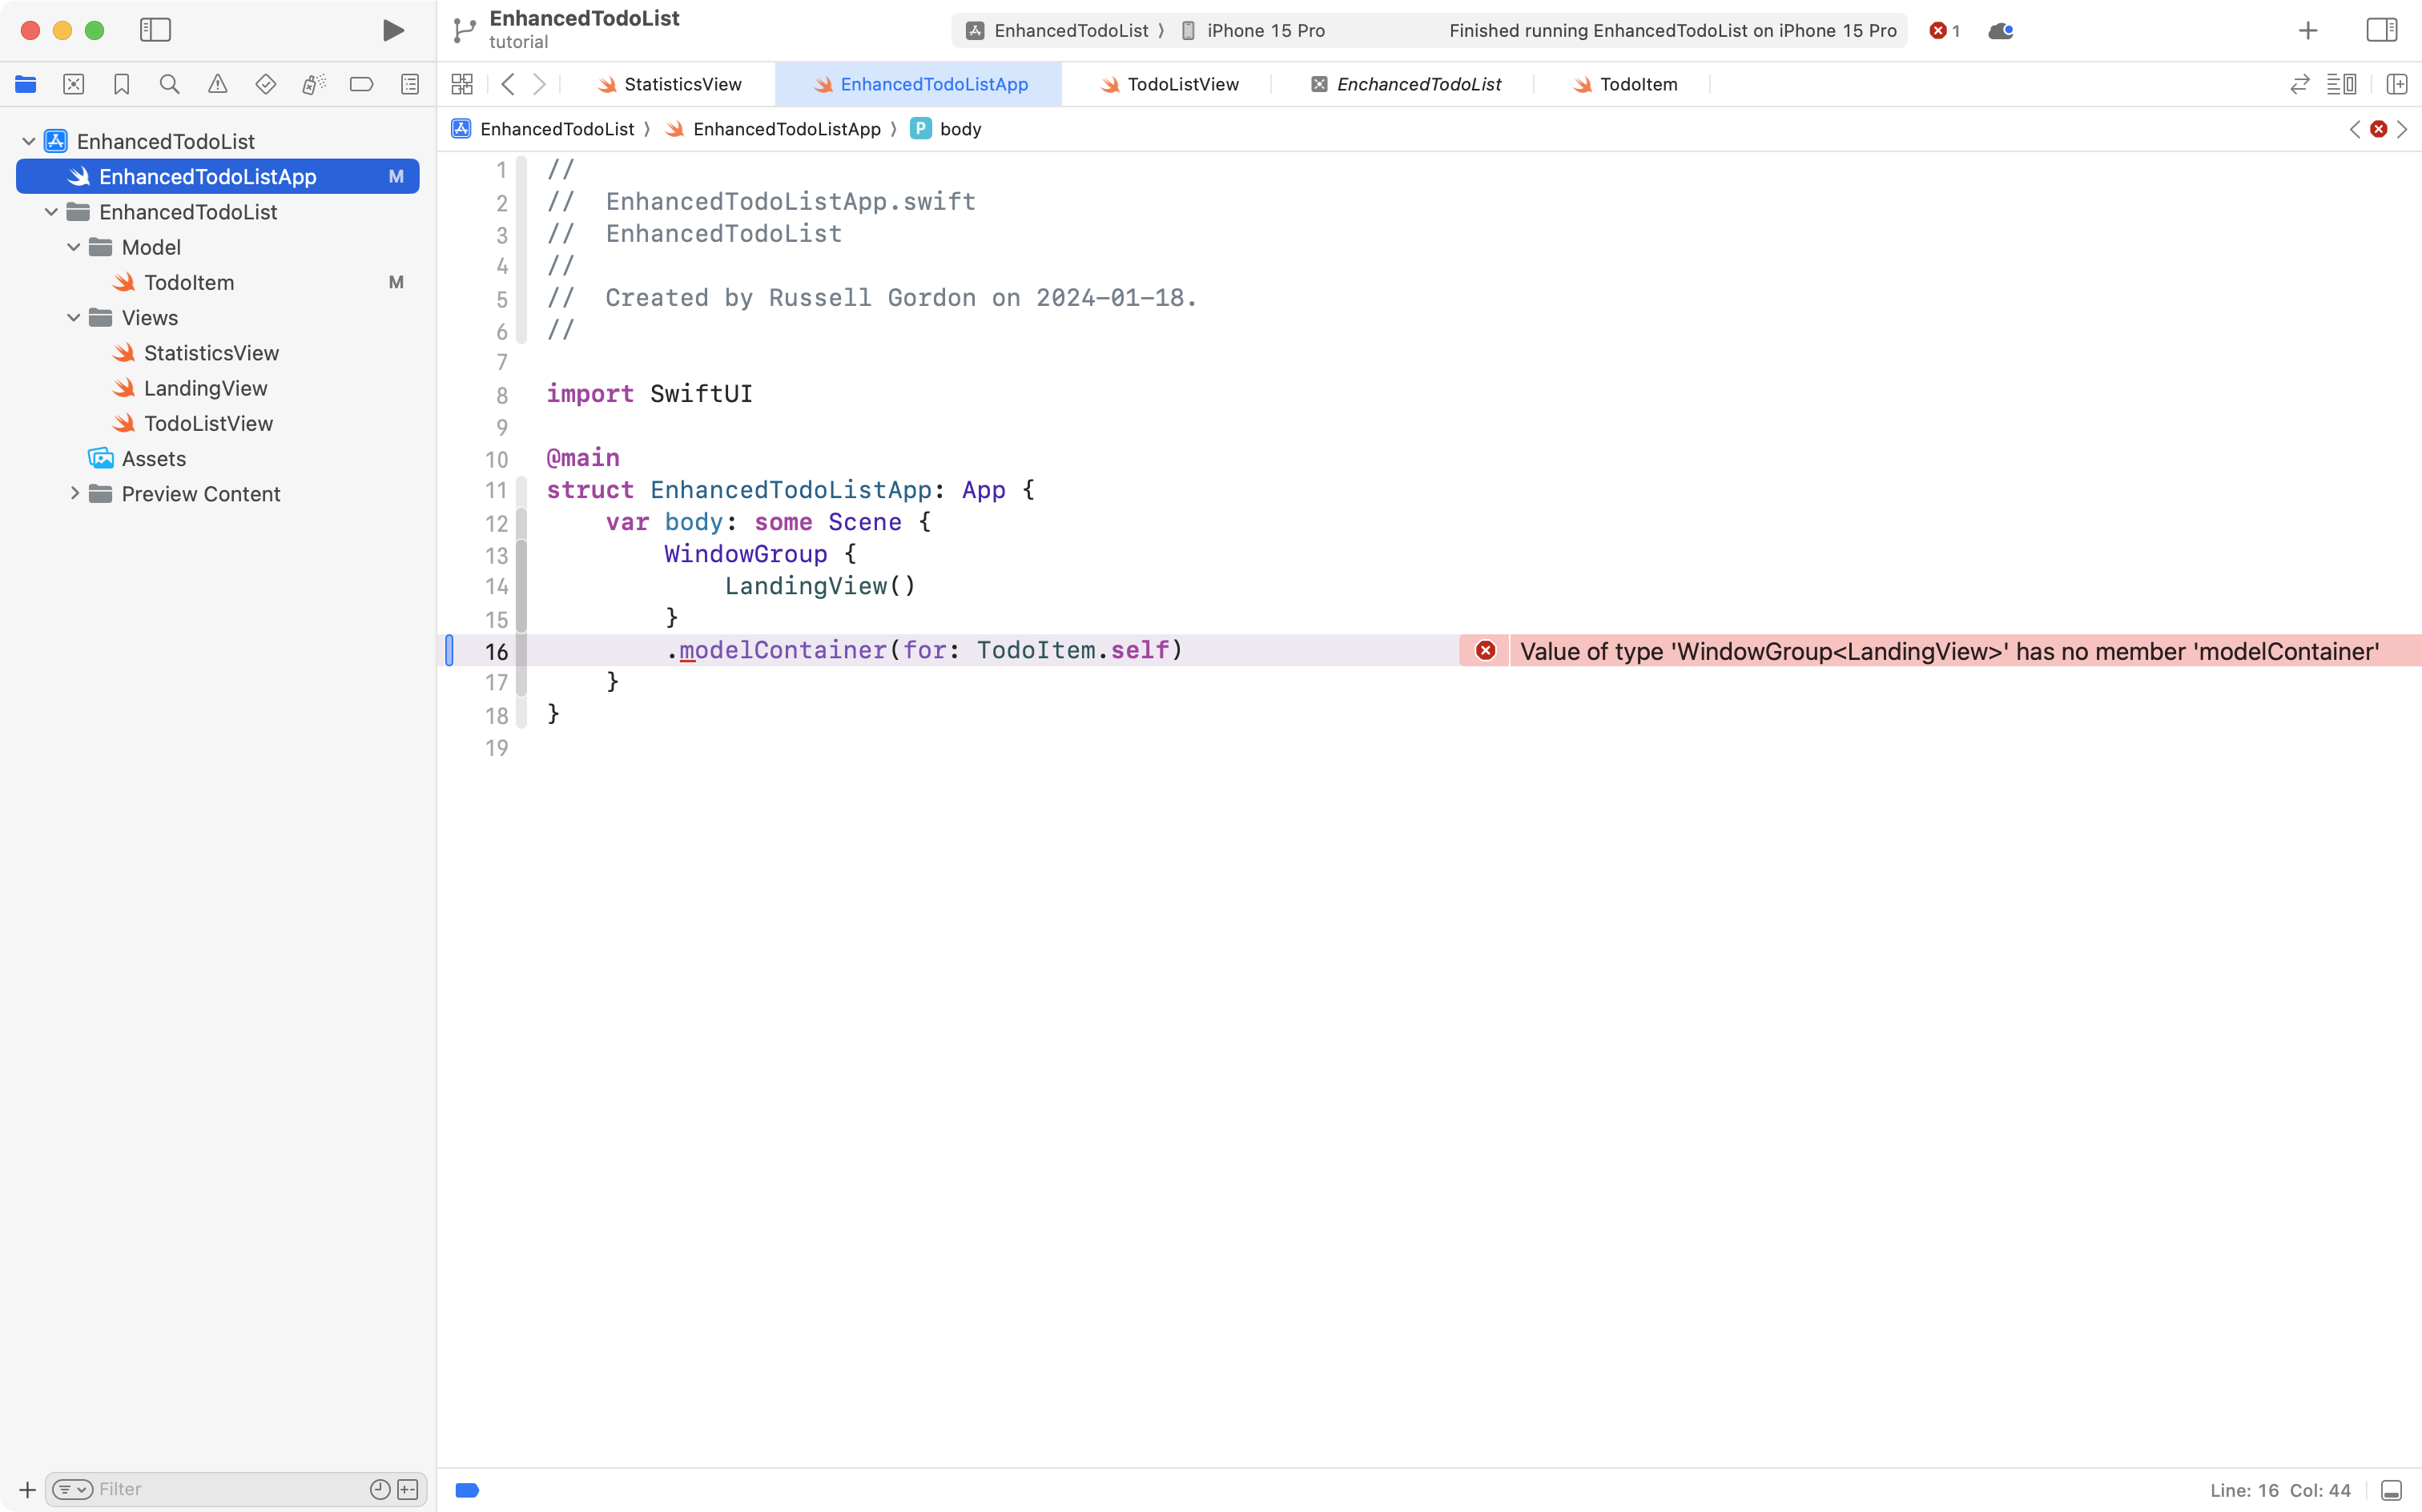
When you see the red error message, that's a reminder – you need to import the SwiftData framework:
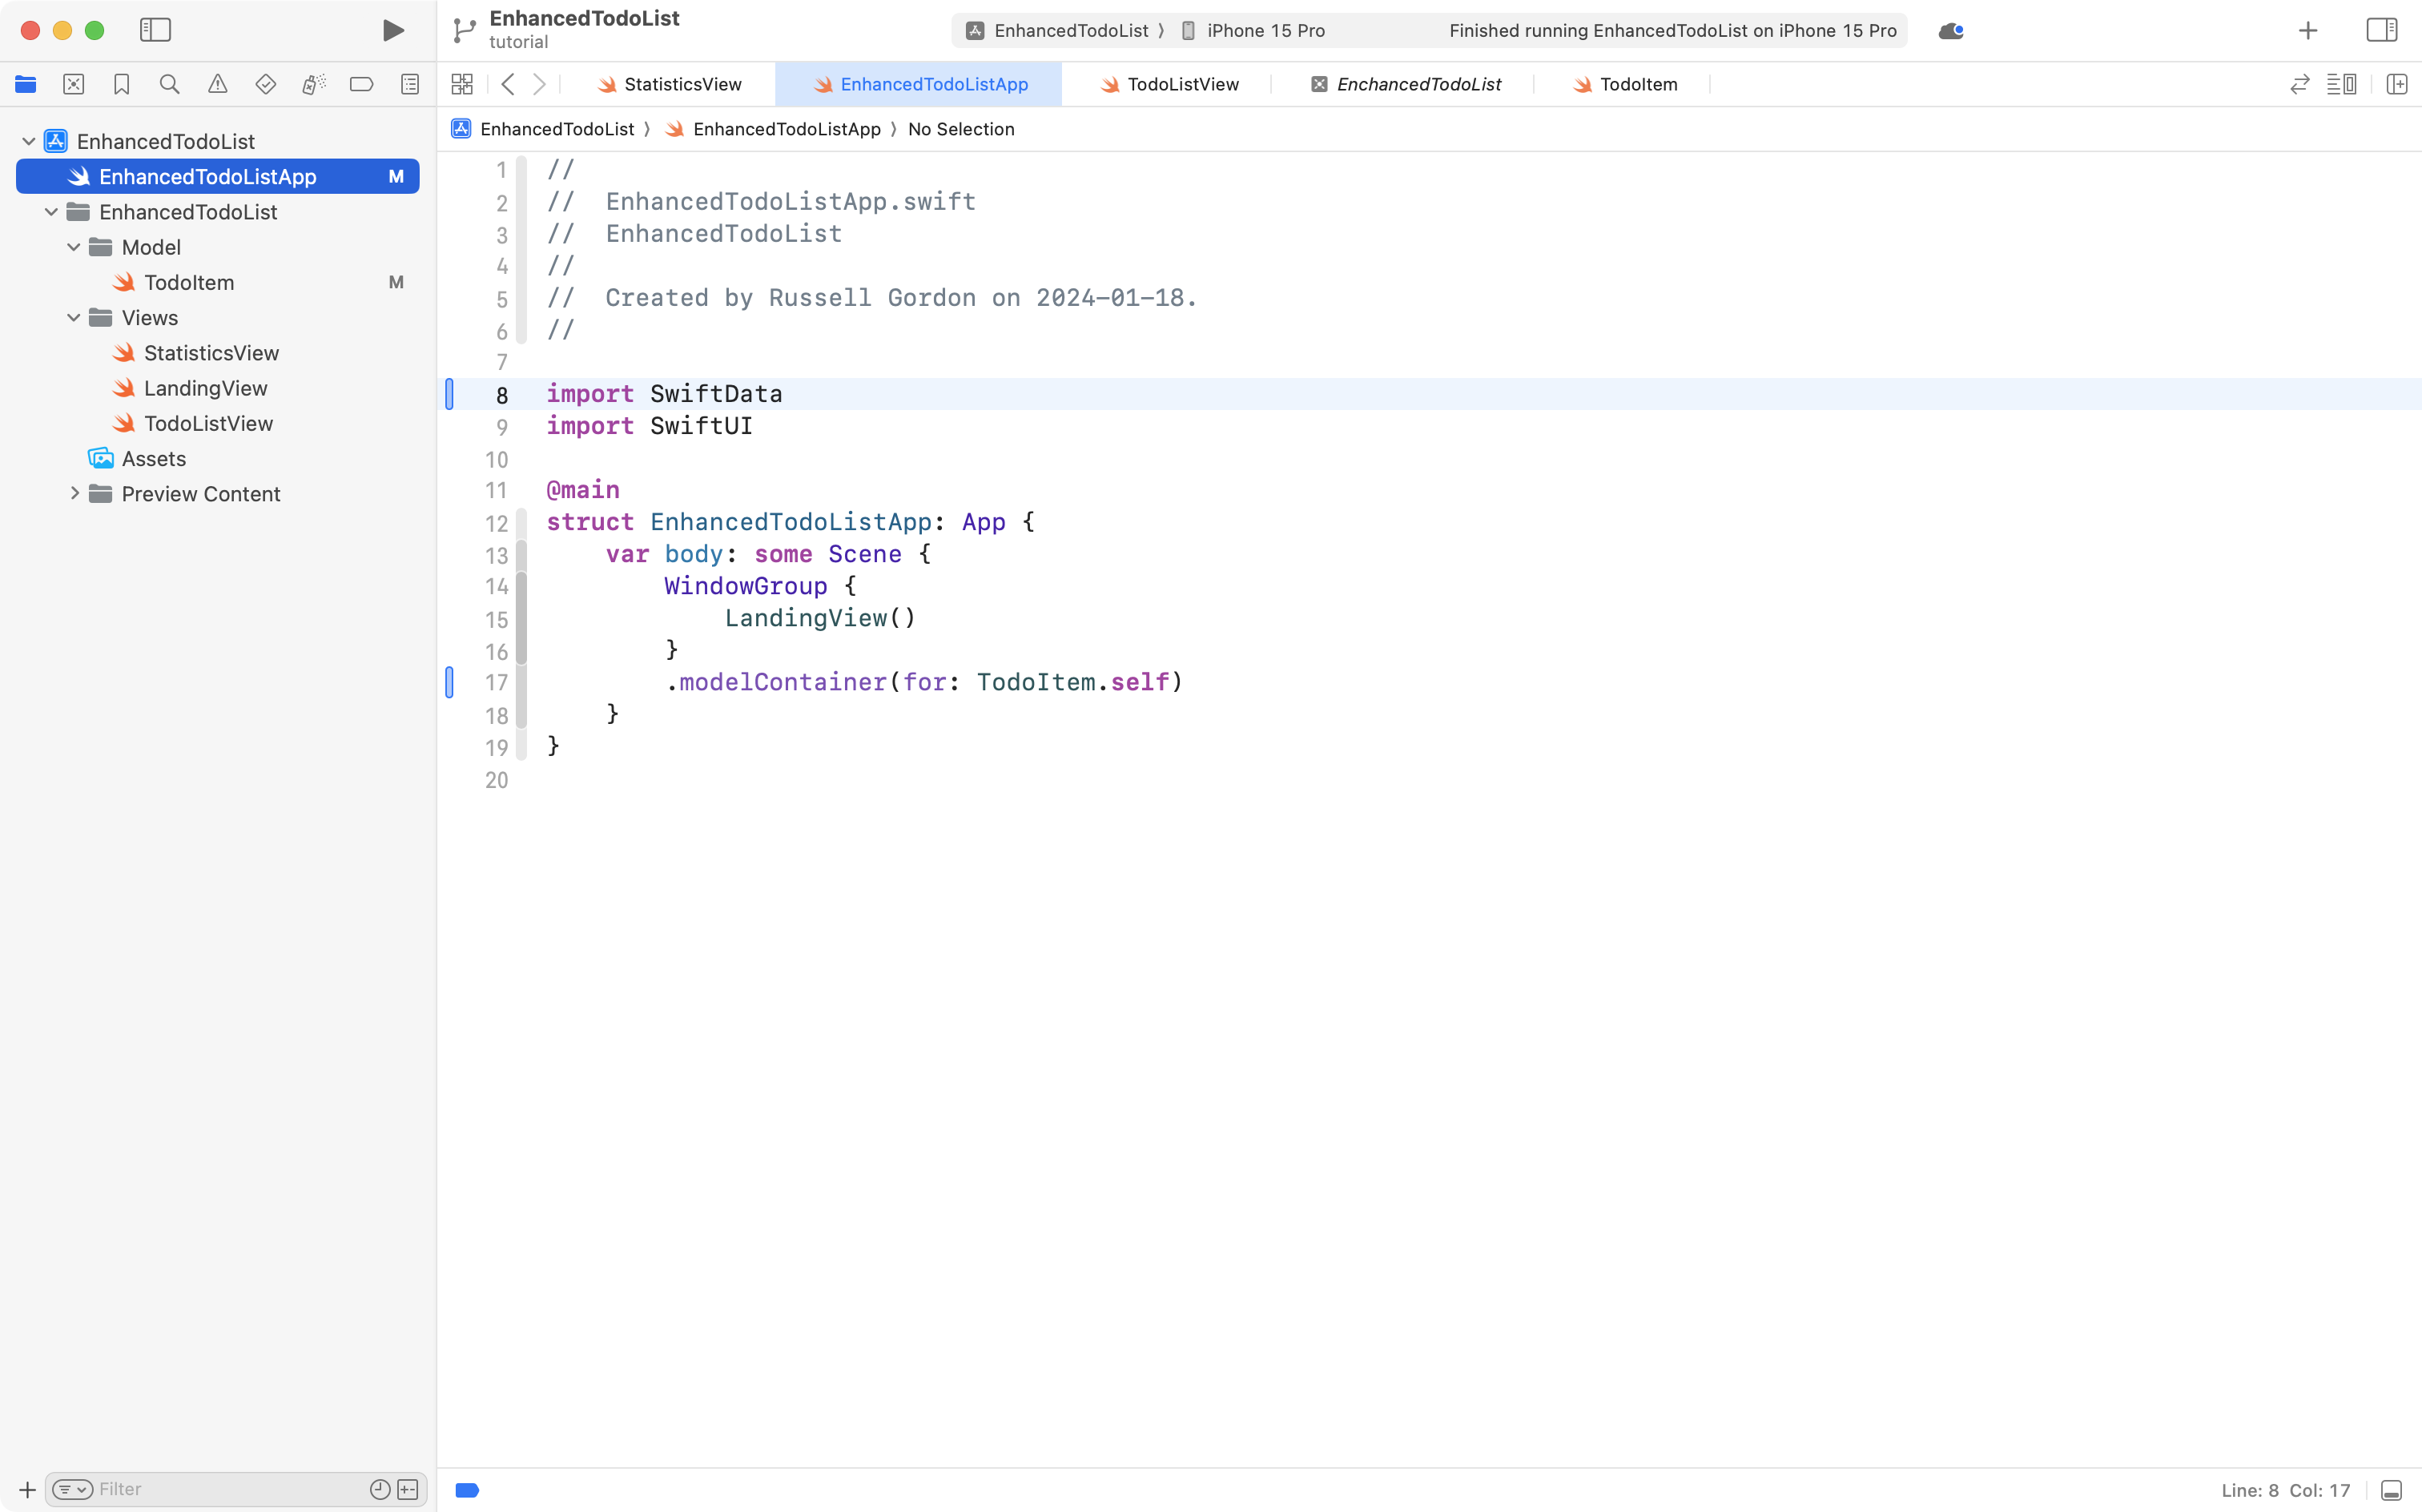
Be prepared to see error messages often when you forget to add the SwiftData framework at first. It's happened to Mr. Gordon frequently! 😅
Quoting from Mark Moeyken's book again – here is what that .modelContainer view modifier is telling SwiftData to do:
- Create our permanent storage (if not already there).
- Create this model (
TodoItem) in our permanent storage (if not already there). - Load the model into the model context (more on this later).
- Add the model context to the environment of the view (or window group) it is attached to.
3 – Add the context
We need the context to do CRUD – create, read, update, or delete data.
Any view that needs to perform those operations needs access to the context.
We access the context through the environment of our app:
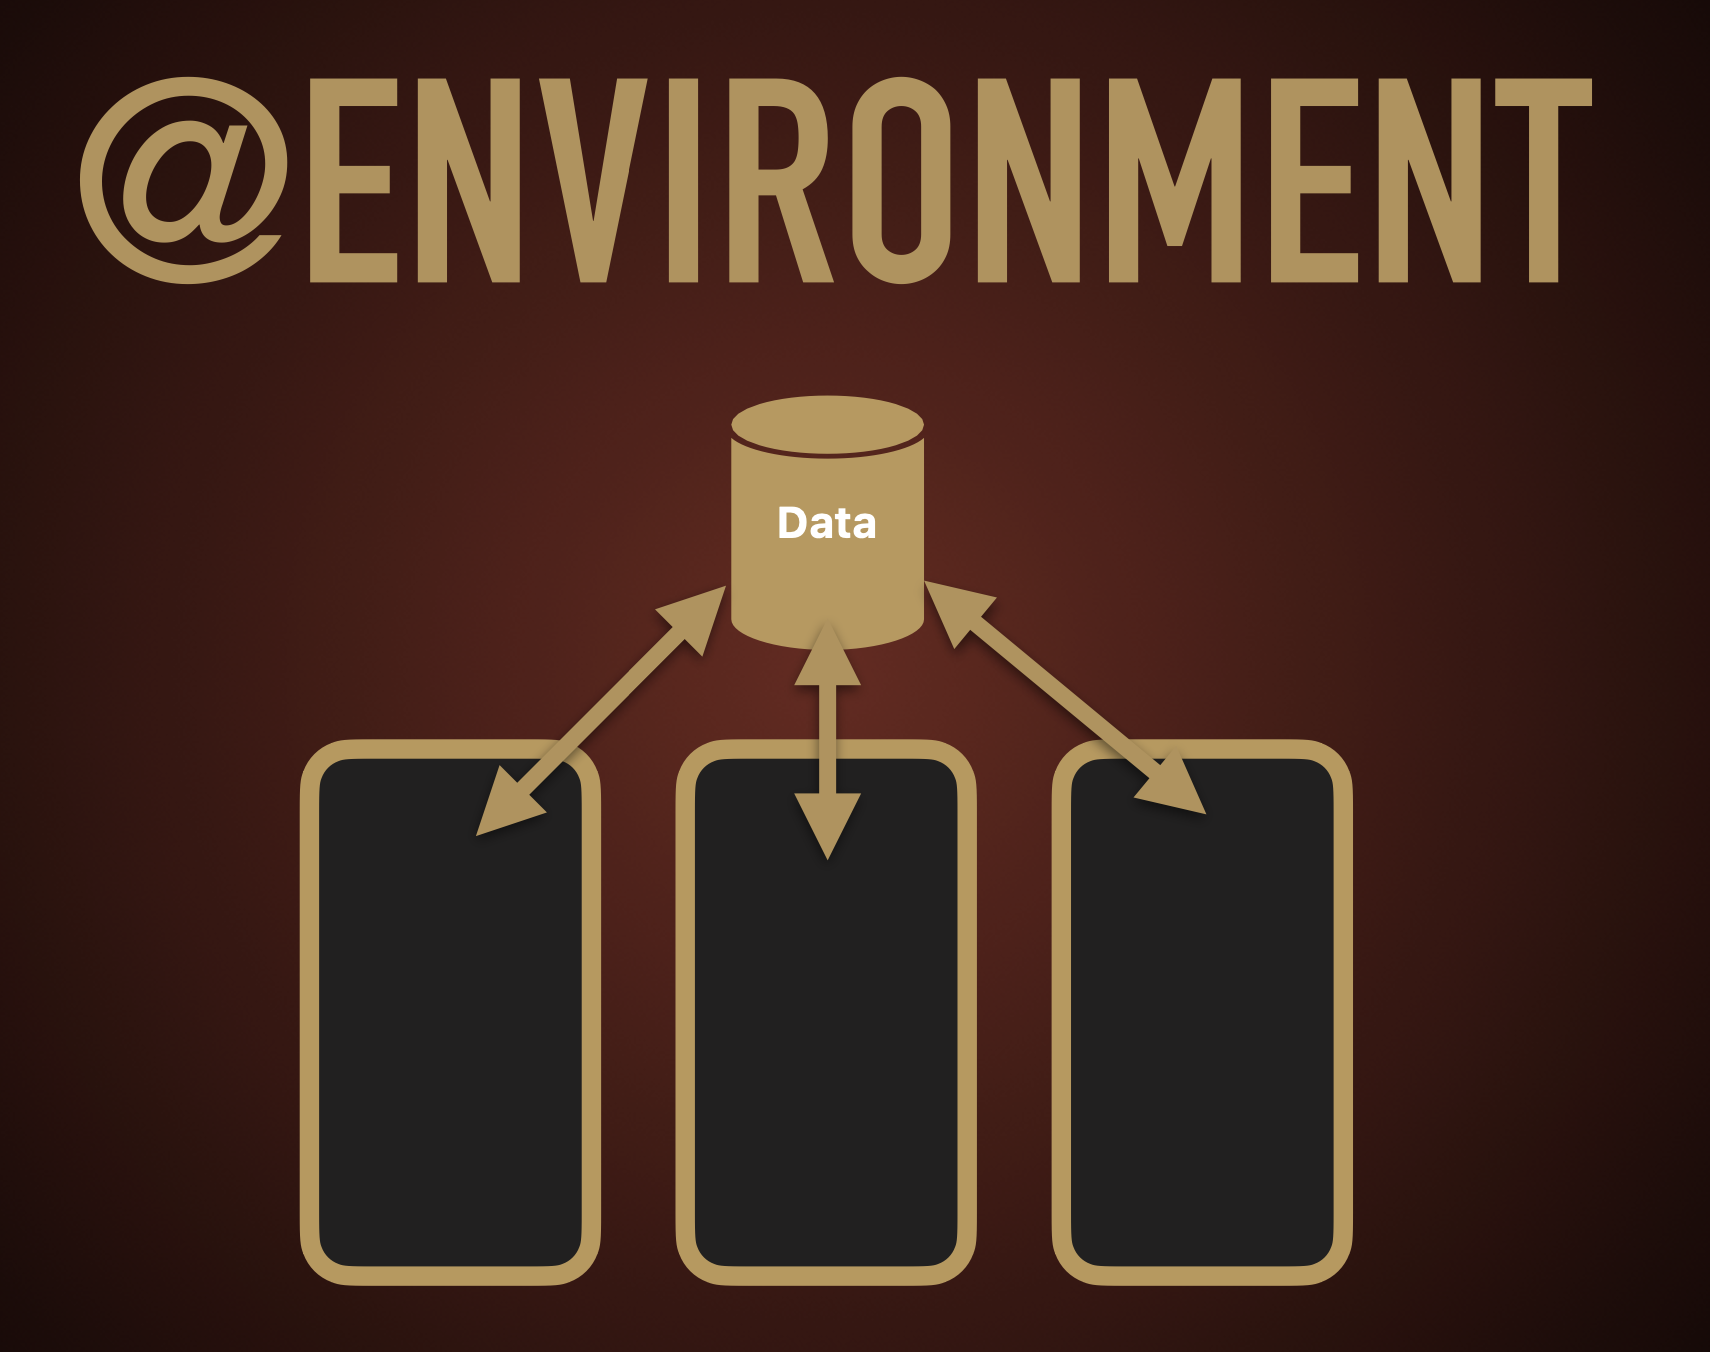
What is this mysterious environment, though?
The environment is a small, special section of variables and constants managed by SwiftUI that make it easy to share information between views.
In this case, a moment ago we created the container, and it performed the four steps described.
One of those was to create the context – which we now need – so here is how to get at it.
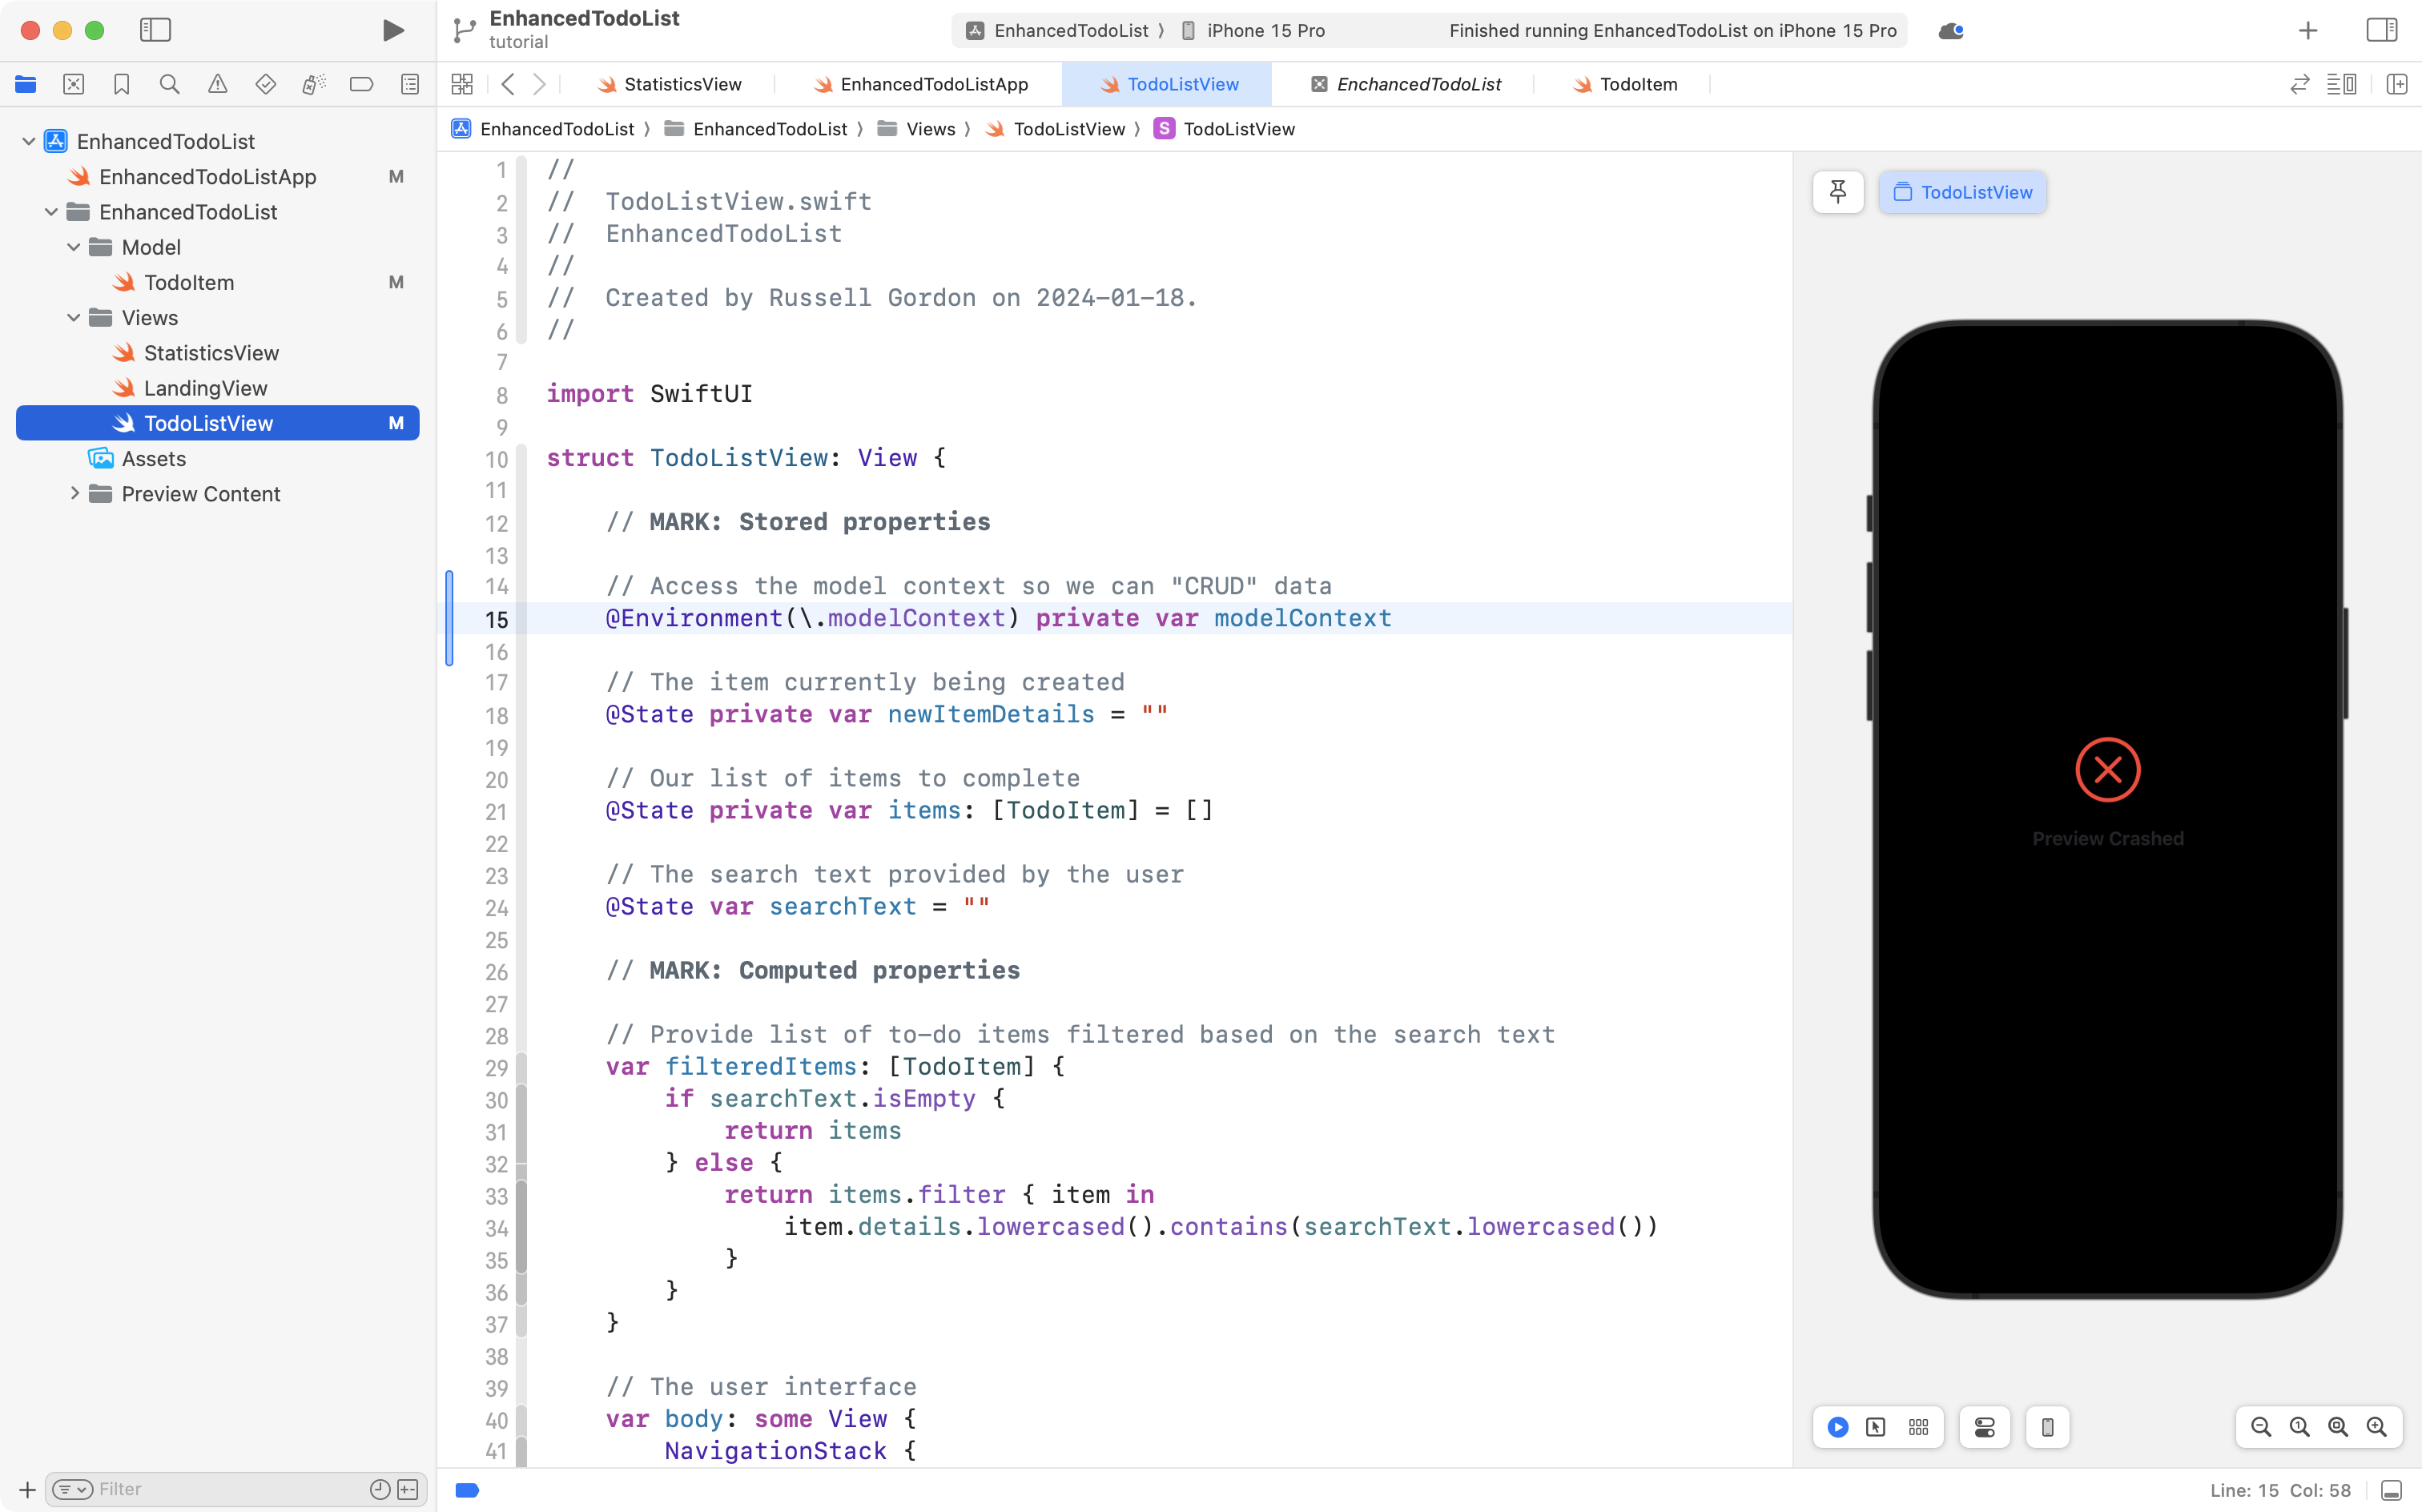
Navigate to the stored properties section fo the TodoListView file:
Don't worry if your preview is currently not working – we are in the middle of adding SwiftData support.
Please add this code to the top of the stored properties section:
// Access the model context so we can "CRUD" data
@Environment(\.modelContext) private var modelContext
... like this:
4 – Adjust the view to run a query
On line 21 we currently create the source of truth – the single place where our list of to-do items exists:
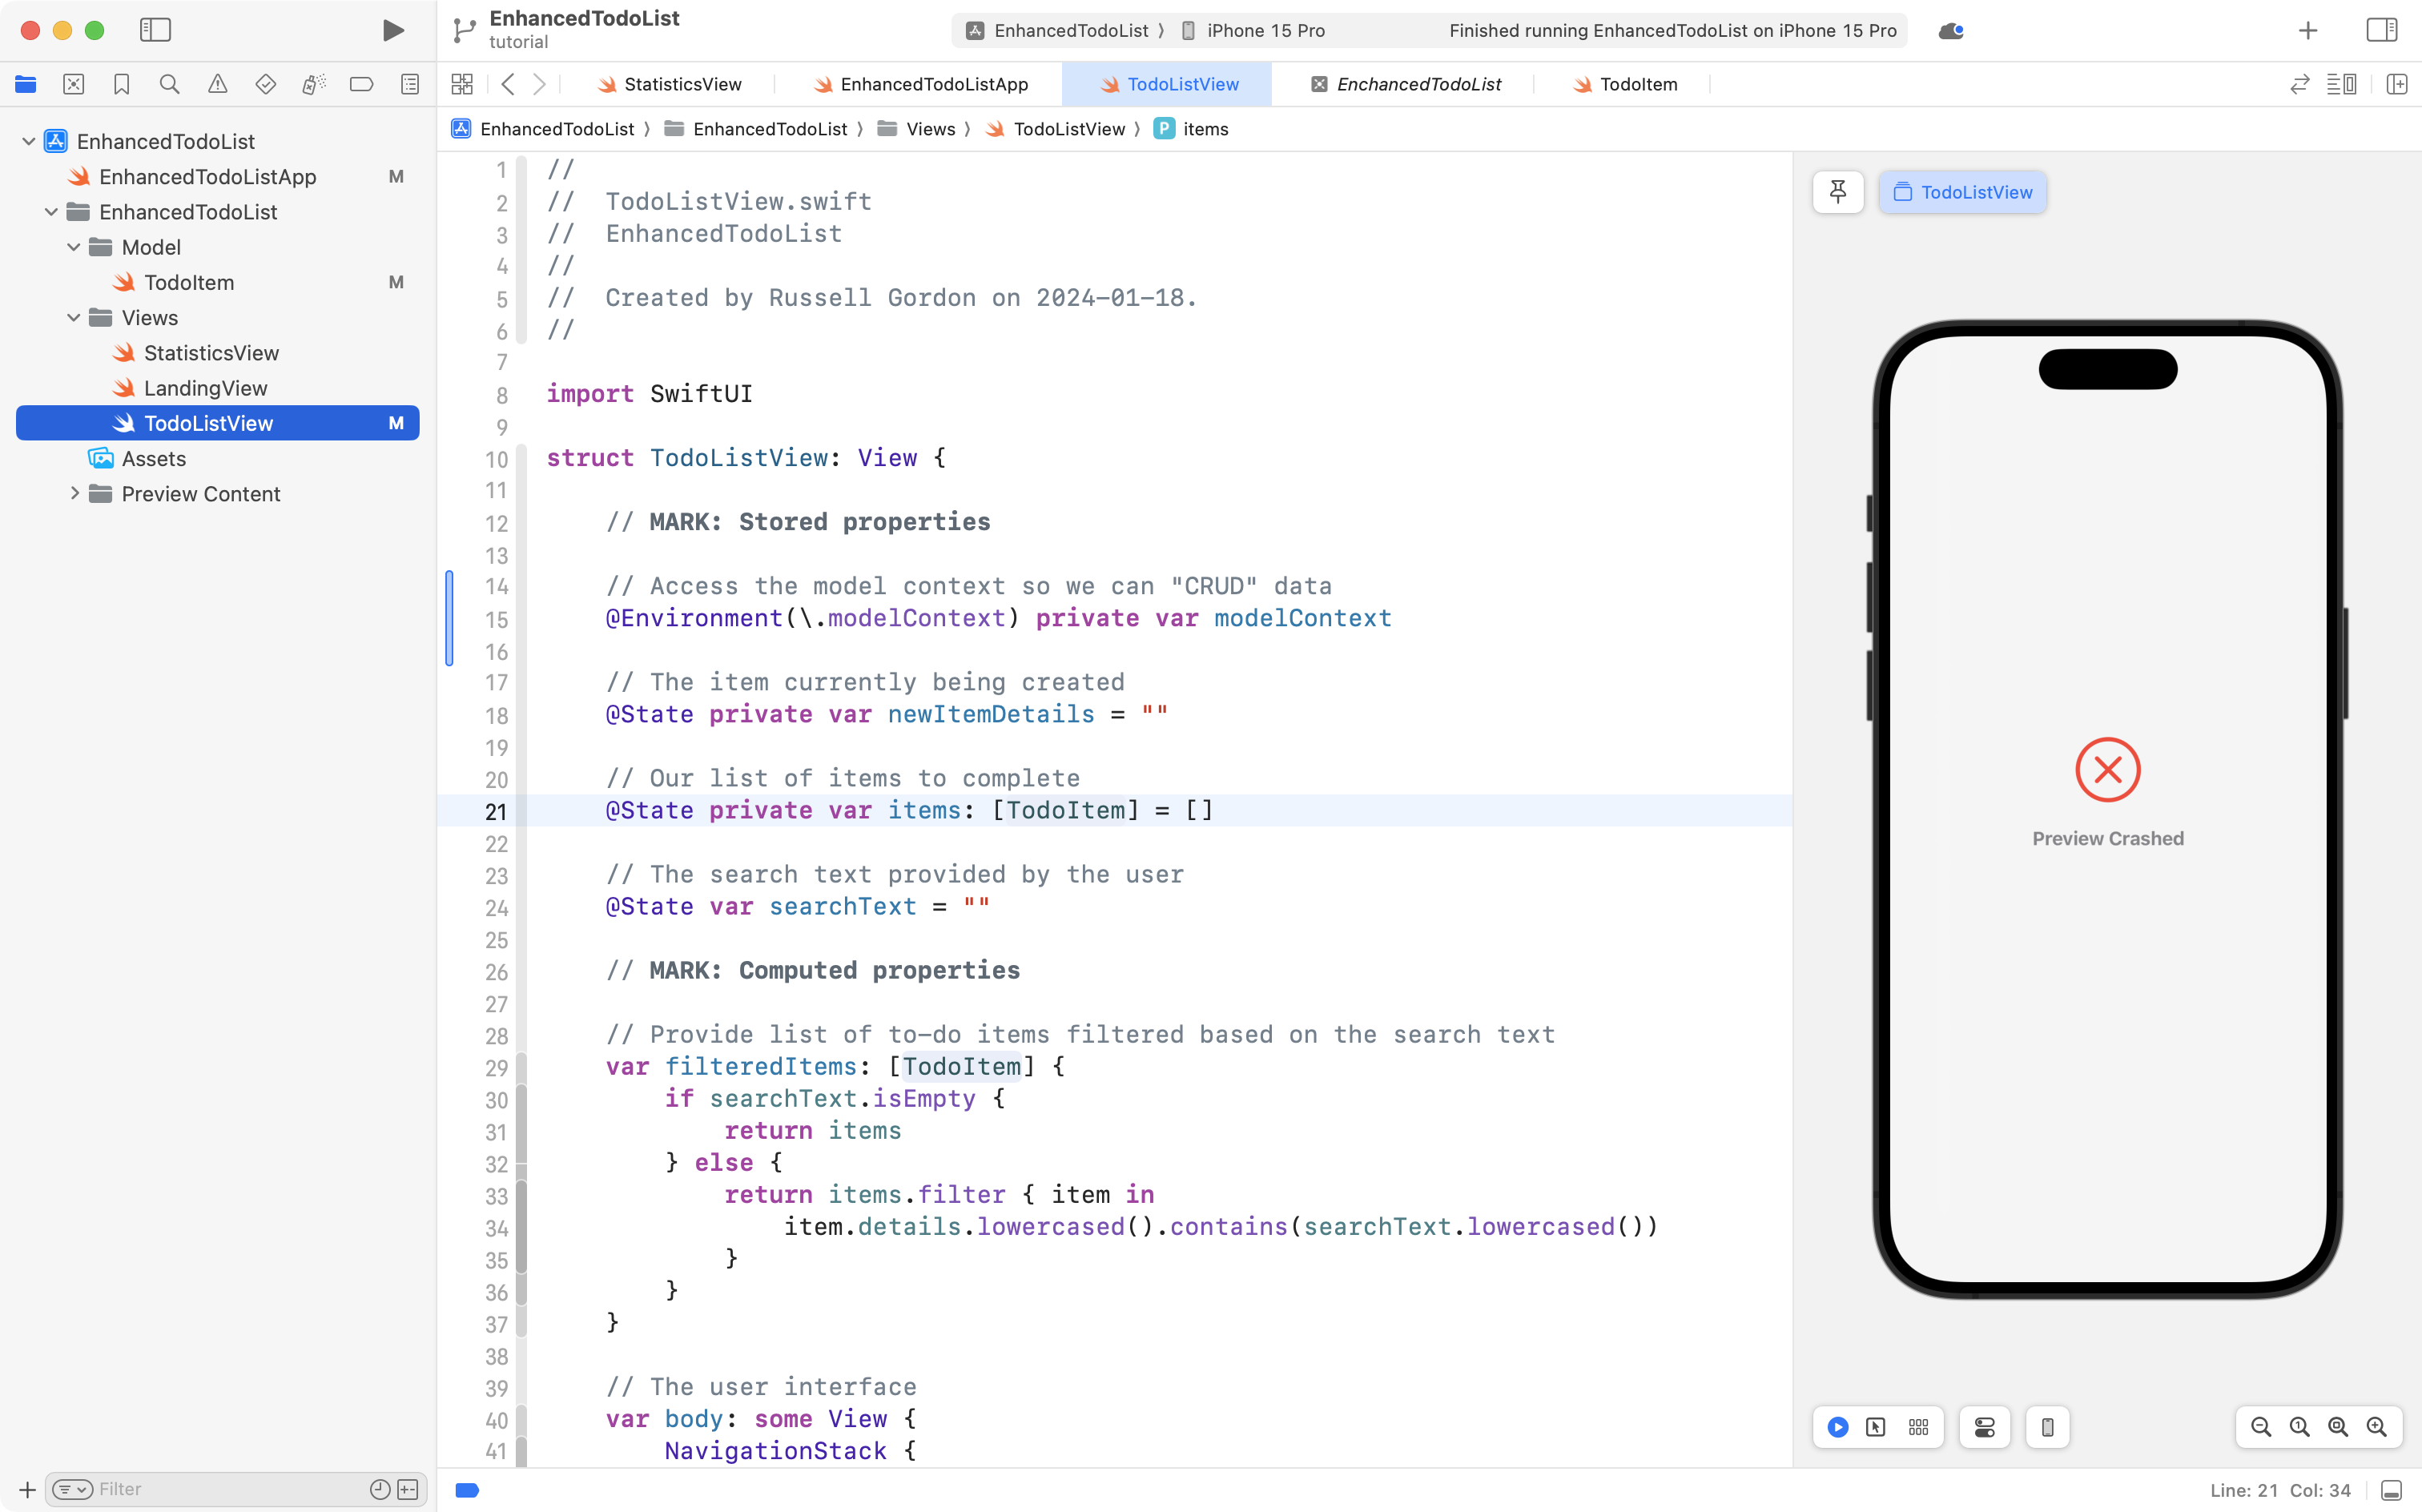
With the following code change, we are moving the source of truth into the database that SwiftData manages on our behalf – essentially, into a database table – just like last year. Take this code:
// Run a query to obtain the list of to-do items
@Query private var items: [TodoItem]
... and replace the code on lines 20 and 21 with it:
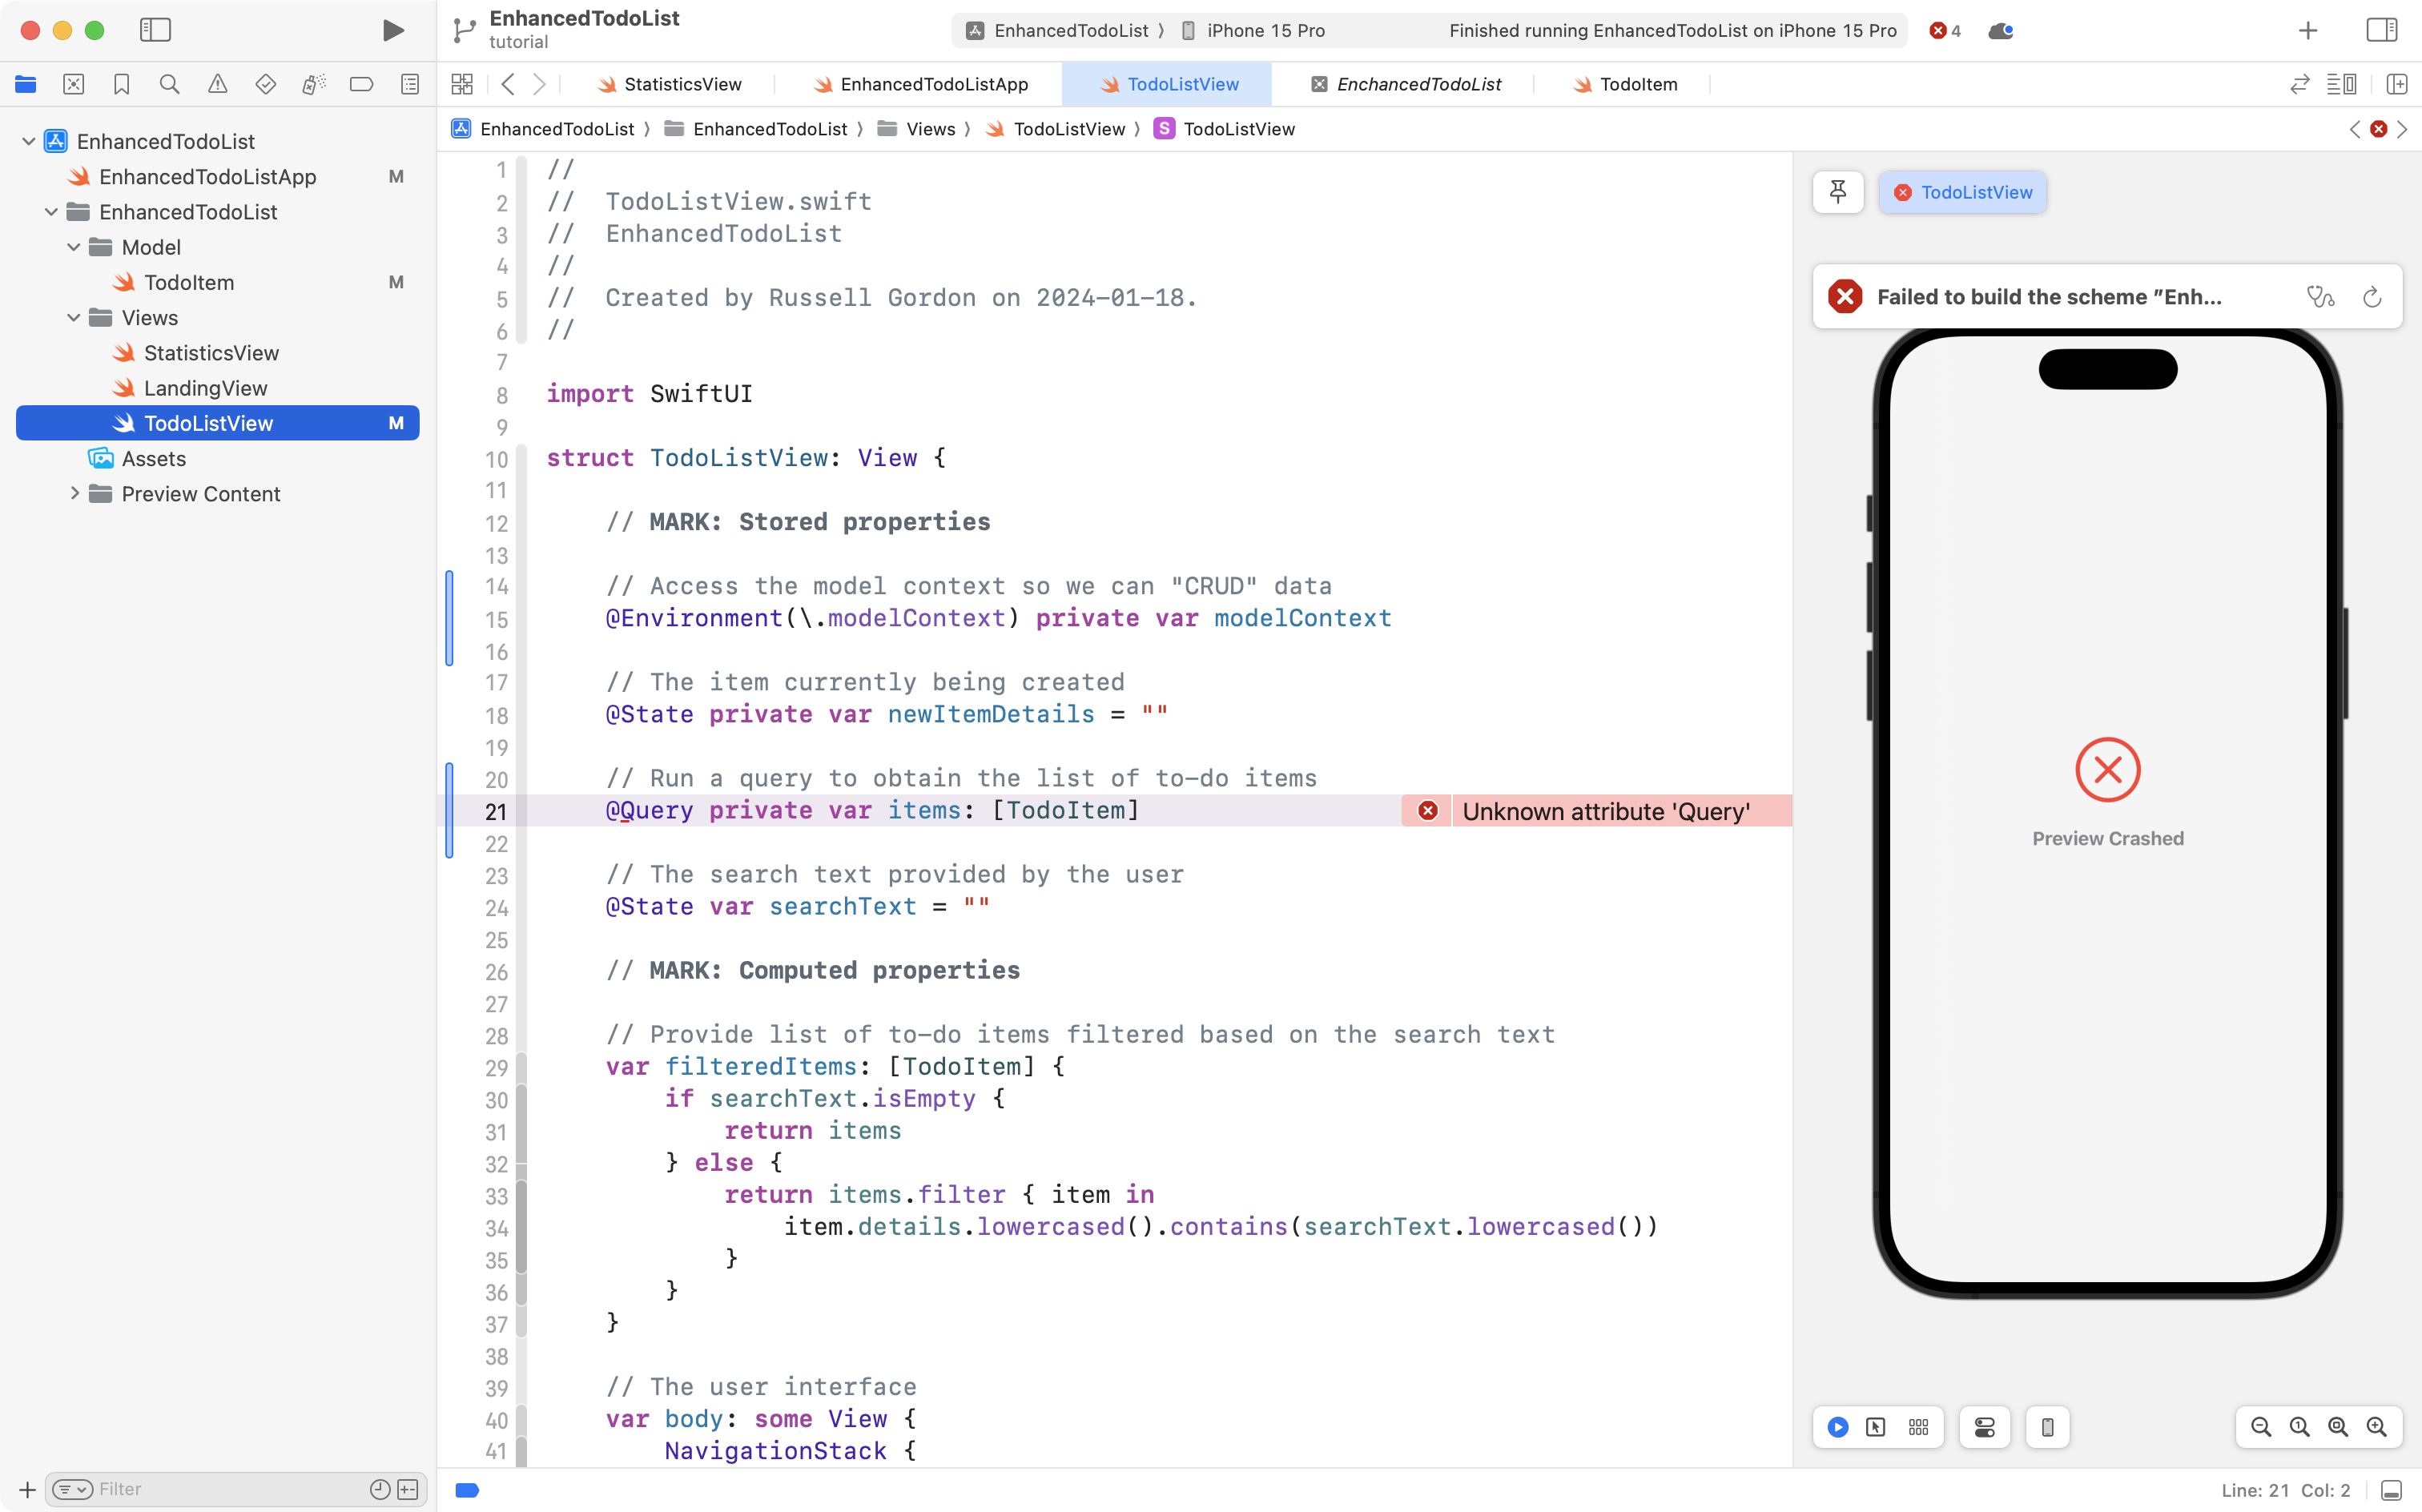
Again, you will see an error message – that's your cue – don't forget to import the SwiftData framework! 😅
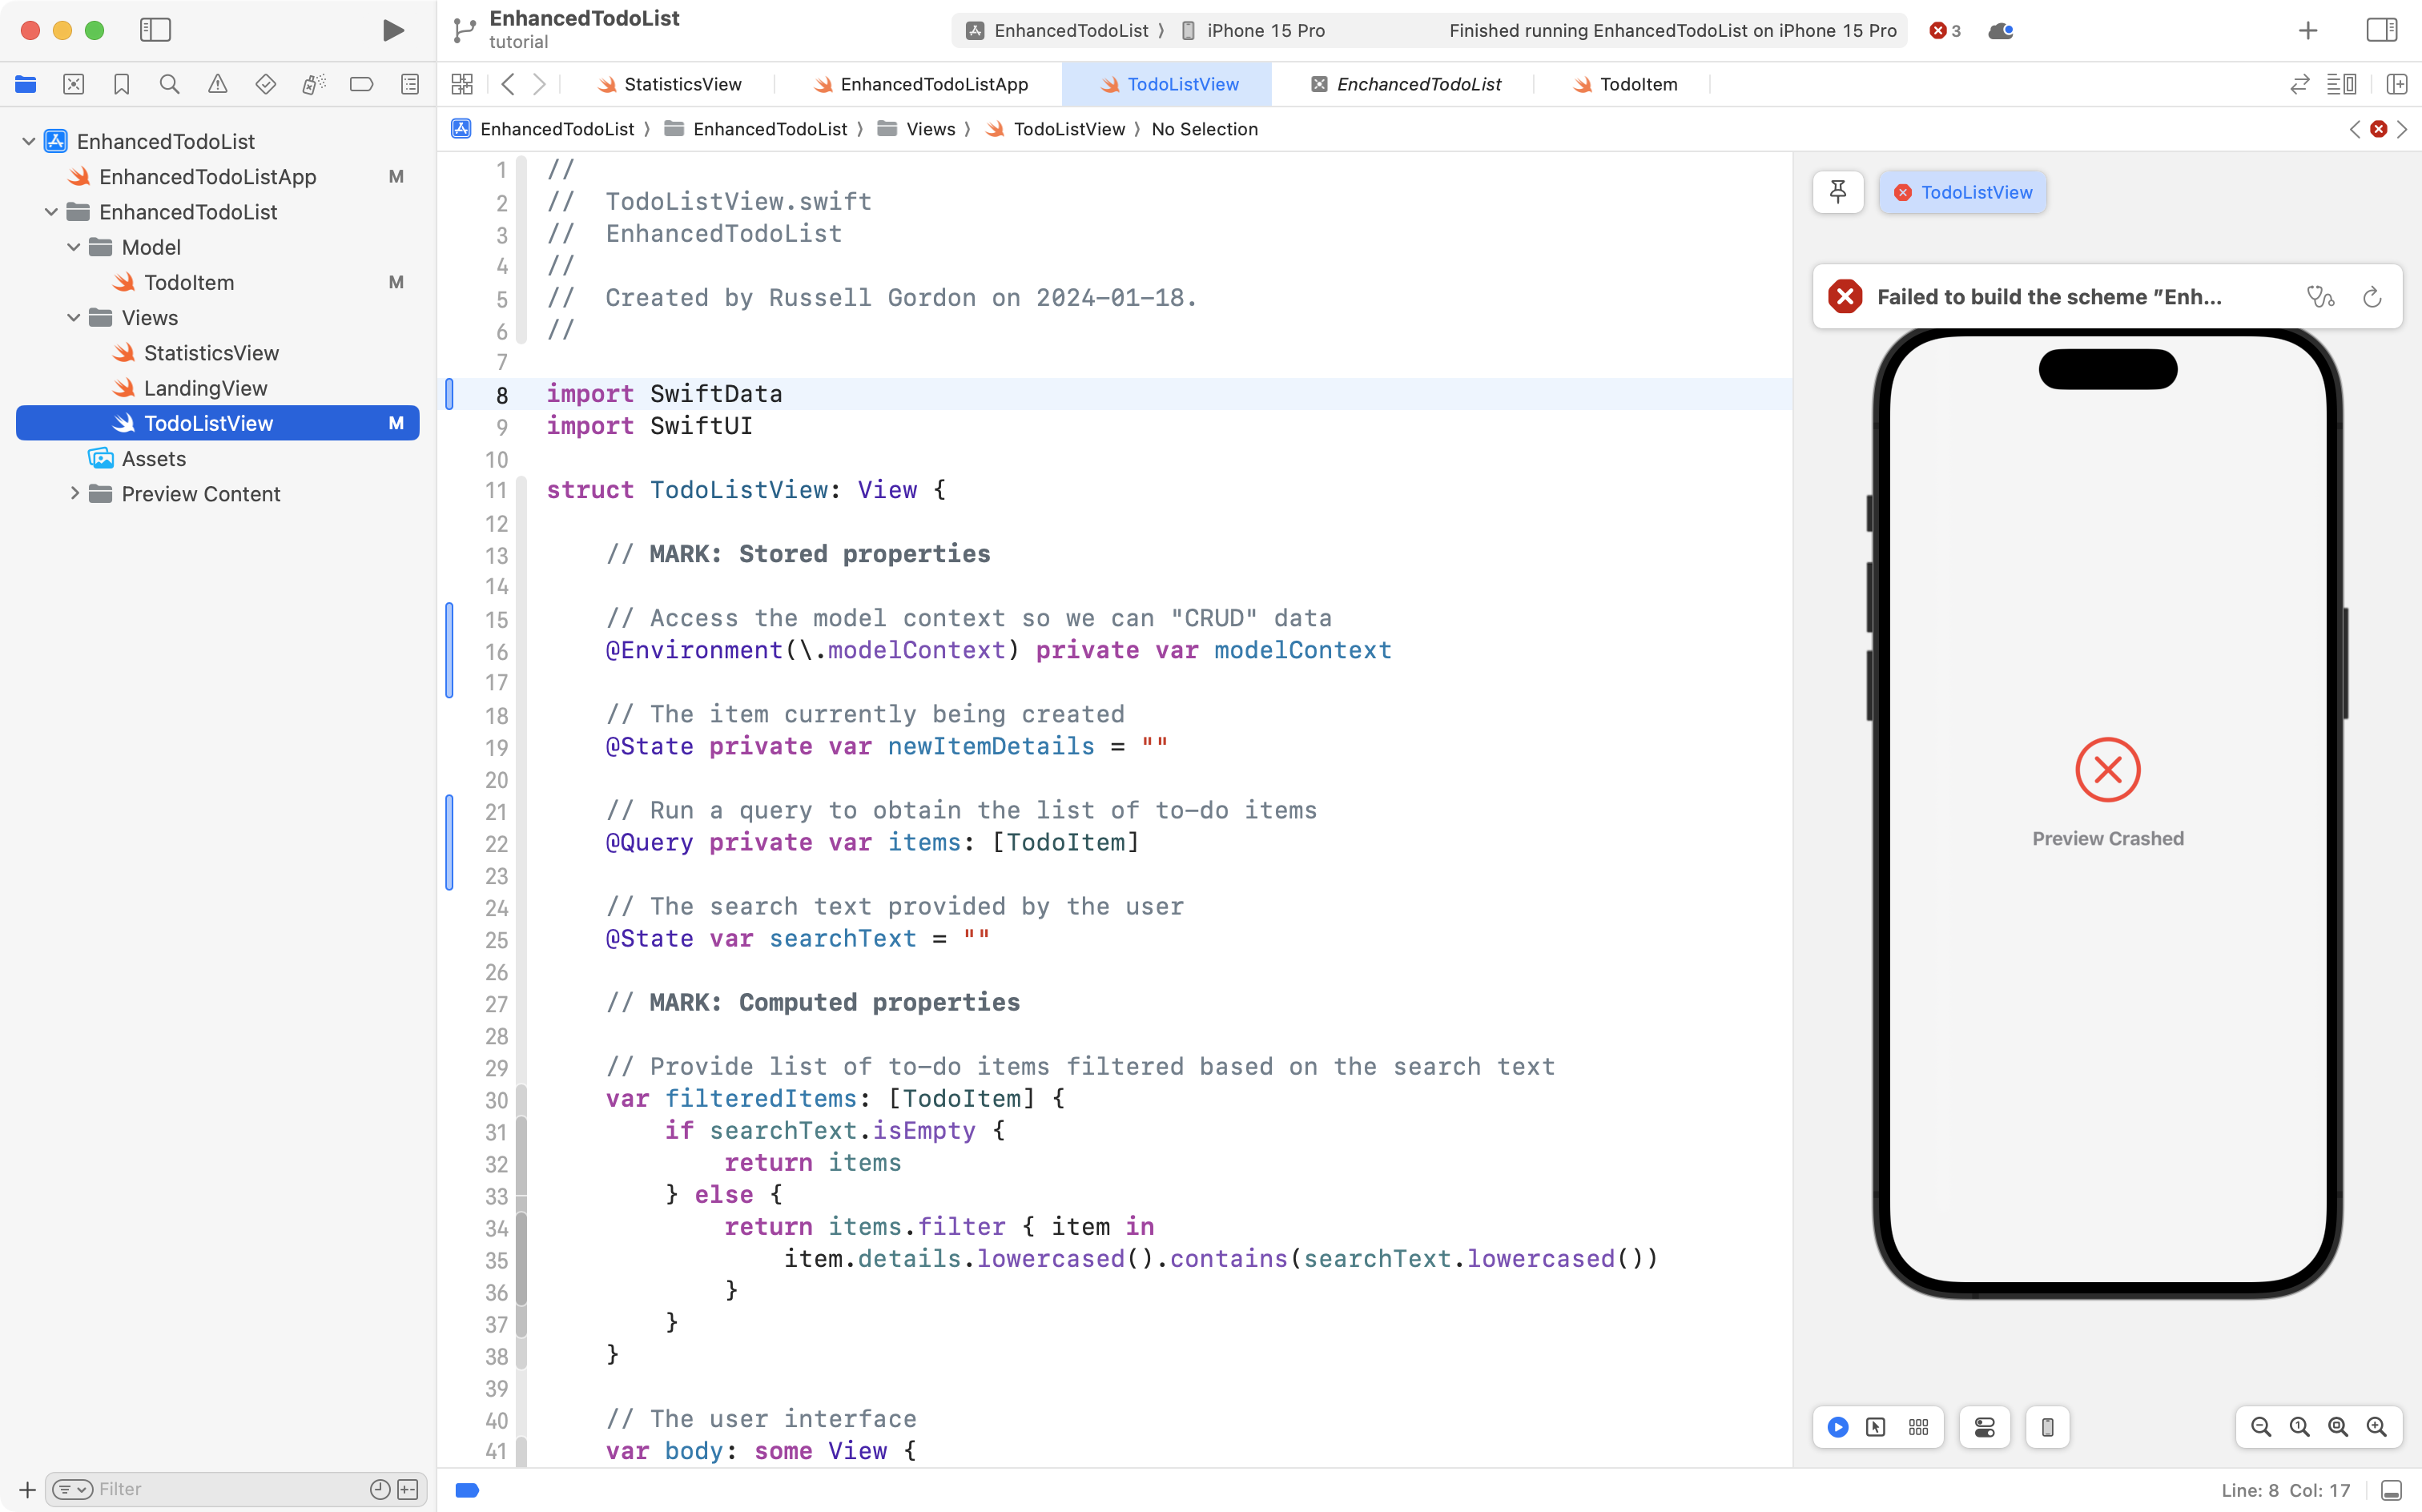
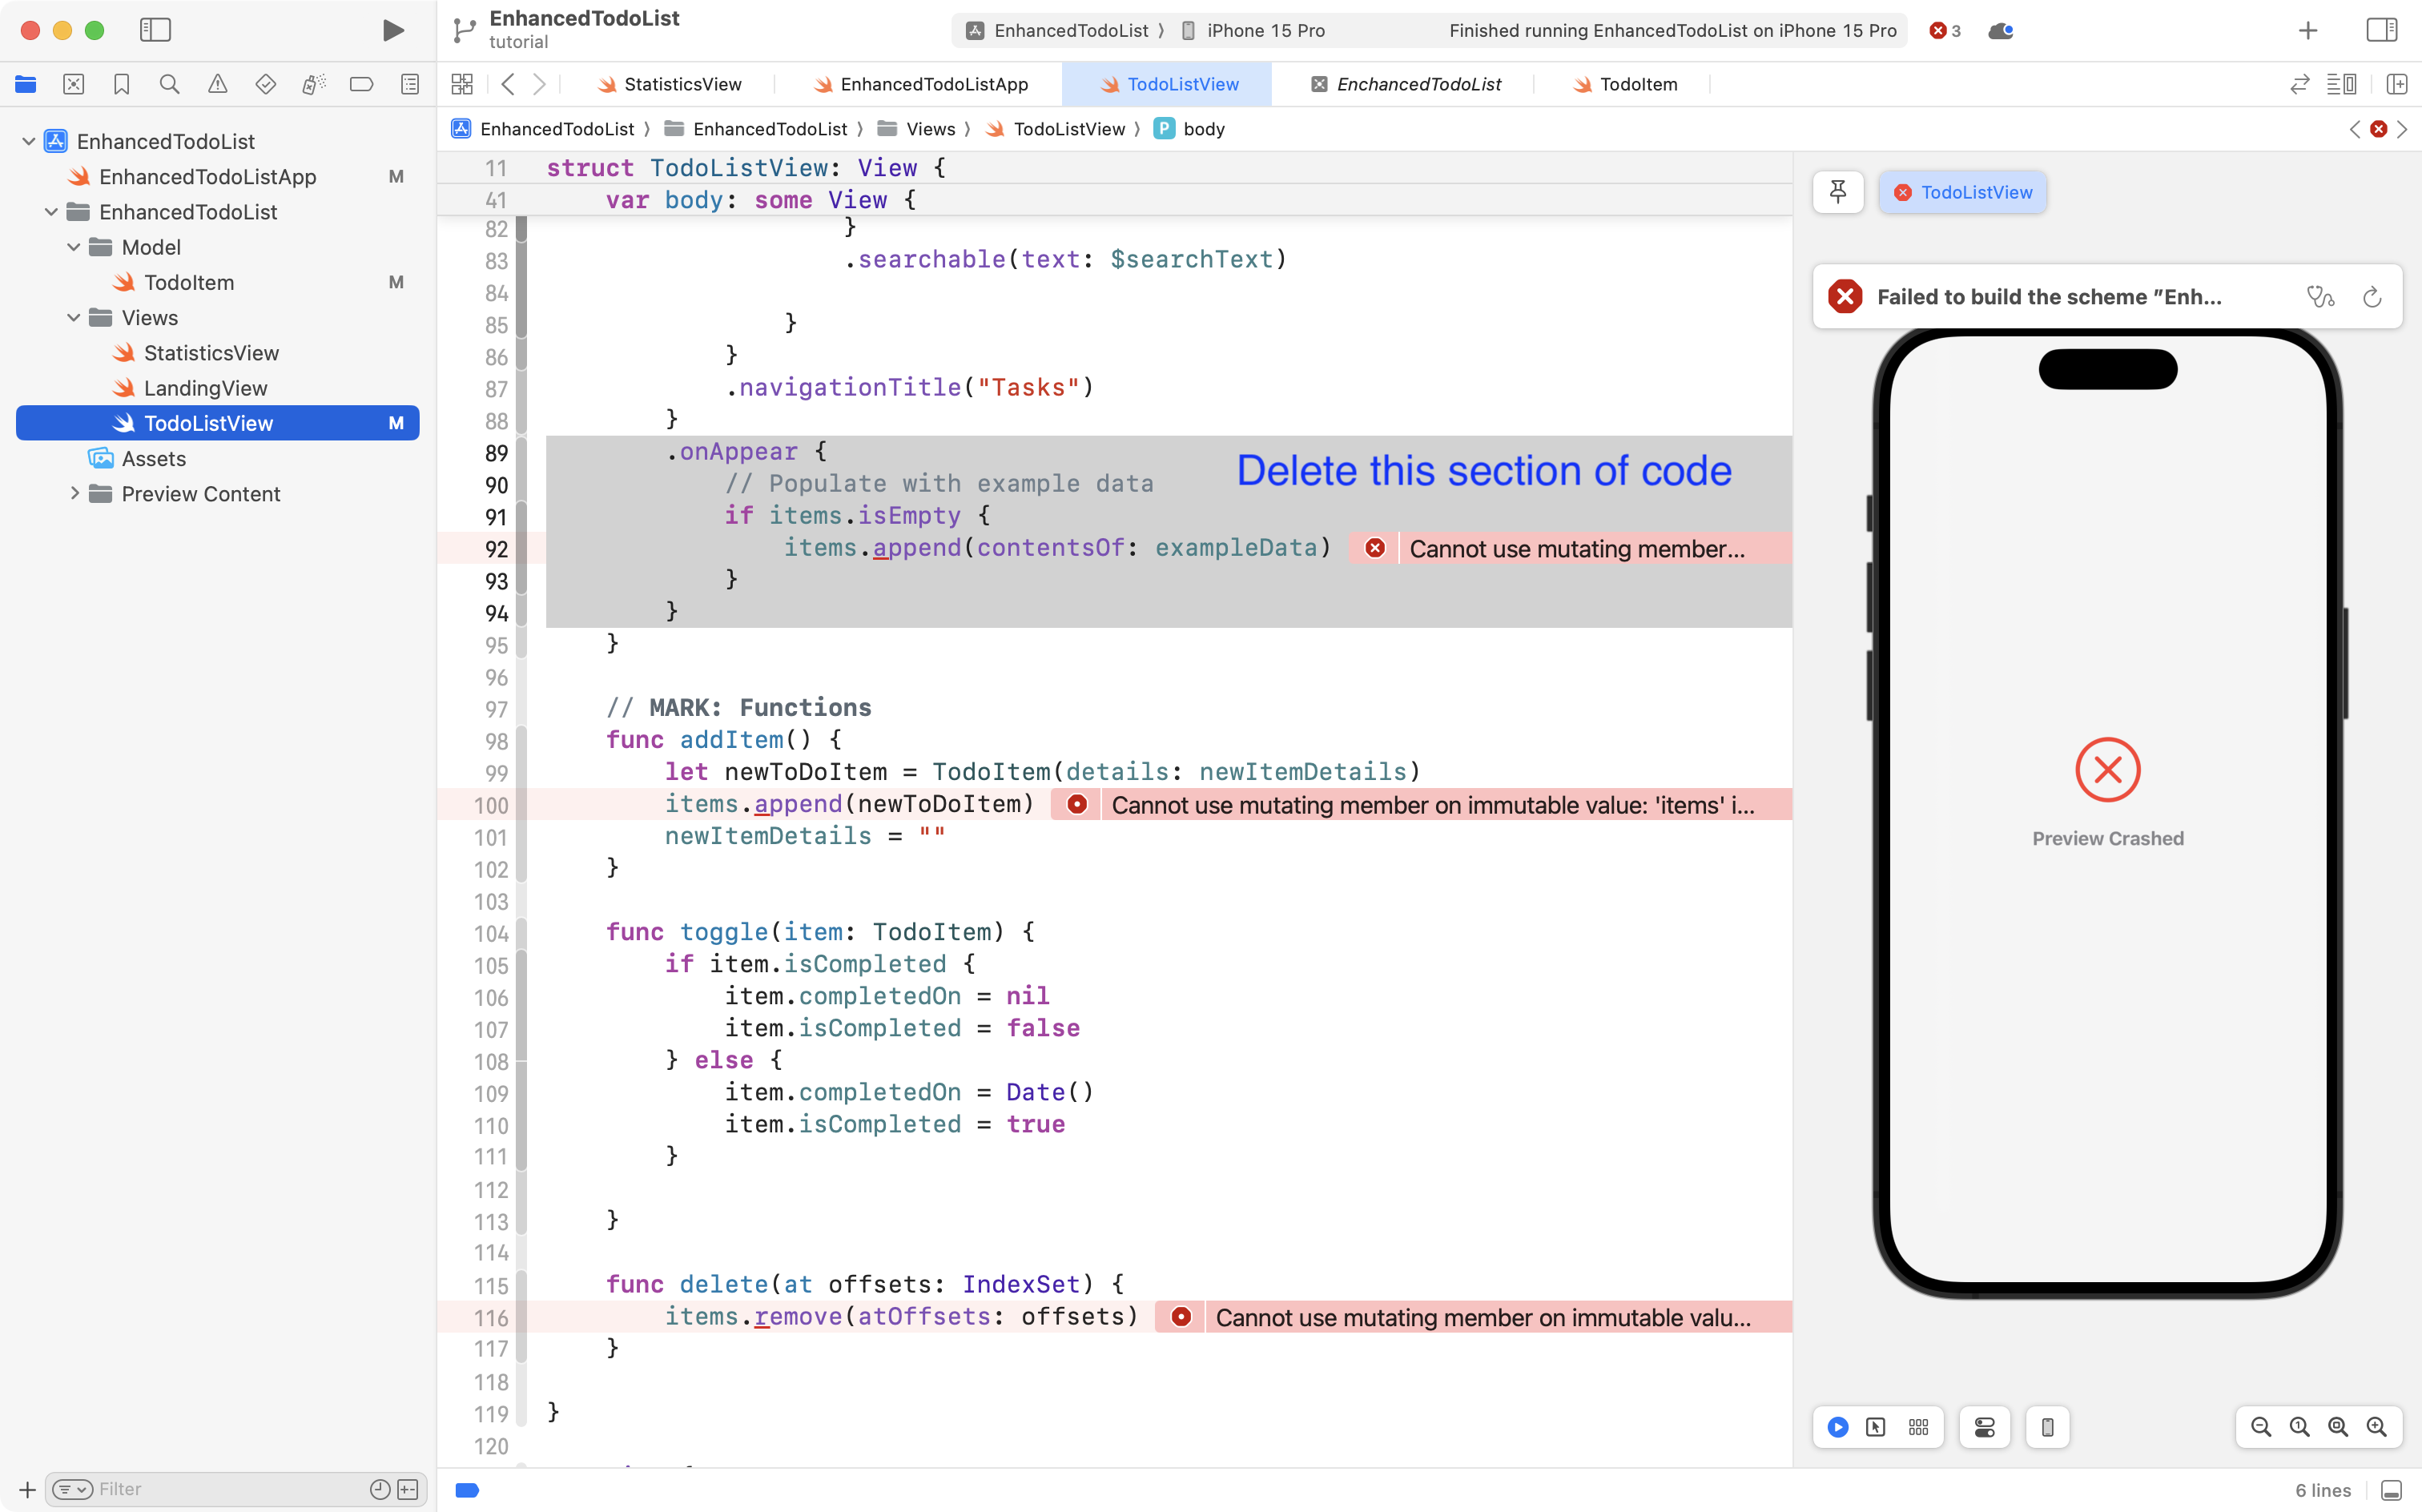
Finally, you will see that three error messages remain – and they all relate to how data is handled – they are all CRUD operations:
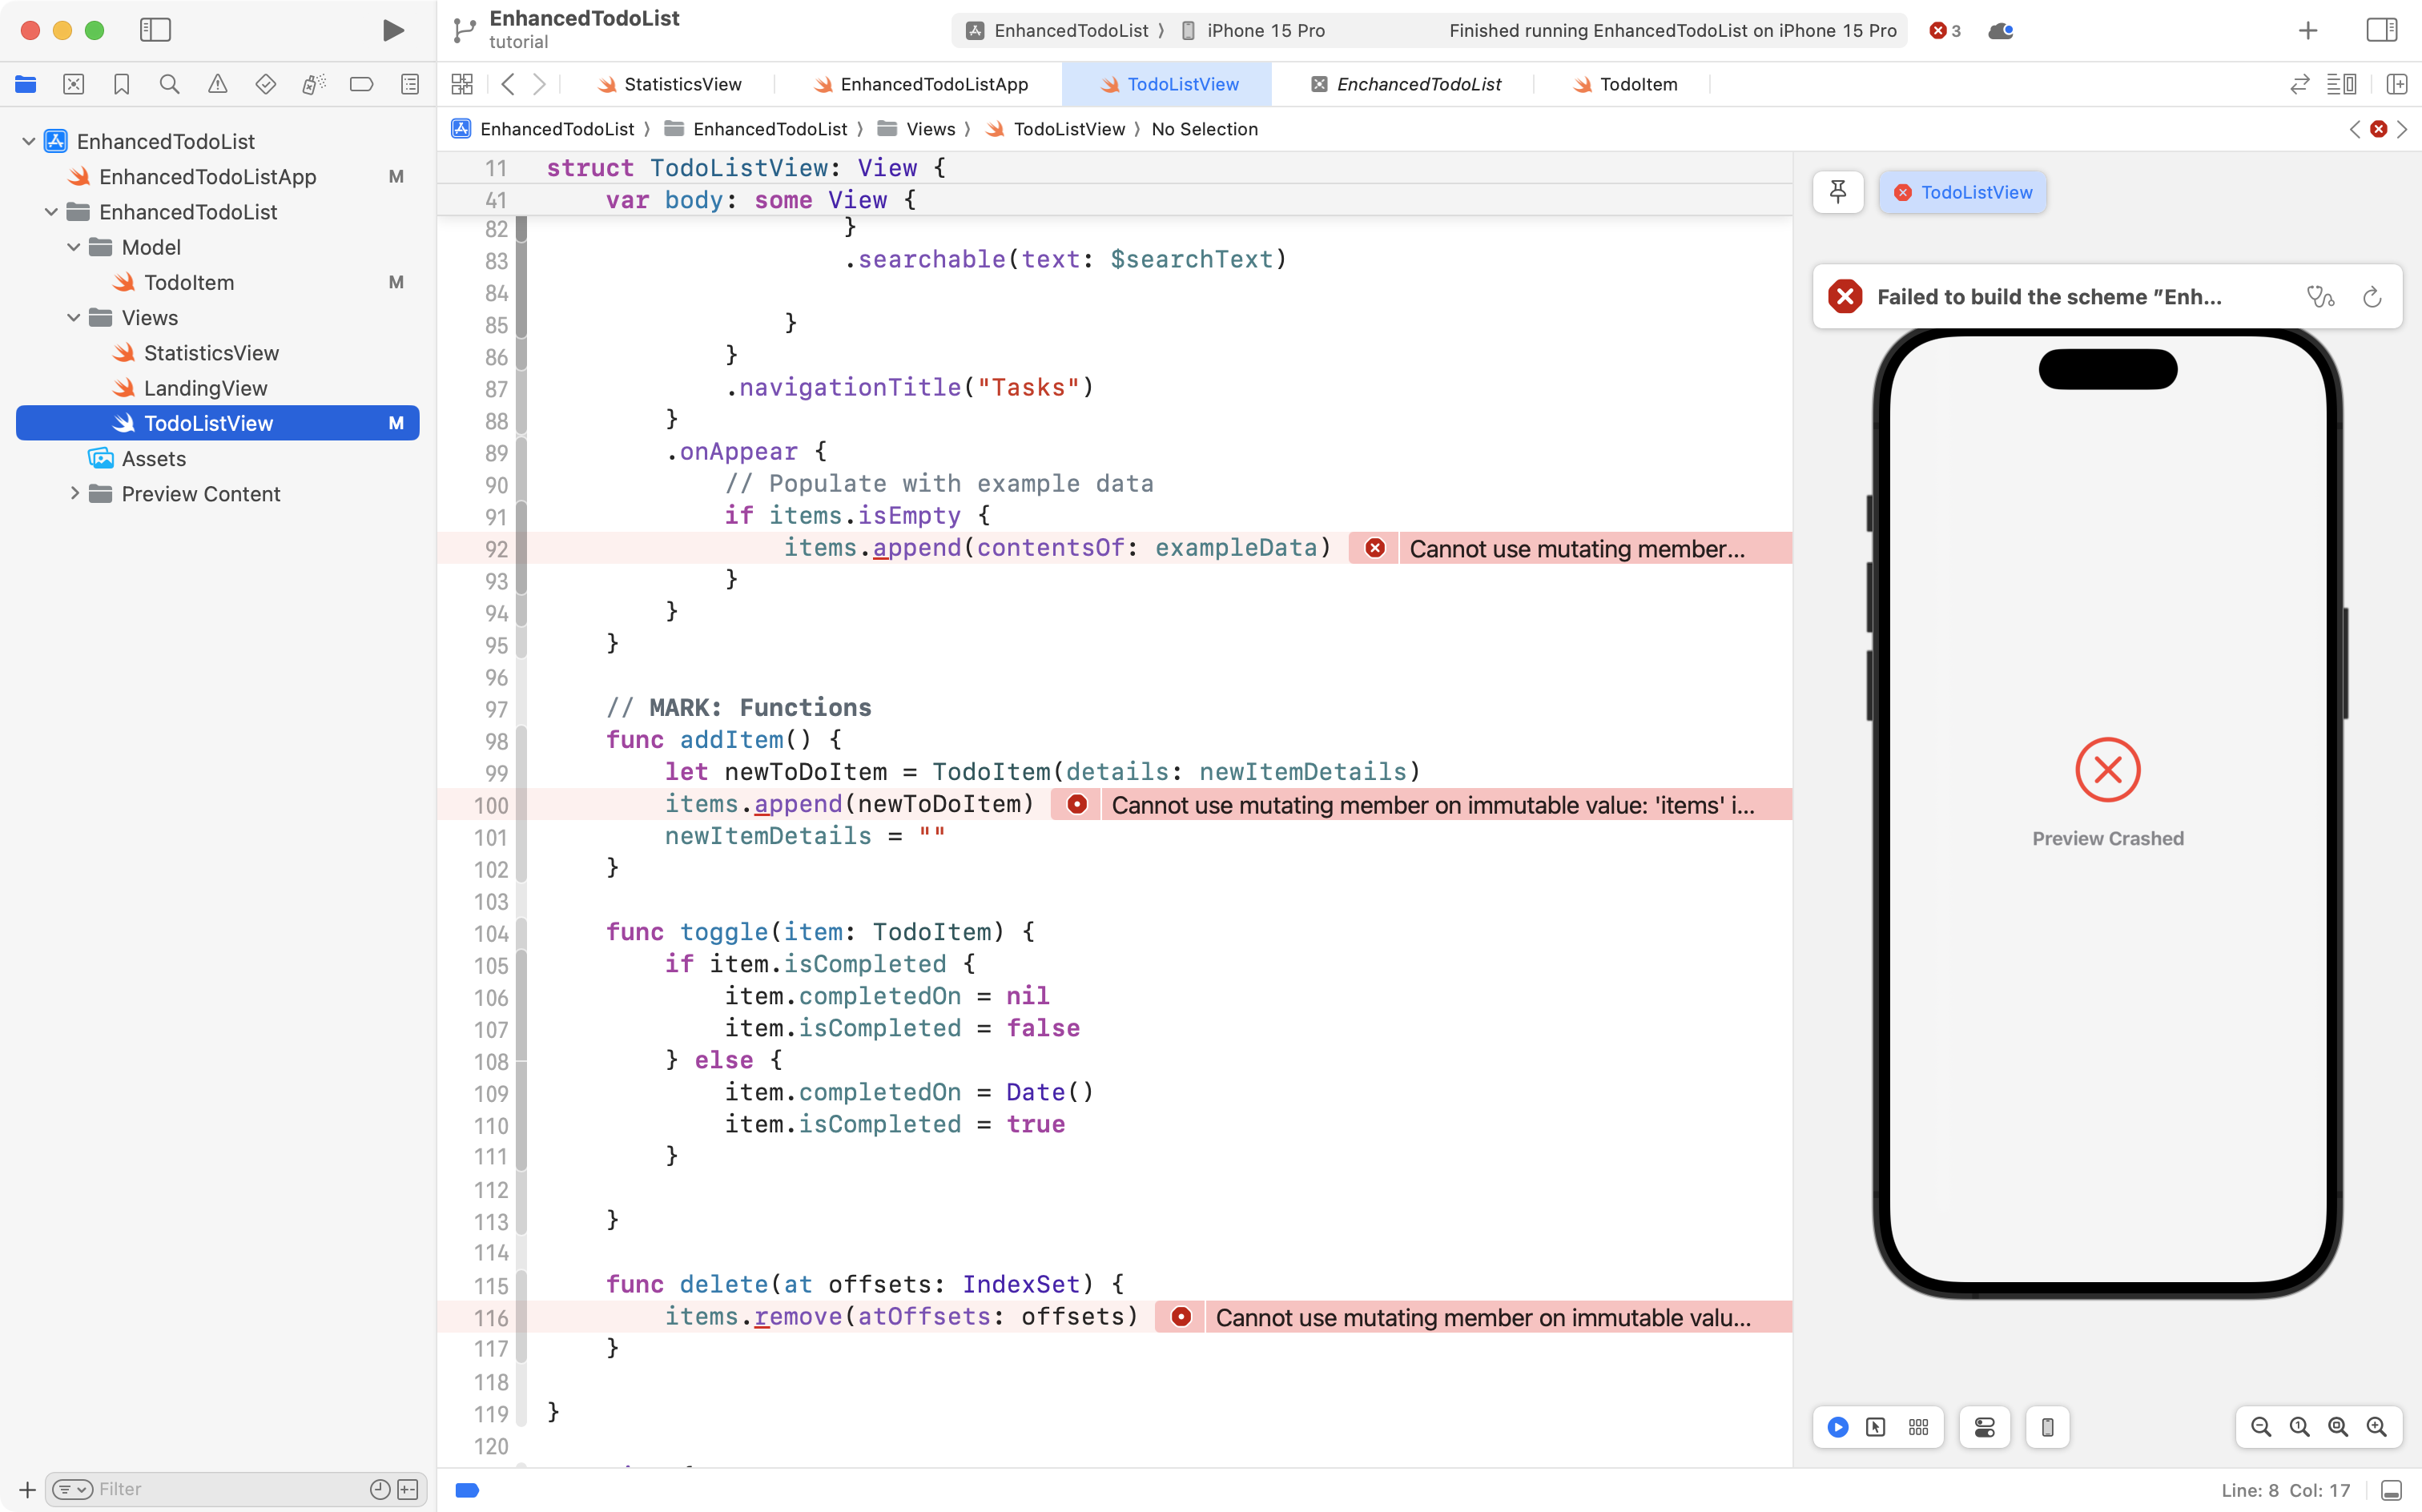
So, first, remove the .onAppear closure that was creating example data for us earlier – we will use a different approach to get example data momentarily:
Your code will then look like this:
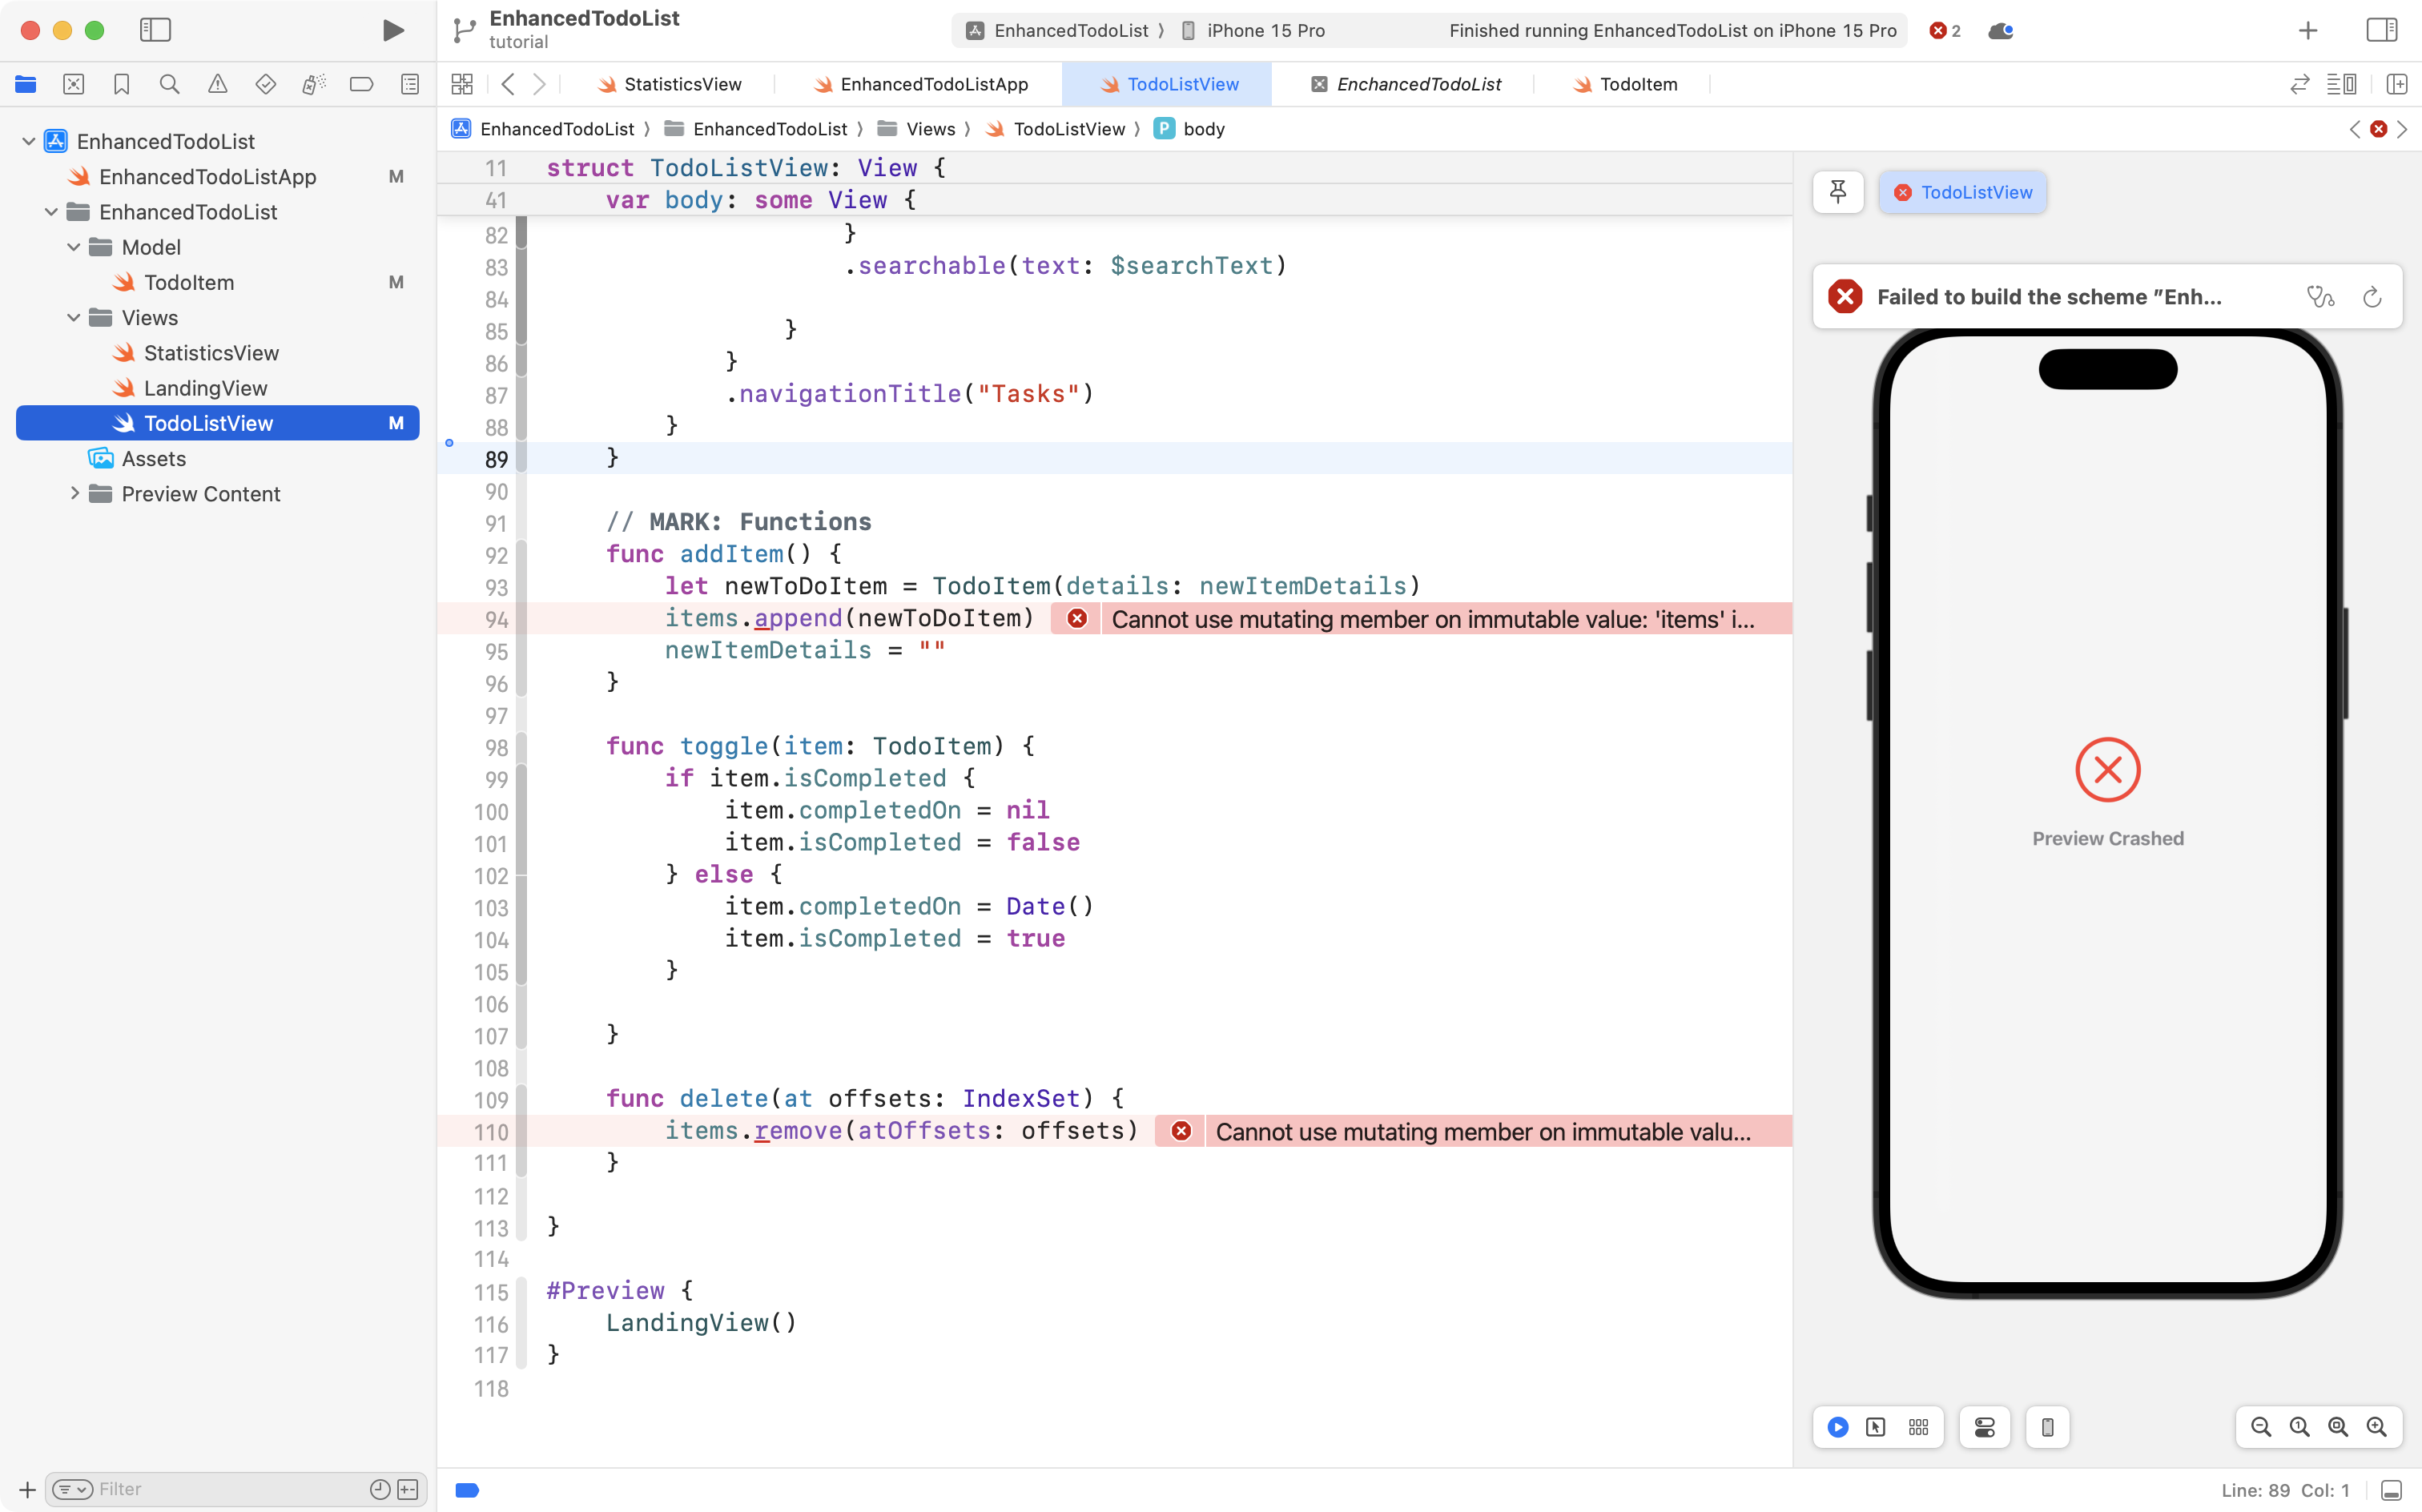
Recall that the context helps us deal with data operations:
So, take this code:
modelContext.insert(newToDoItem)
... and replace the code on line 94:

... so that it looks like this:
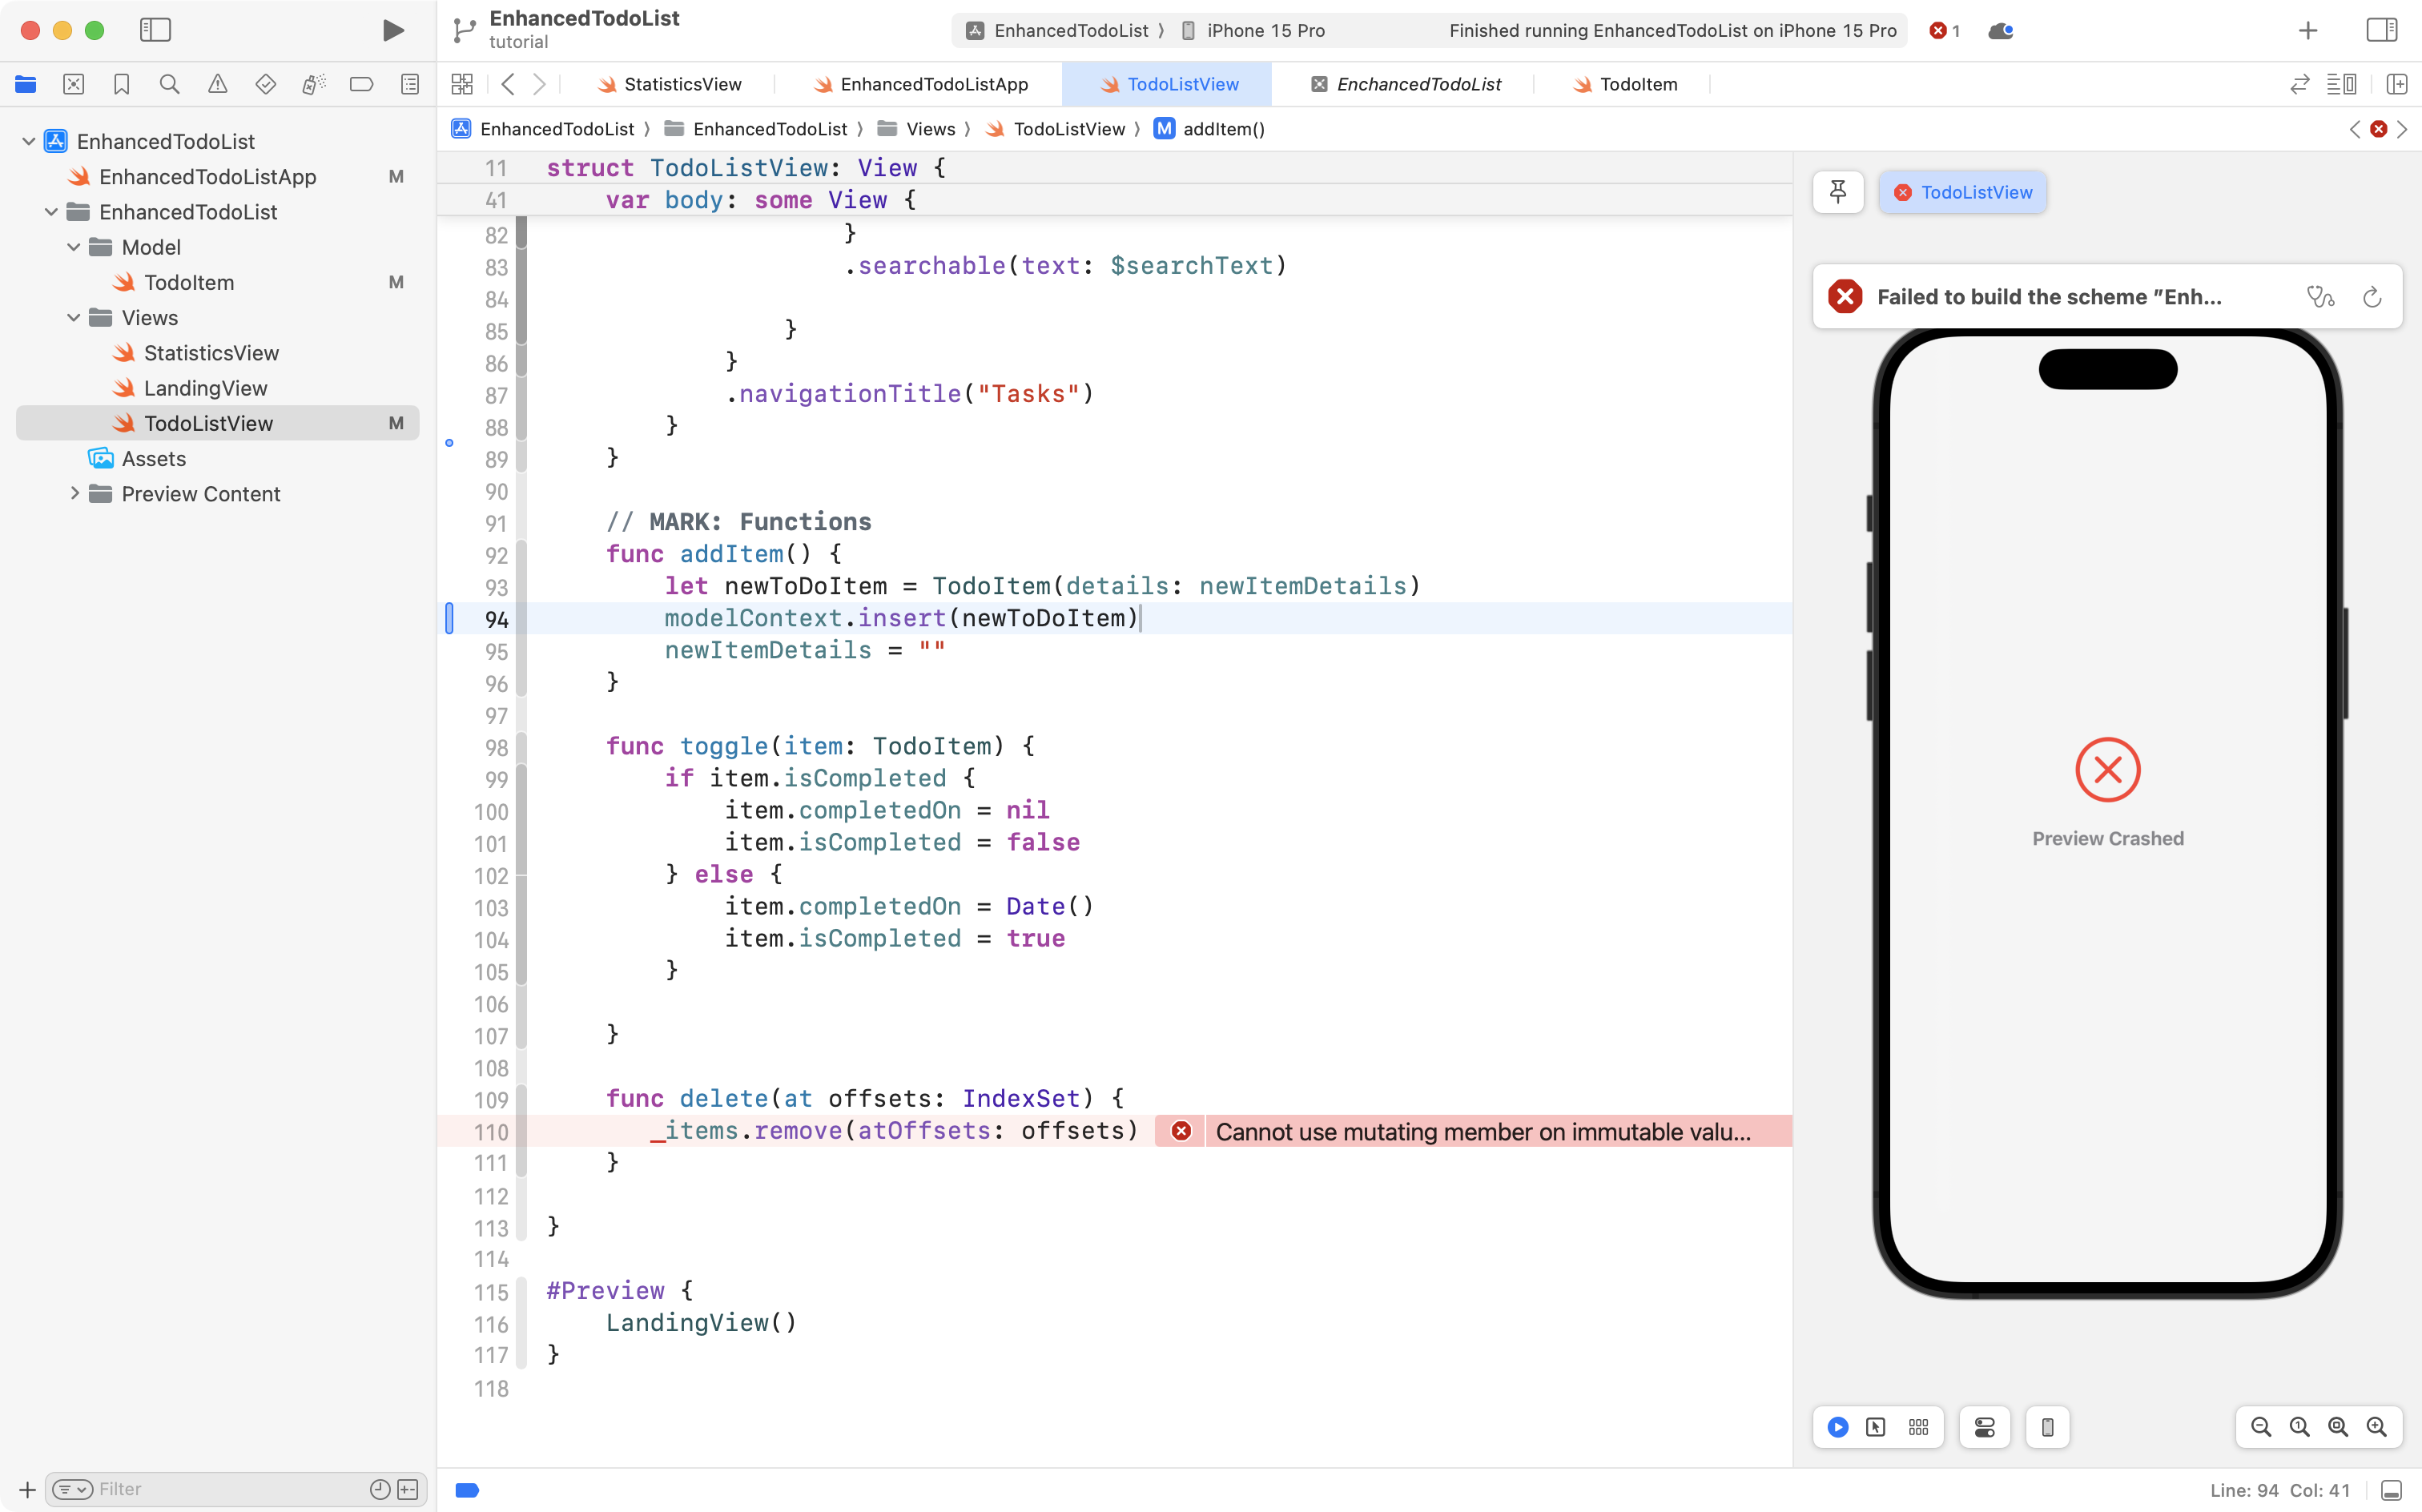
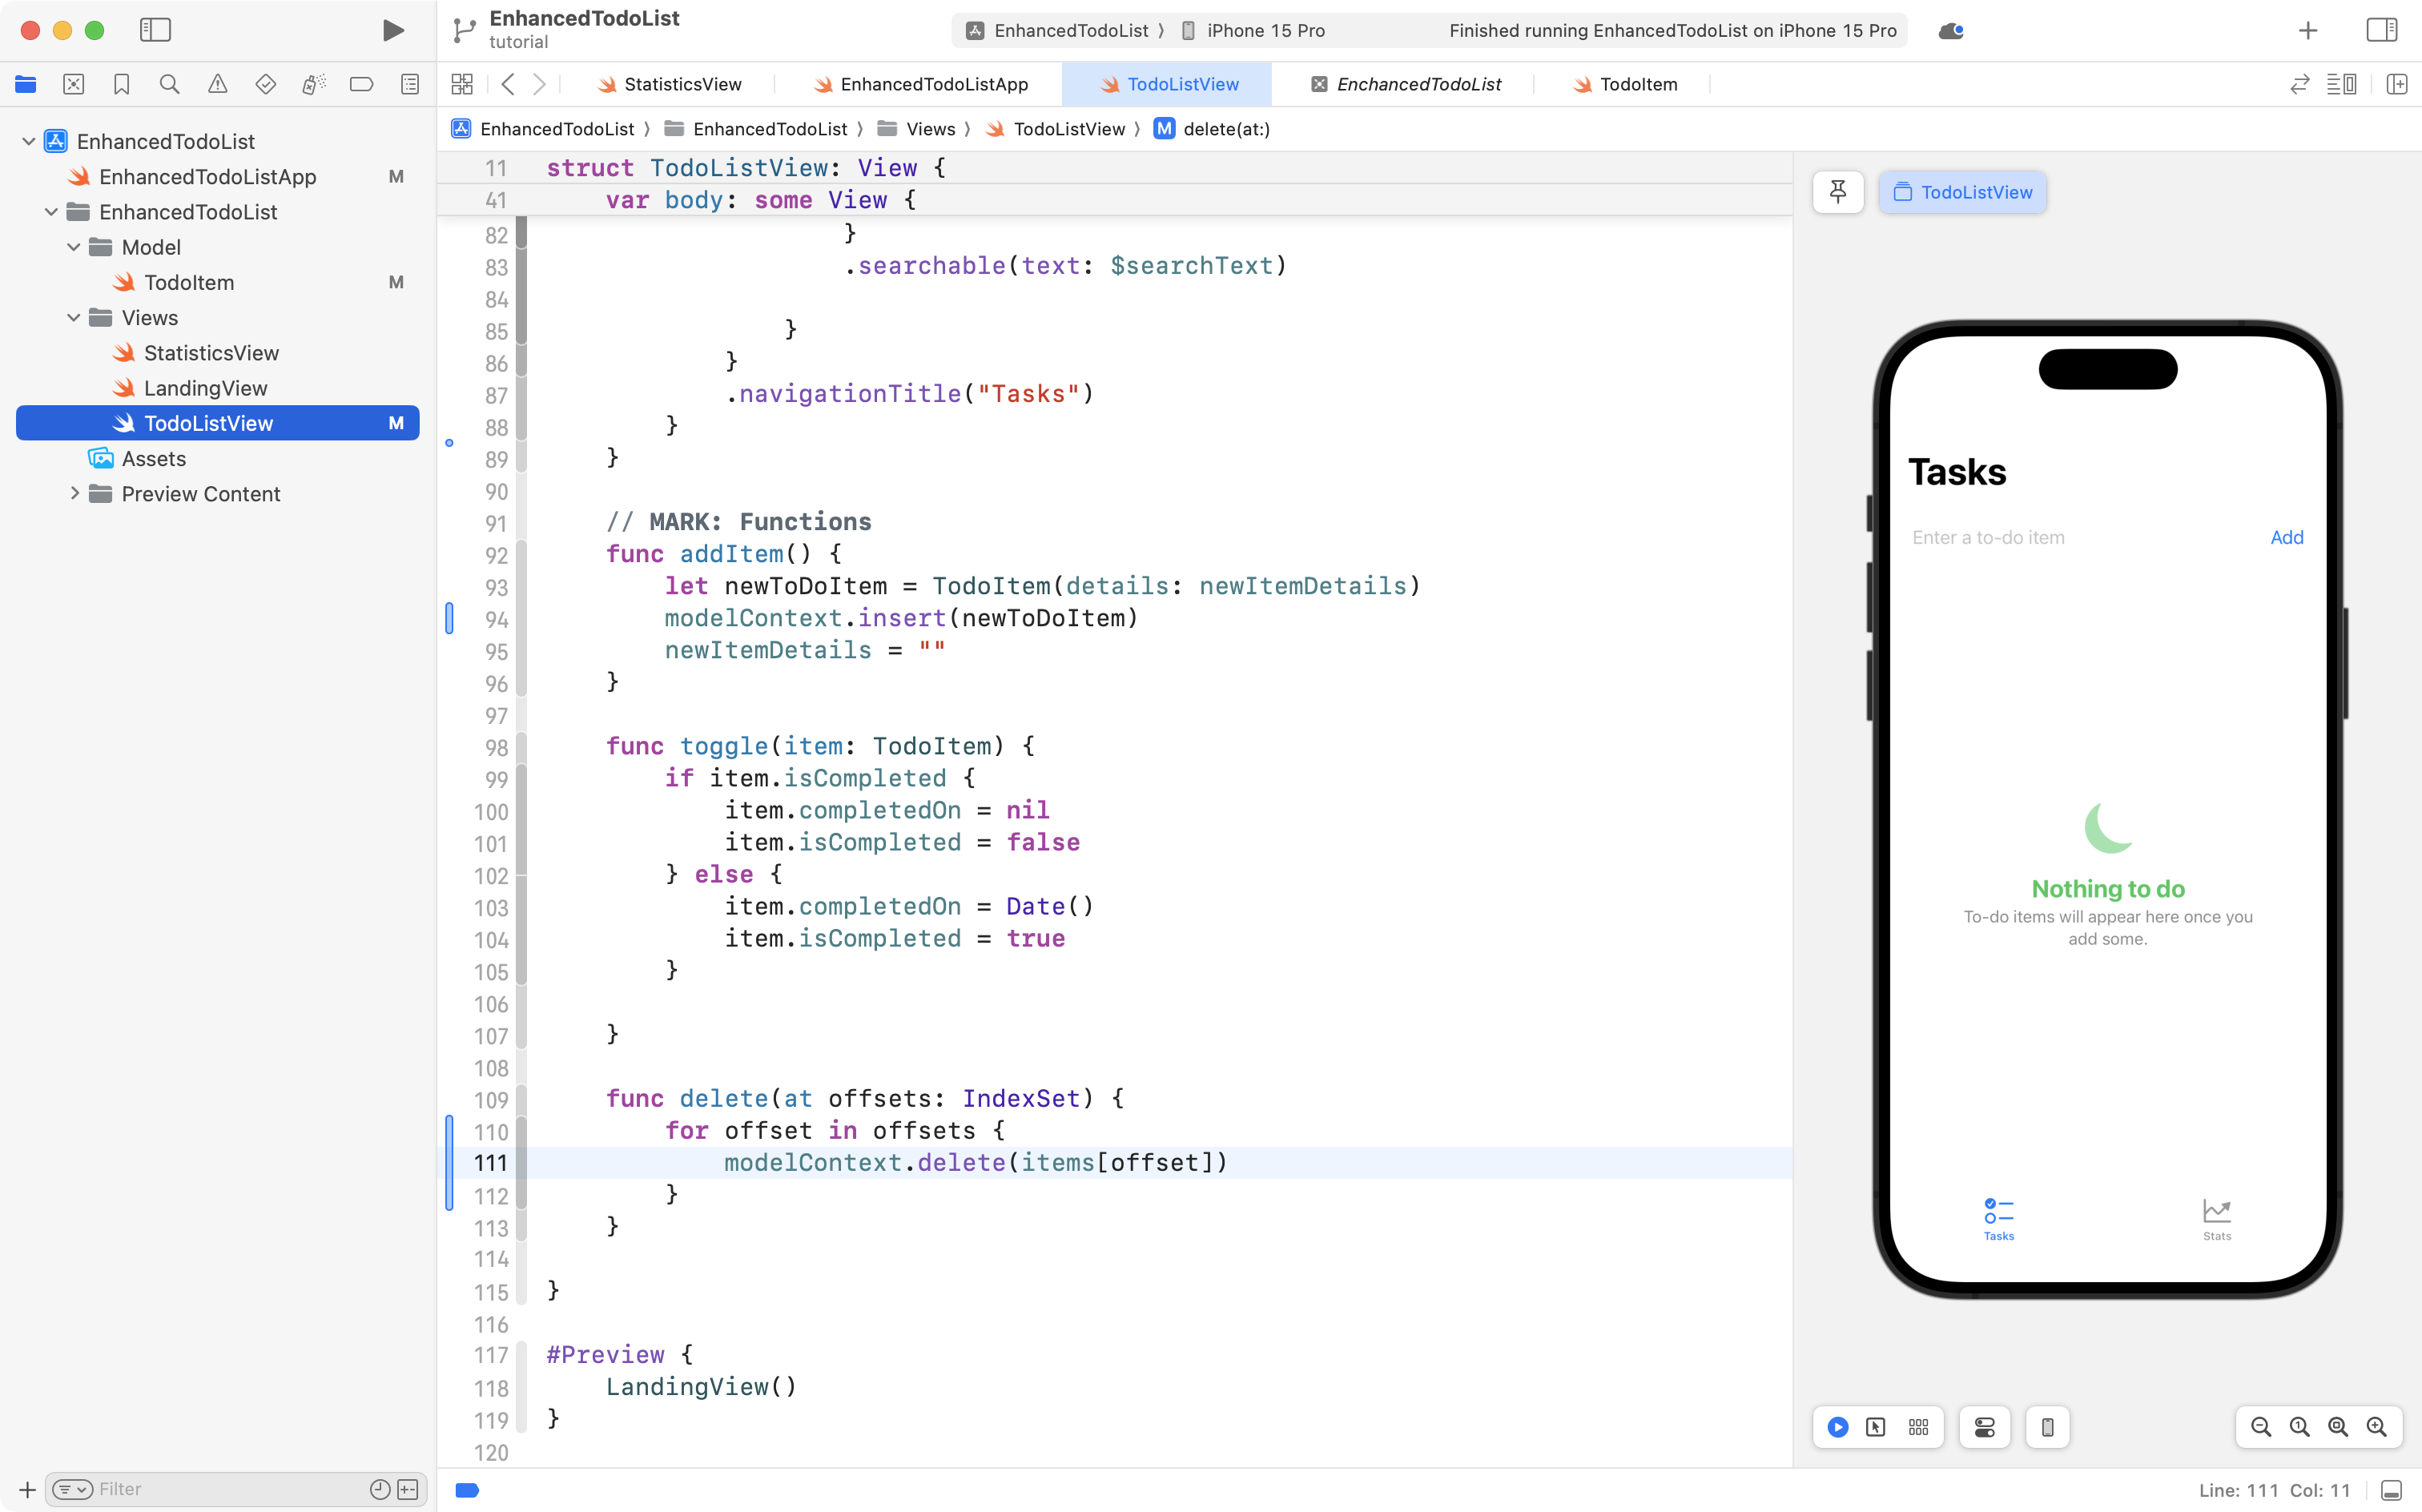
Finally, take this code:
for offset in offsets {
	modelContext.delete(items[offset])
}
... and replace the code on line 110:
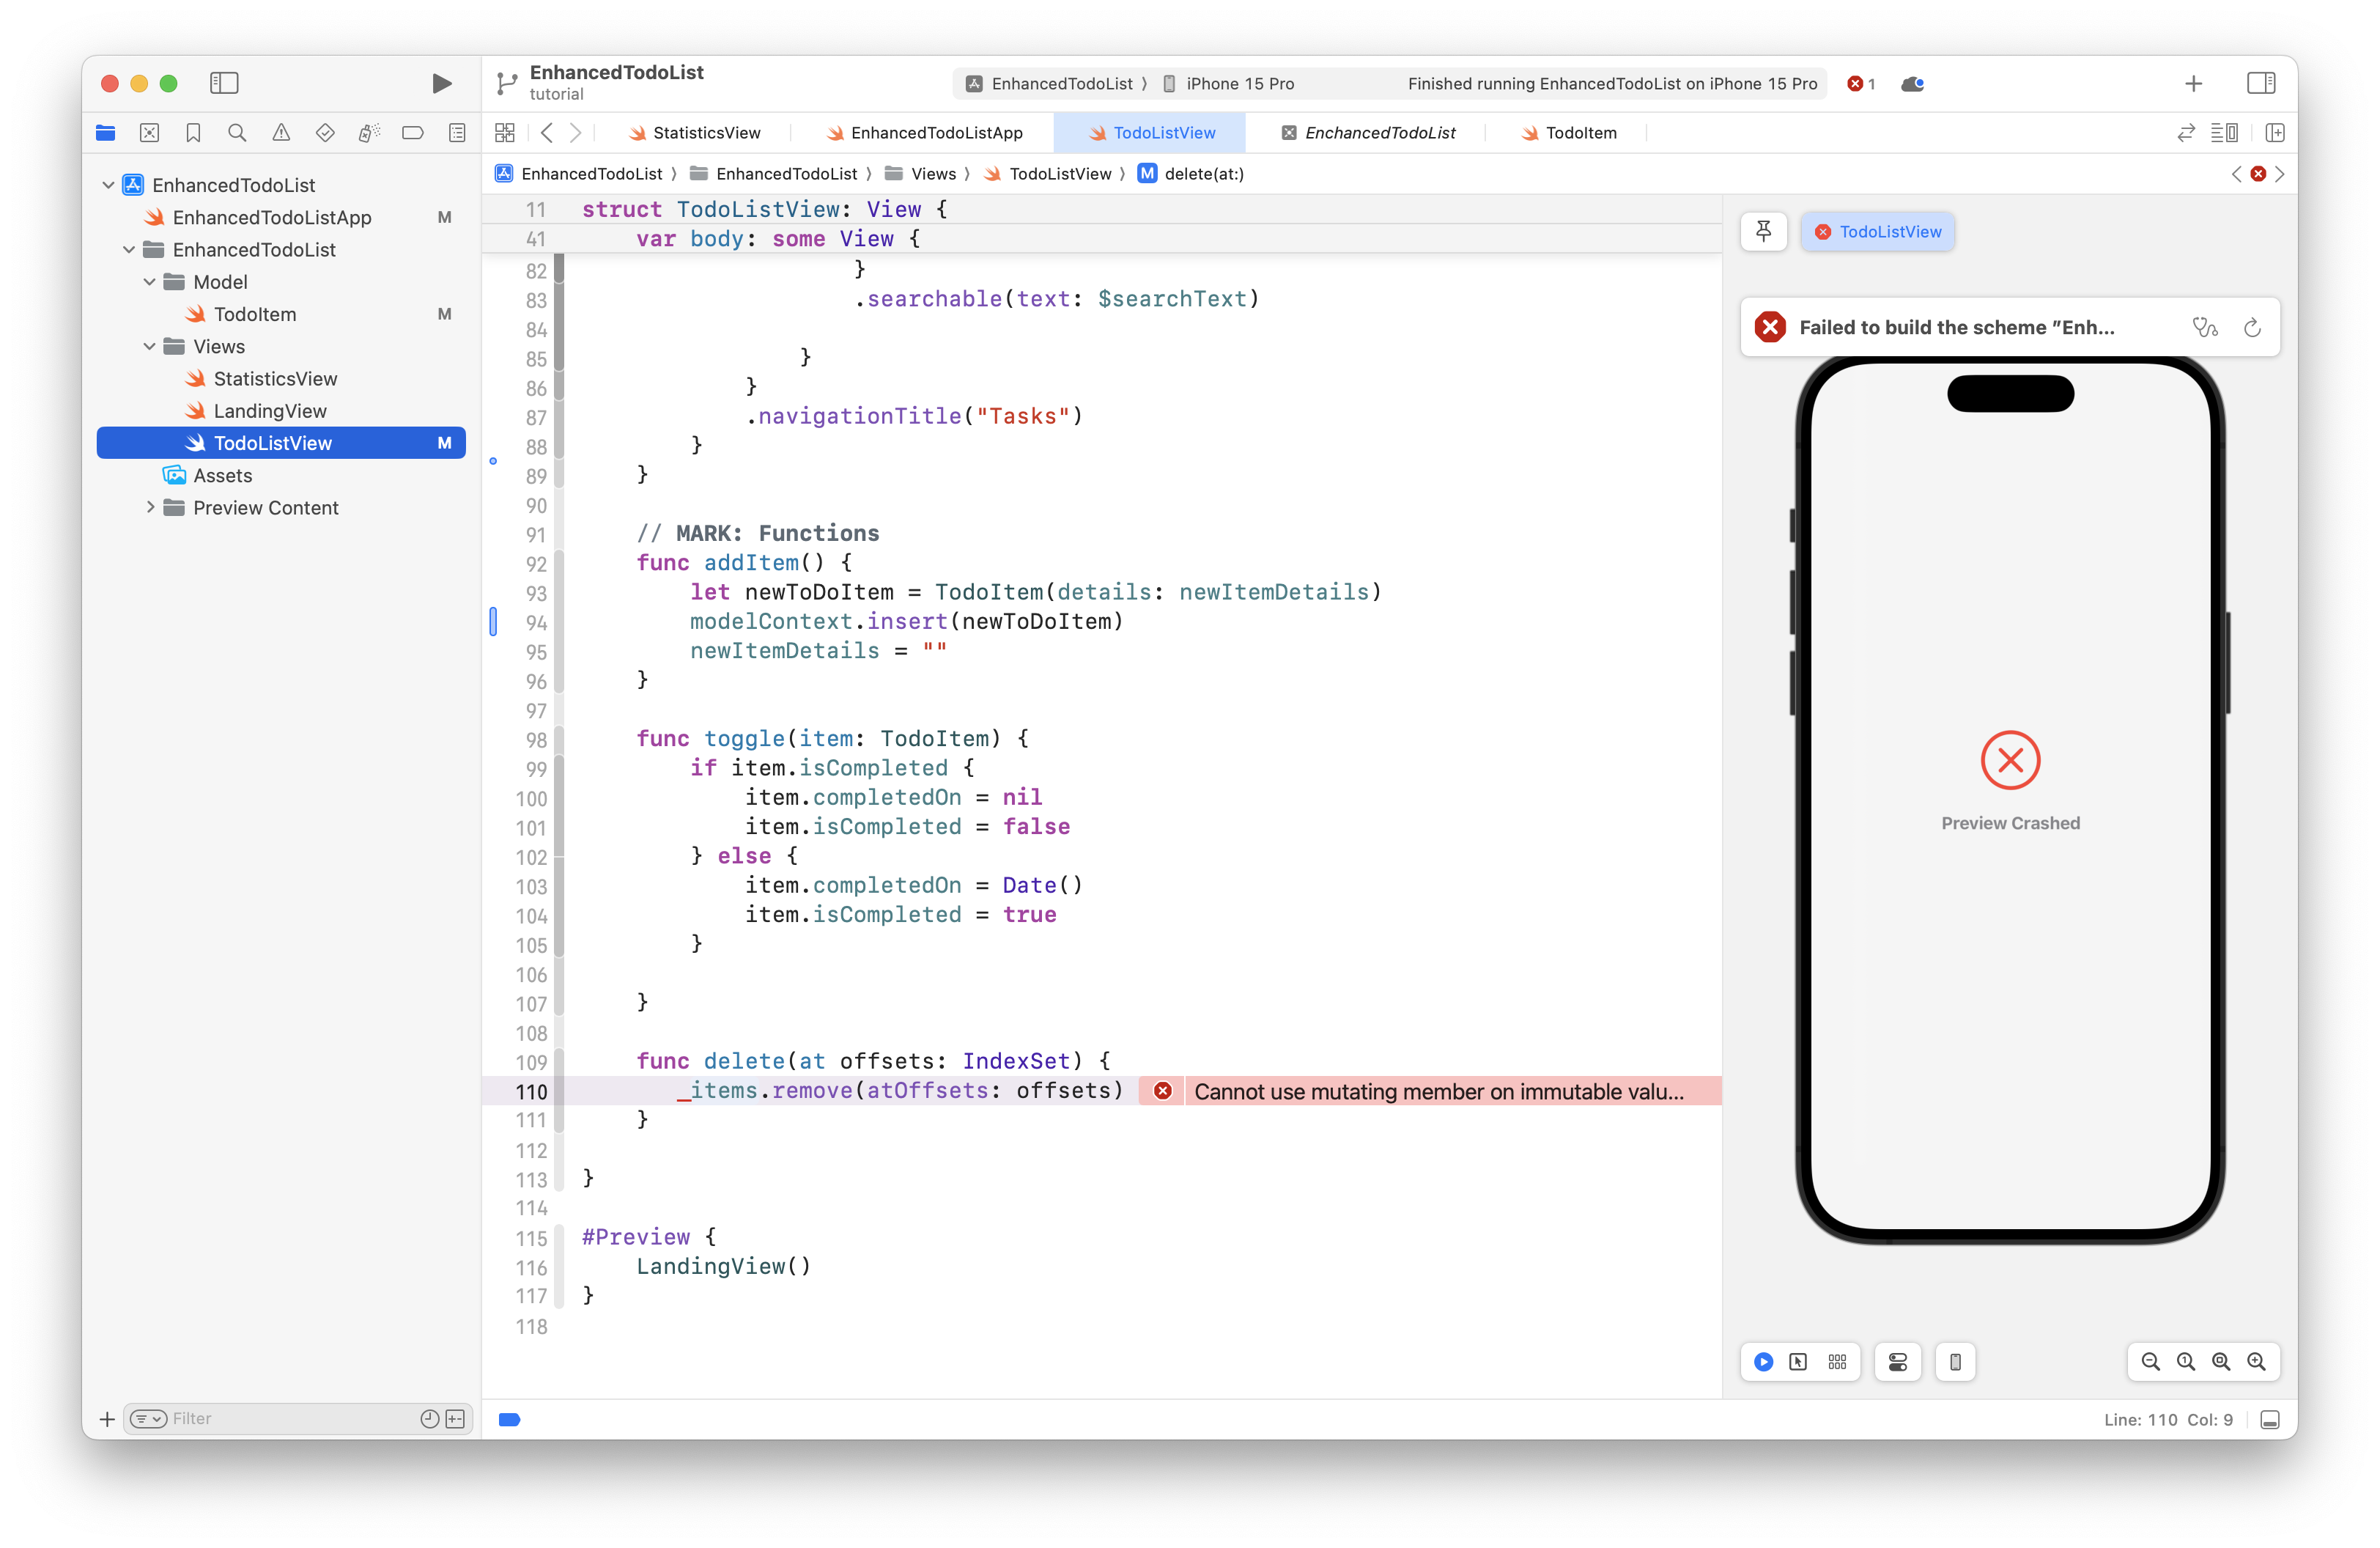
... so that it looks like this:
To summarize, when adding SwiftData into an existing app, there are typically four steps:
- Adjust the model
- Add the container
- Add the context to view(s)
- Adjust view(s) to use a query
After taking those steps, you will find that data is persisted when your app closes or is otherwise quit:

Whew! That was only a little bit of code, but lot of learning. 🤯
Please commit and push your work with this message:
Added data persistence using the SwiftData framework.
Mock data for previews
Generally speaking, SwiftUI Previews should not be used to test an entire app.
They are meant for trying out a portion of our app using a small amount of data that we don't typically want to keep around.
In situations like this, we can still use SwiftData, but keep the container in-memory.
In this way, we don't have to worry about refreshing a database in the SwiftUI Previews window after testing new code (recall that this was a pain point and modest source of confusion when using Blackbird last year).
To do this, navigate to the TodoItem model, and highlight the existing code that created example data for us:
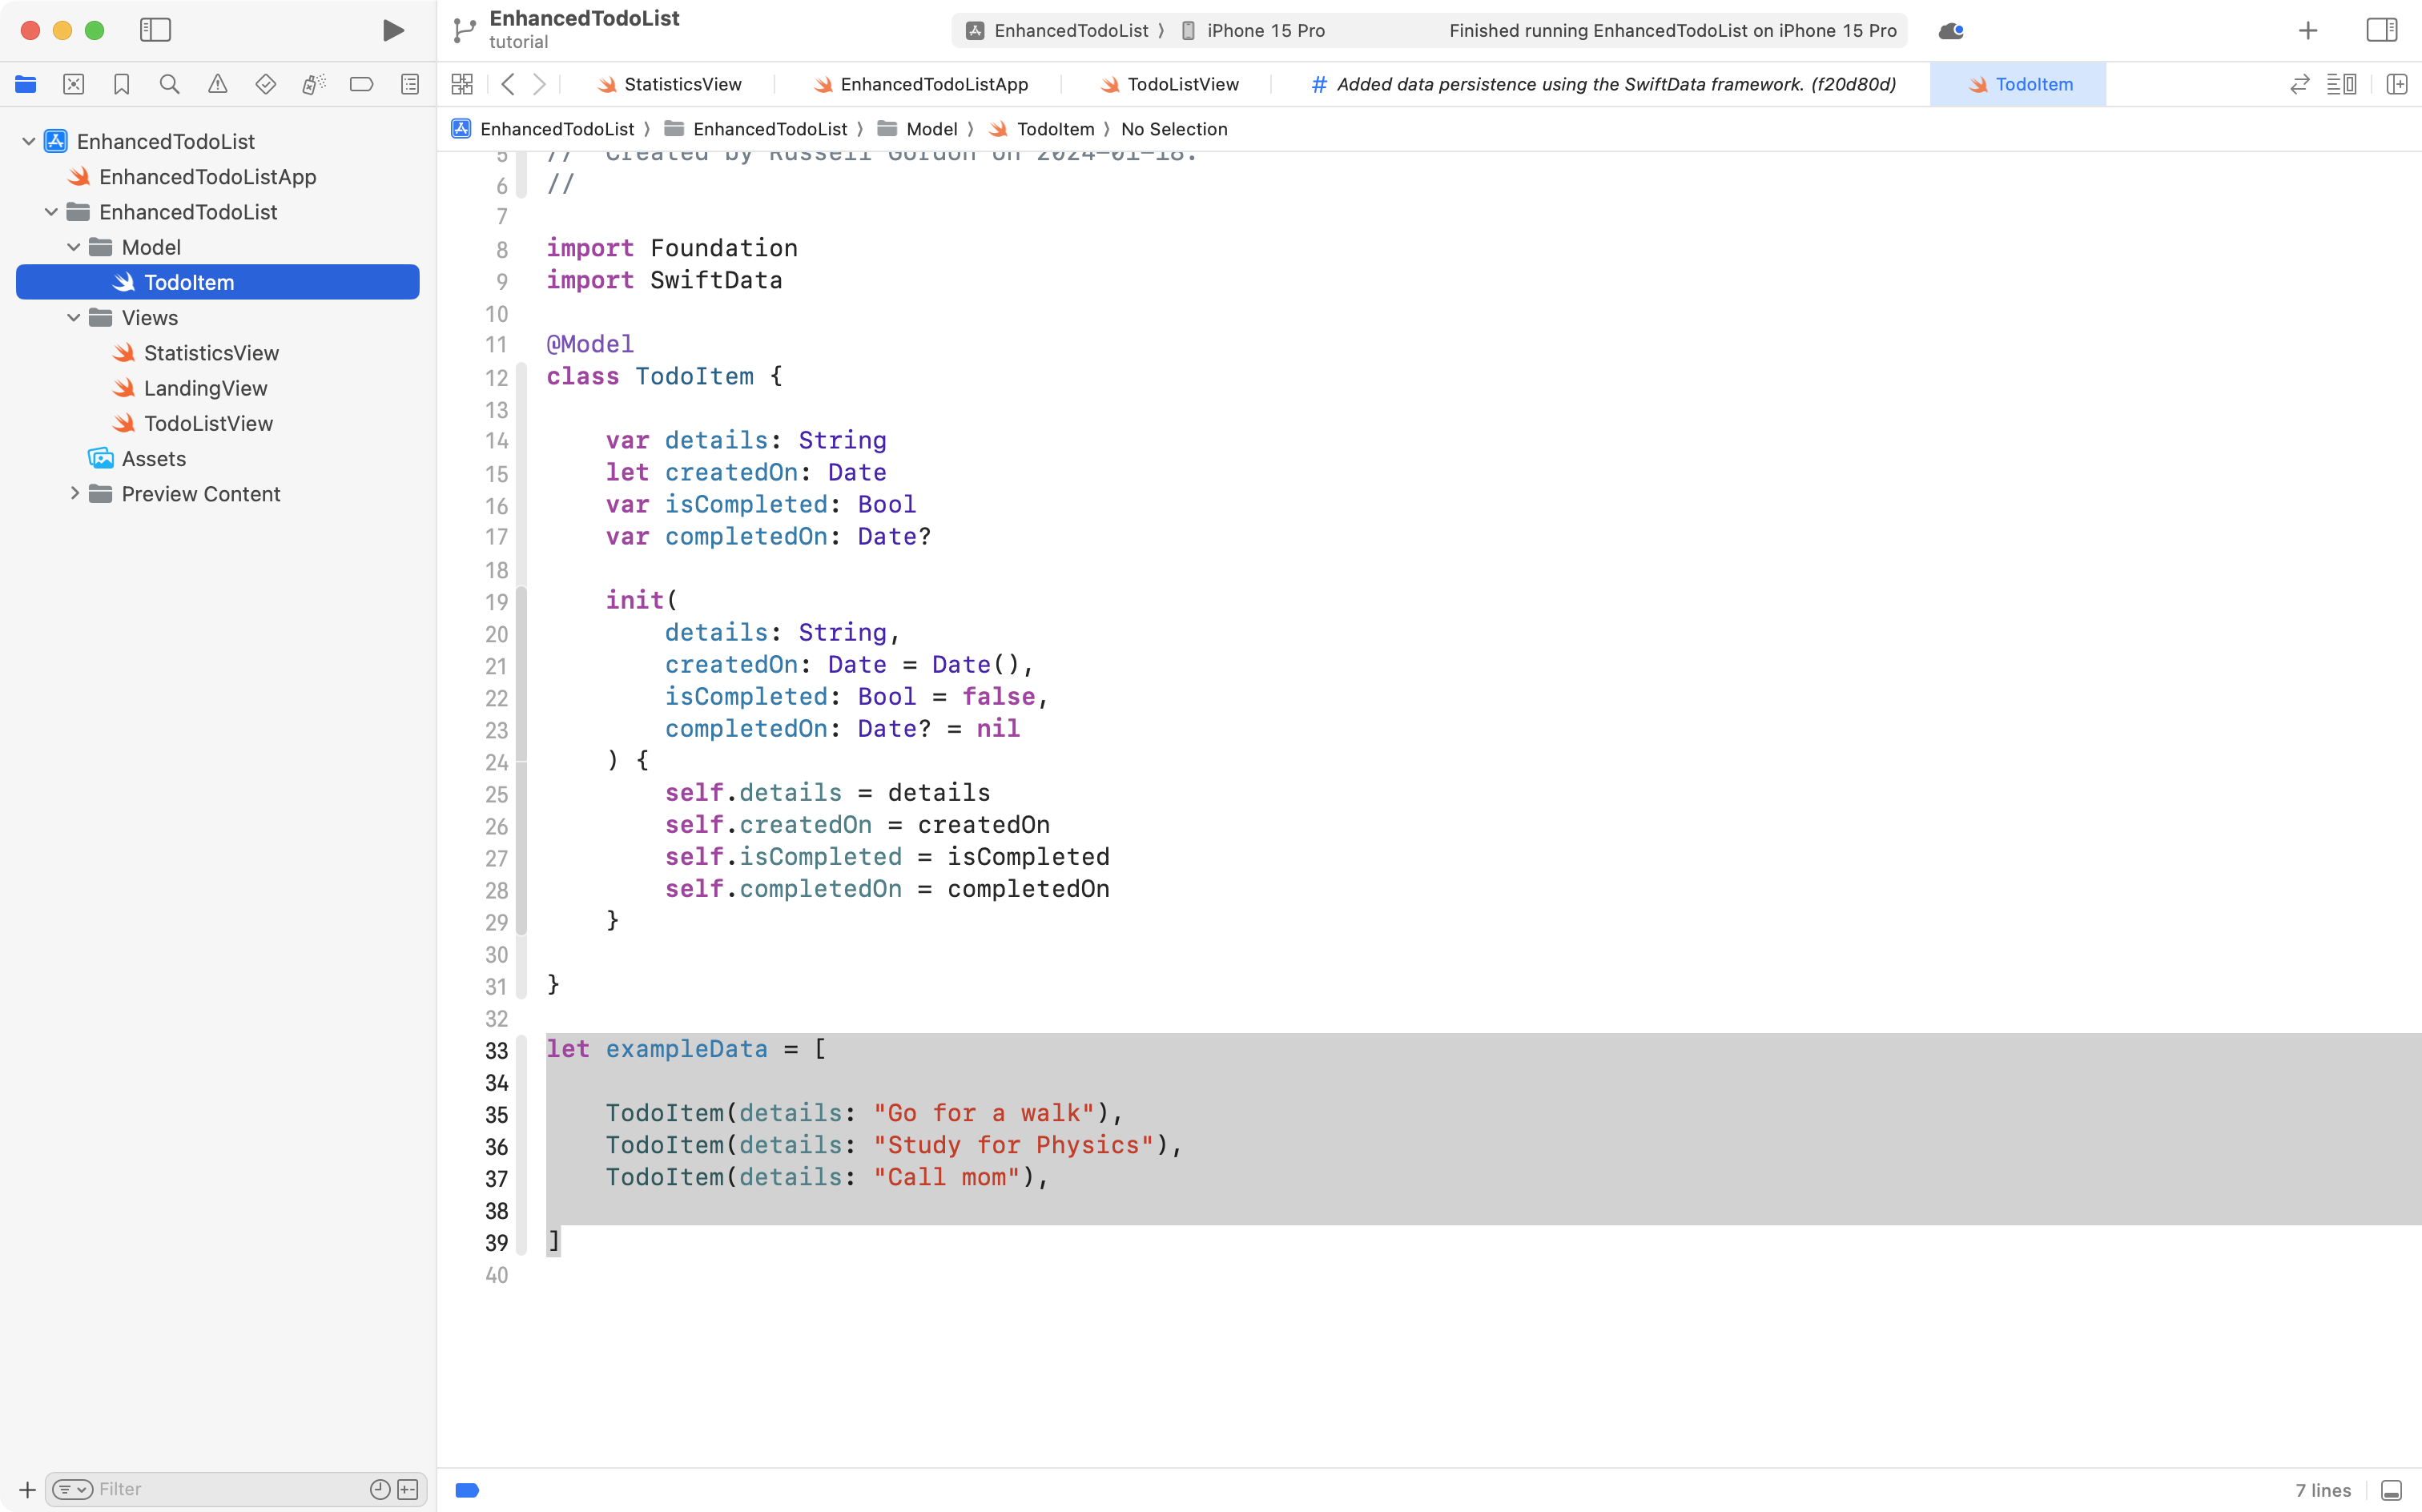
Replace that code with this code:
extension TodoItem {

    @MainActor
    static var preview: ModelContainer {

        let container = try! ModelContainer(
            for: TodoItem.self,
            configurations: ModelConfiguration(isStoredInMemoryOnly: true)
        )

        // Add mock data
        container.mainContext.insert(
            TodoItem(details: "Go for a walk", isCompleted: false)
        )
        container.mainContext.insert(
            TodoItem(details: "Have a nap", isCompleted: true)
        )
        container.mainContext.insert(
            TodoItem(details: "Call mom", isCompleted: false)
        )

        return container
    }
}
... like this:
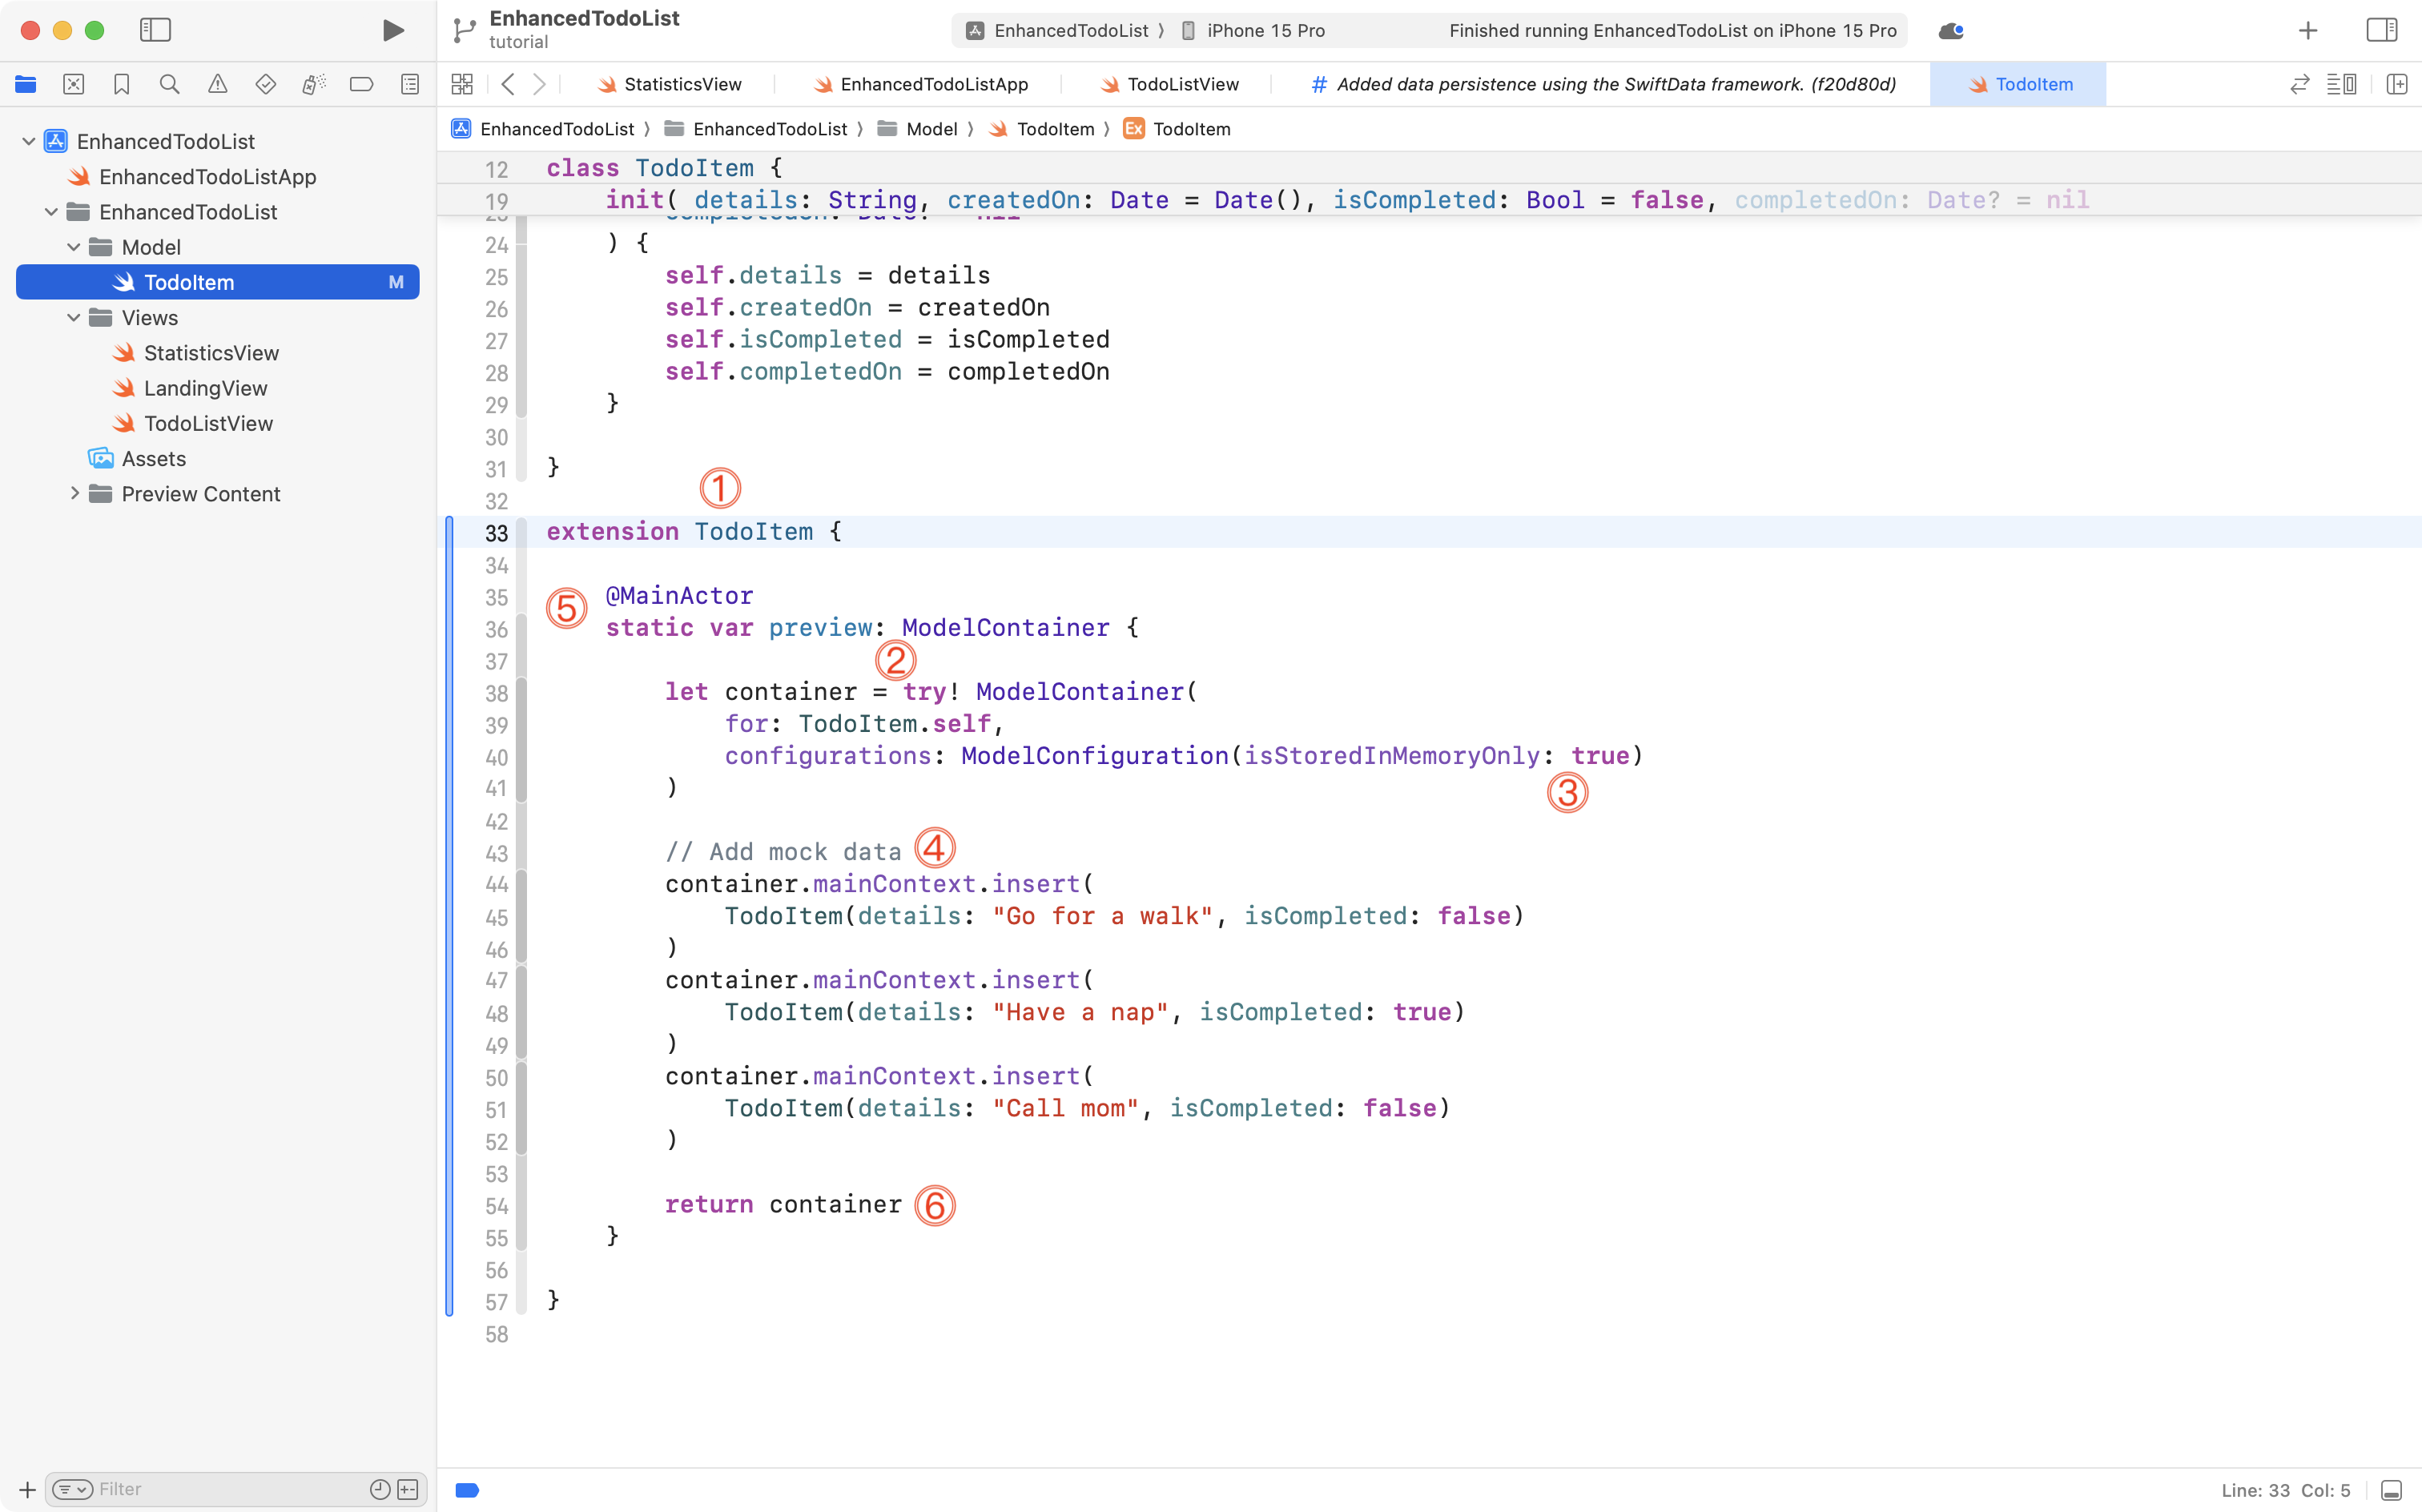
There's a lot going on there, so let's break that down.
- We are adding functionality to our model,
TodoItem, by way of an extension. - We are creating a computed property named
preview. It is marked with thestatickeyword so that we do not have to create an instance ofTodoItemto use this property (more on that soon). The computed property returns an instance of the datatypeModelContainerwhich is used to store information. - The container is "in-memory" only which means data won't actually be persisted – which is perfect for use with SwiftUI Previews.
- We use the context that SwiftData automatically makes available from the container. That context exists on the main thread of the app – this is implied by it's name –
mainContext. We use this context to insert three instances of mock data using theTodoItemmodel. - Computers run many threads at a time to do work on our behalf. Applications written in SwiftUI are automatically made multi-threaded to take advantage of modern CPU architectures. We cannot run this computed property on a background thread if it is using a context on the main thread to insert data. By using the
@MainActorkeyword we are telling Swift to run this computed property on the main thread of our app. - Finally, the in-memory container with our mock data is returned from the static computed property.
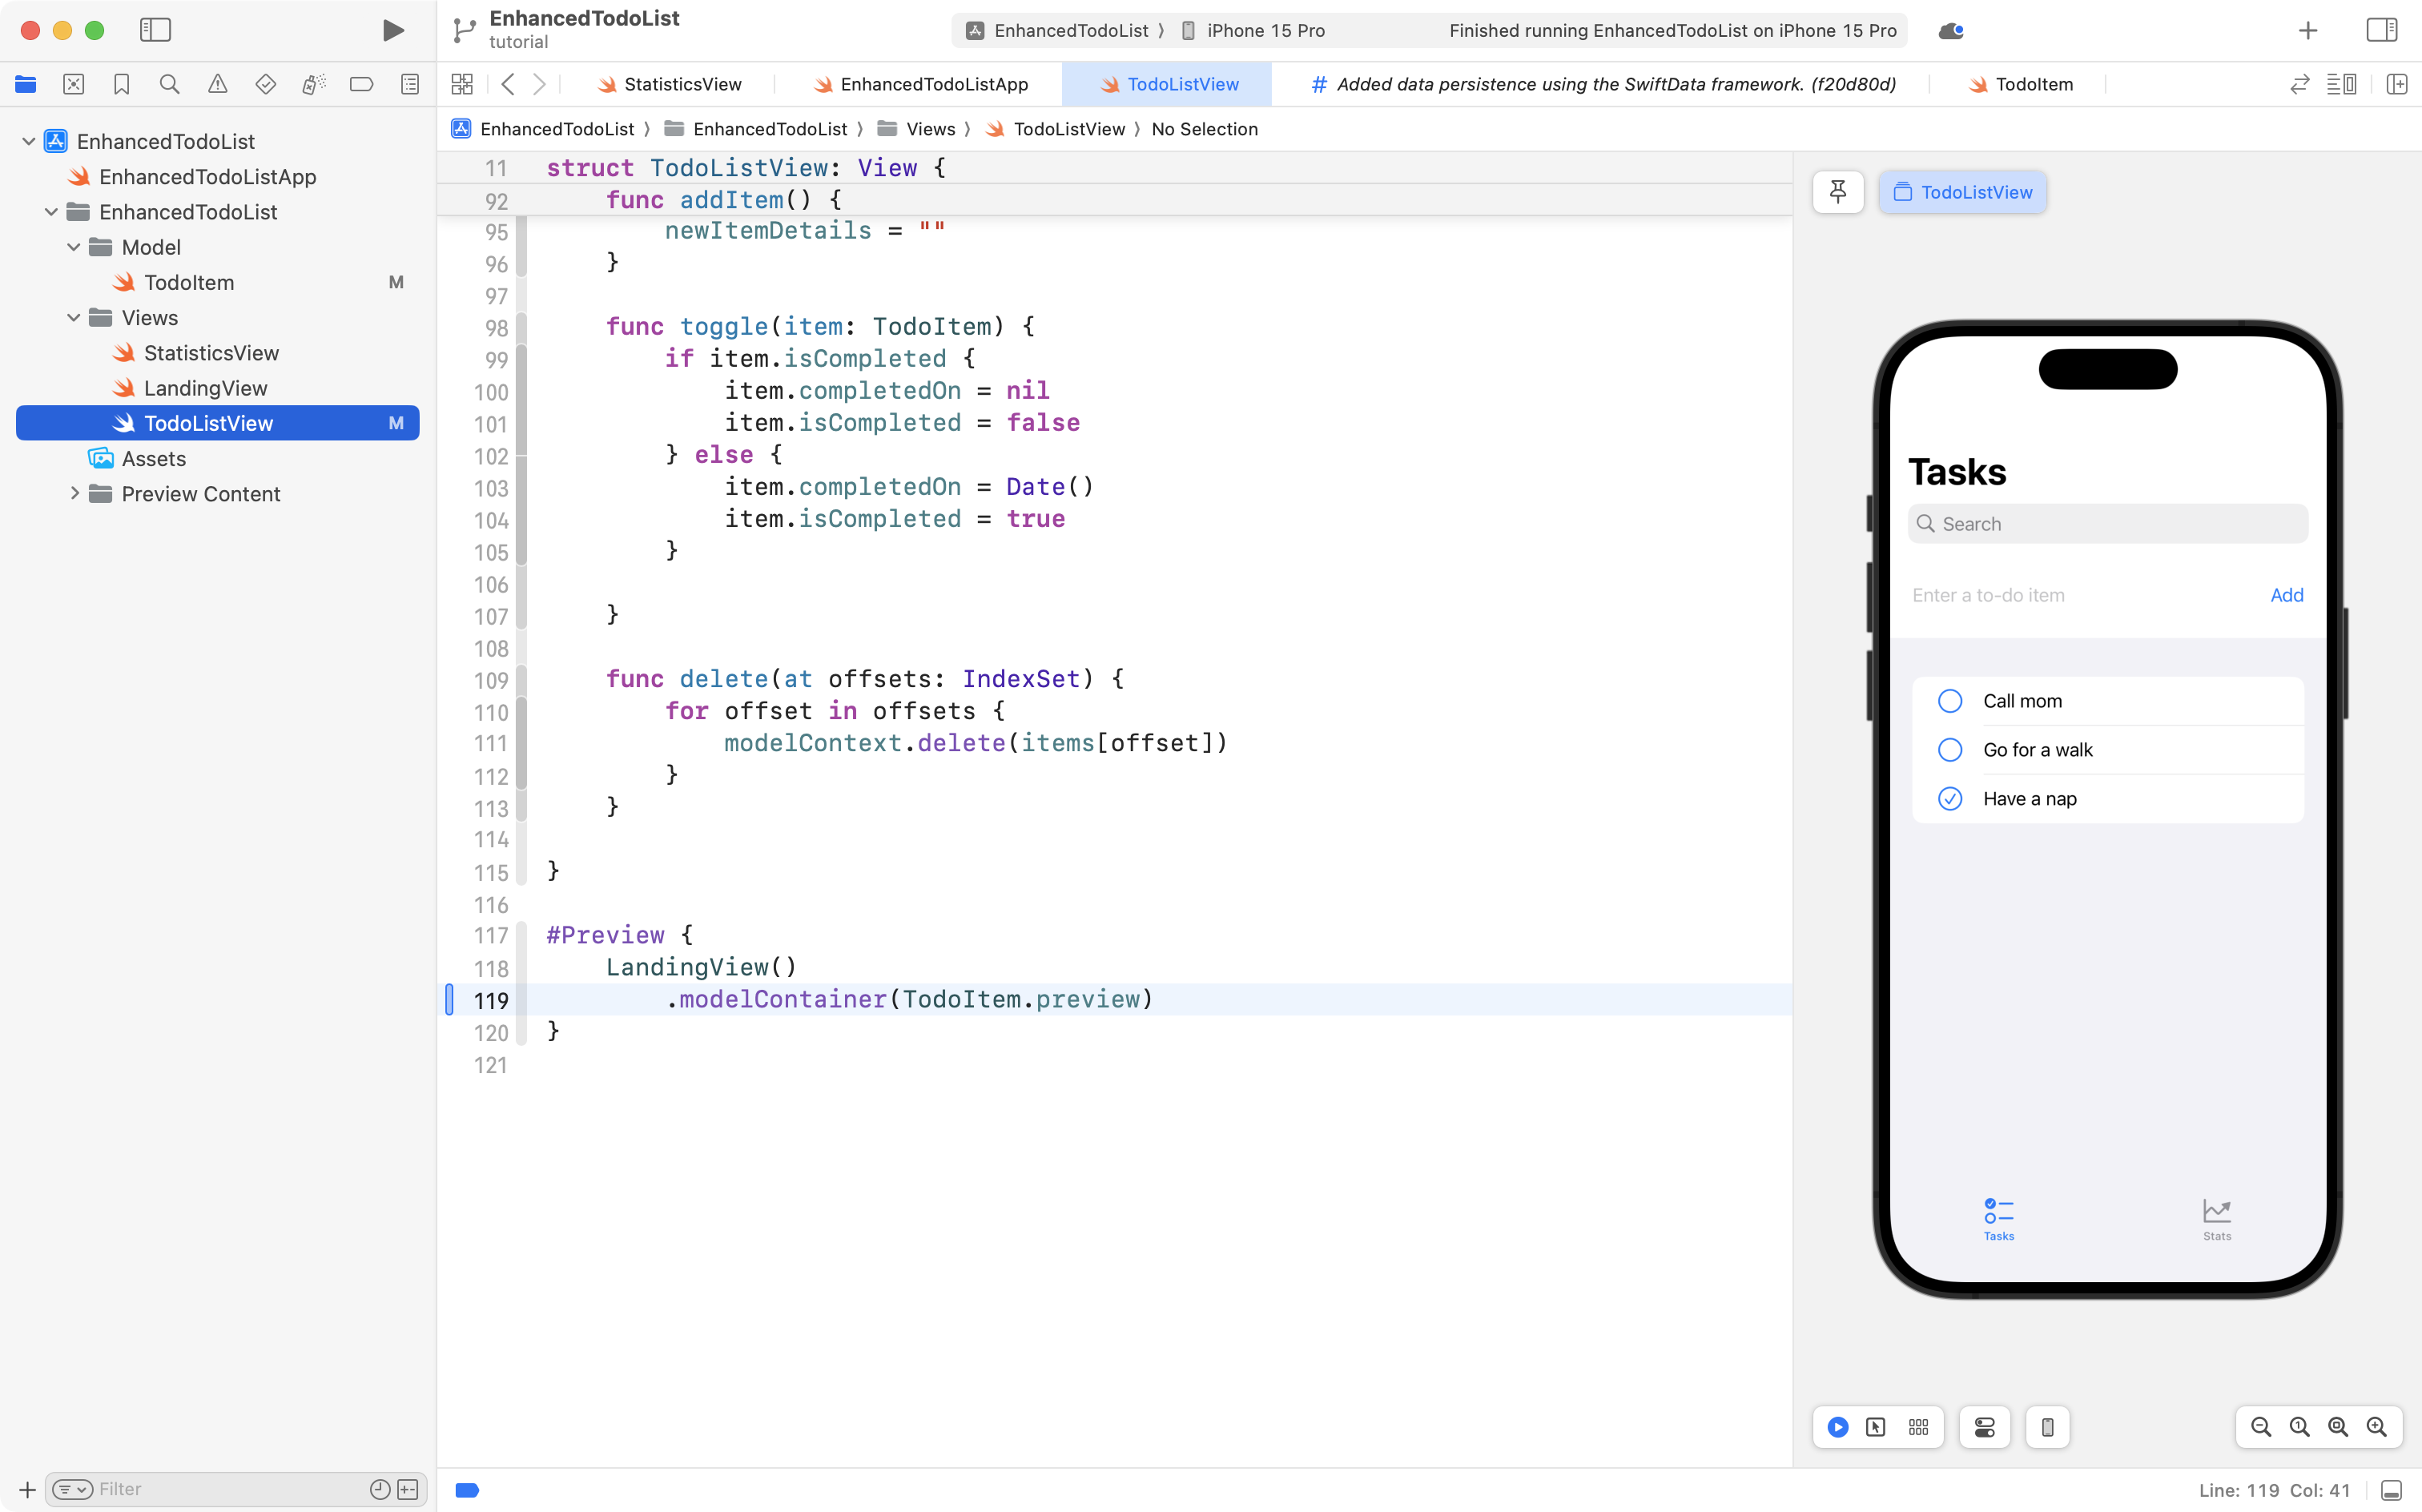
To use this new code, switch to the TodoListView file, and find the preview:
... then add this code:
.modelContainer(TodoItem.preview)
... like this:
In this way, we are using the static computed property named preview from the TodoItem model. A static computed property, as you can see here, may be used without creating an actual instance of that data type.
This inserts the in-memory container with our mock data into the environment used by the SwiftUI Preview for this view.
You can interact with the view as you'd like for testing purposes or for refining the look and feel of a user interface.
However, when you return to the preview again later, the same three pieces of mock data will be present. Remember, the preview container was in-memory only, so data is not persisted.
Commit and push your work with this message:
Added mock data to our model for use with SwiftUI Previews.
Statistics
We are going to work with our statistics view now:

This will go quickly, and the code will be provided for you.
The point of this final section of the tutorial is just to examine how to use SwiftData to pull information in that we can use to build a chart.
Before we do that, we should recognize that we want to preview the statistics page
We want to view the statistics page with the tab view present, so we will first make a small edit to the LandingView file.
Improve the landing view
Navigate to the landing view:
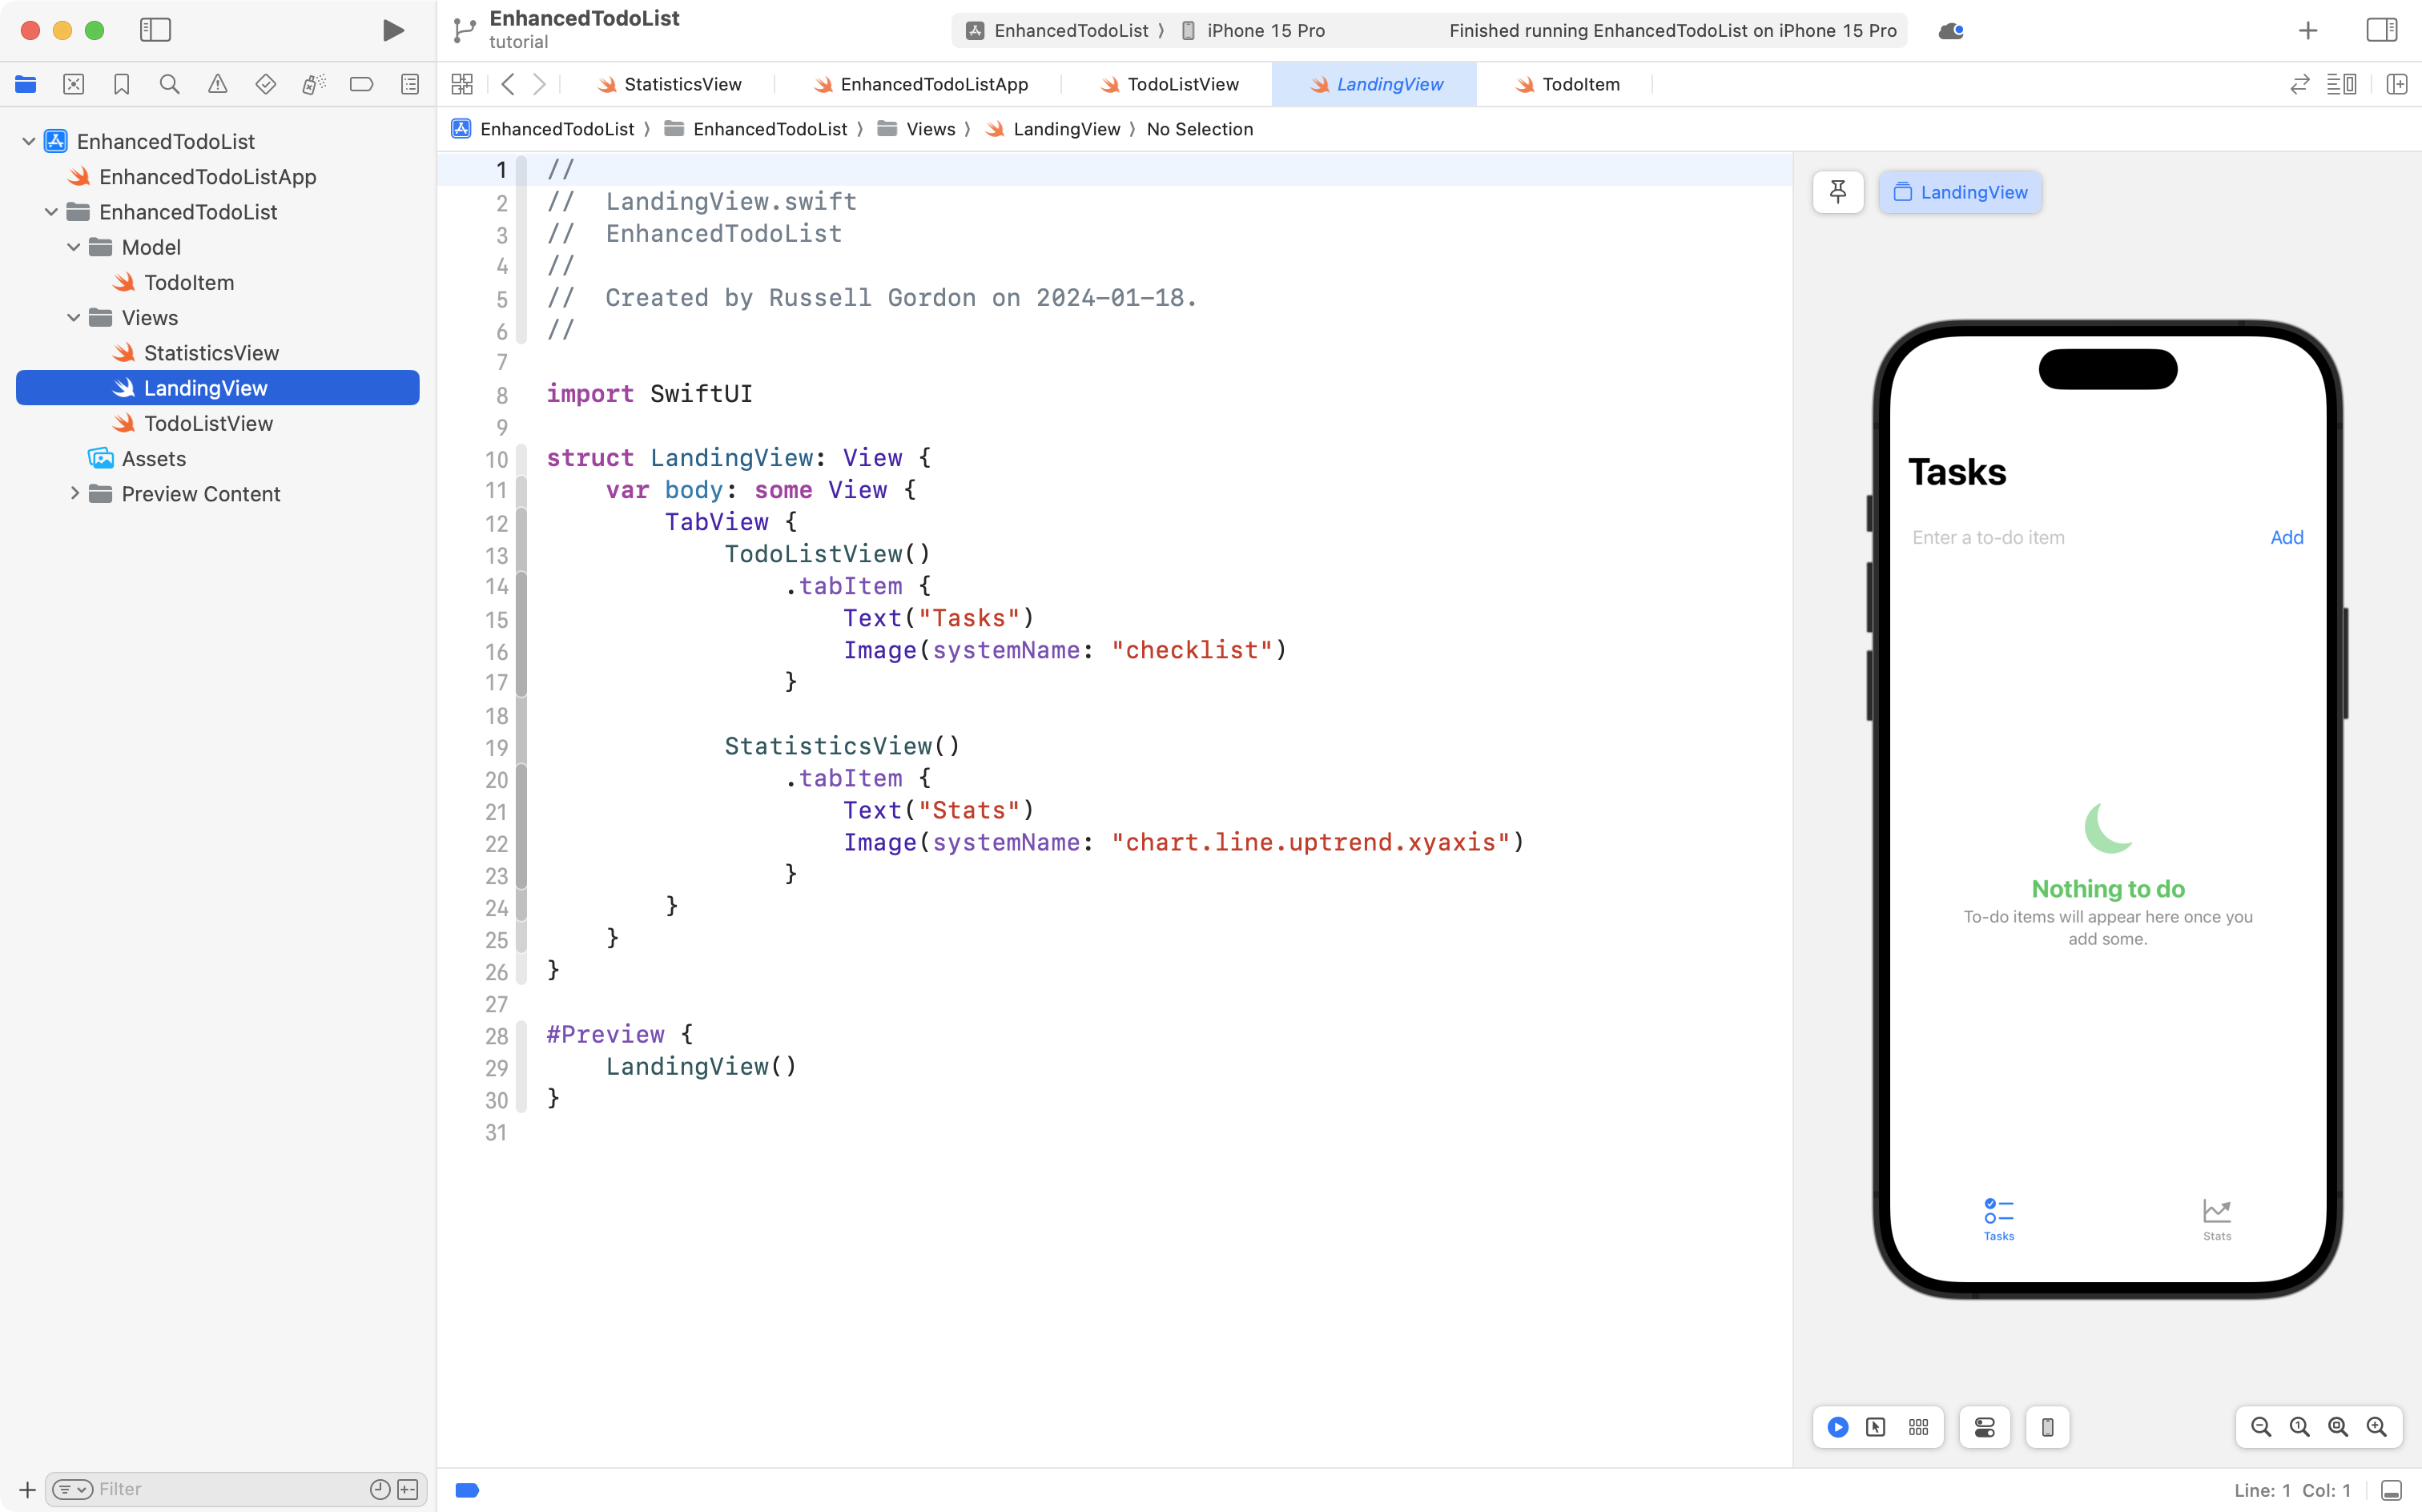
Highlight all the code after the header comment and replace it with this:
import SwiftUI

struct LandingView: View {

    @State var selectedTab = 1

    var body: some View {
        TabView(selection: $selectedTab) {
            TodoListView()
                .tabItem {
                    Text("Tasks")
                    Image(systemName: "checklist")
                }
                .tag(1)

            StatisticsView()
                .tabItem {
                    Text("Stats")
                    Image(systemName: "chart.line.uptrend.xyaxis")
                }
                .tag(2)
        }
    }

    // Allow the selected tab to be passed in
    init(selectedTab: Int = 1) {
        _selectedTab = State(initialValue: selectedTab)
    }
}

#Preview {
    LandingView()
}
... so it looks like this:
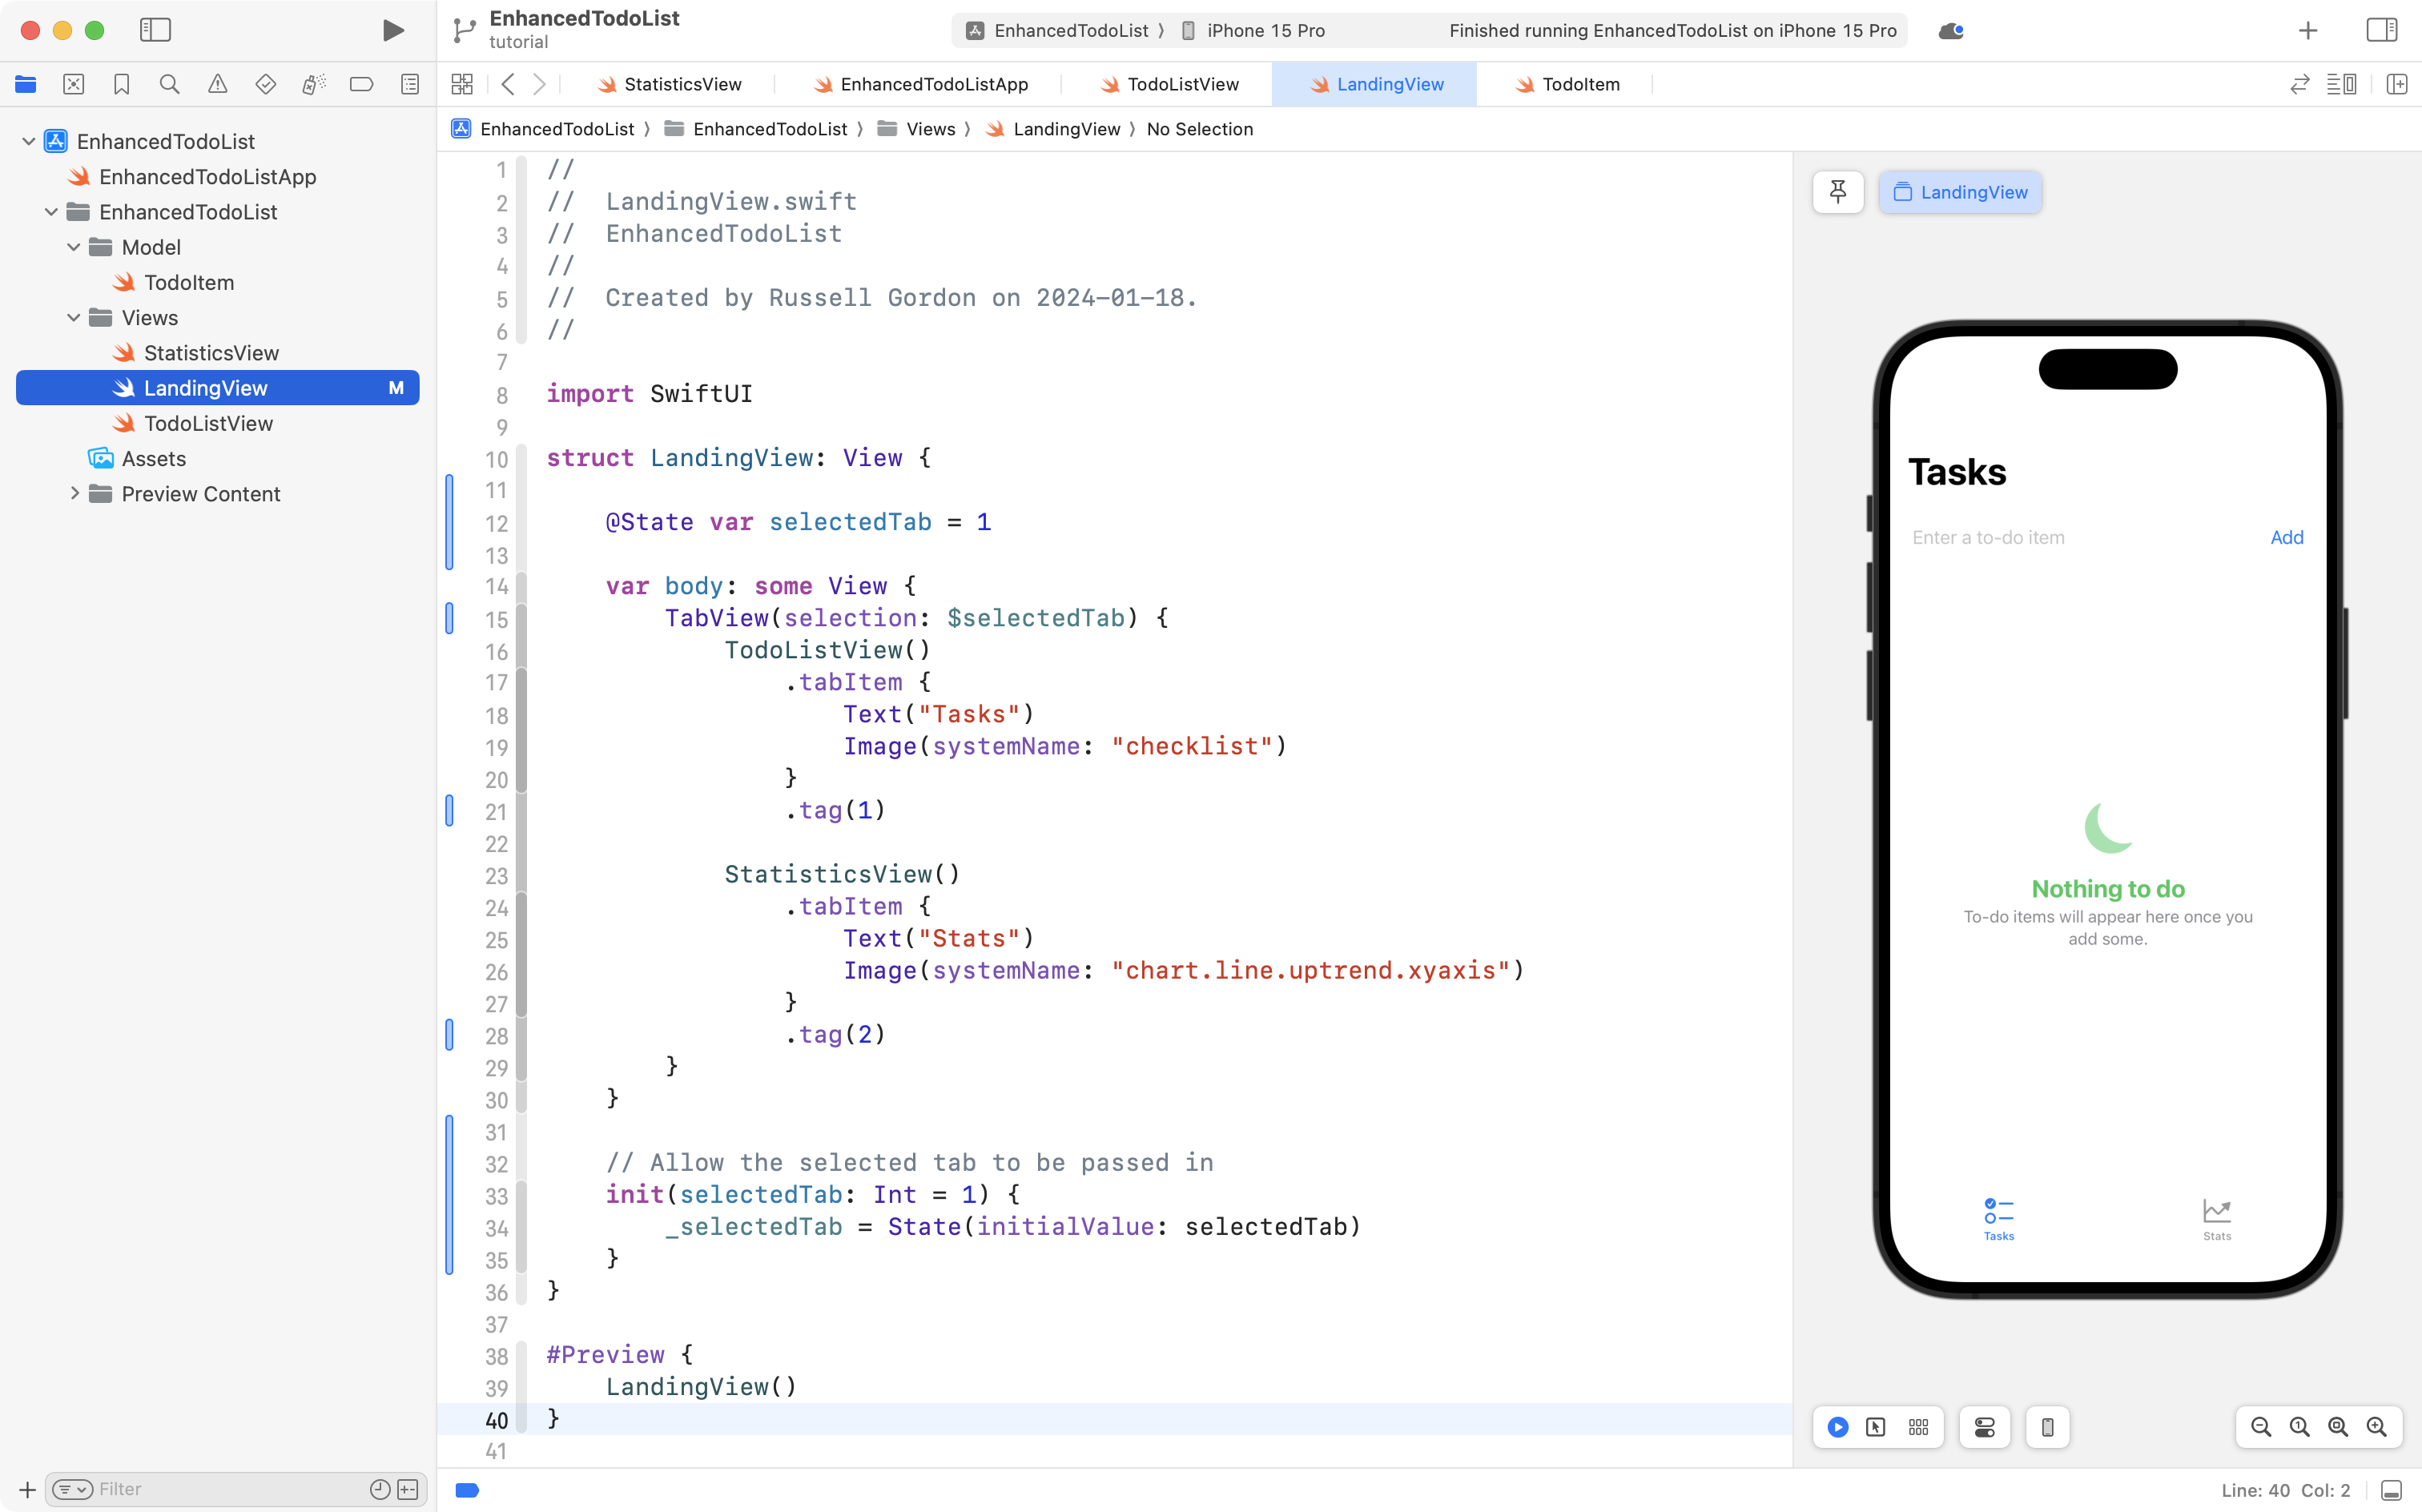
Let's break that down.
- On line 12, a stored property named
selectedTabis created to keep track of what tab is active. - On line 15, the
TabViewis modified so that it will bring the selected tab forward in the user interface. - On lines 21 and 28, we tag each tab with a unique integer. This is how the
TabViewkeeps track of what view to show whenselectedTabchanges from1to2. - On lines 32 to 35, we have added an initializer to the
LandingViewstructure. This is a new technique you have not seen before. By defaultLandingViewwill present the Tasks tab. However, if a2is received by the initializer, the Stats tab will be shown instead.
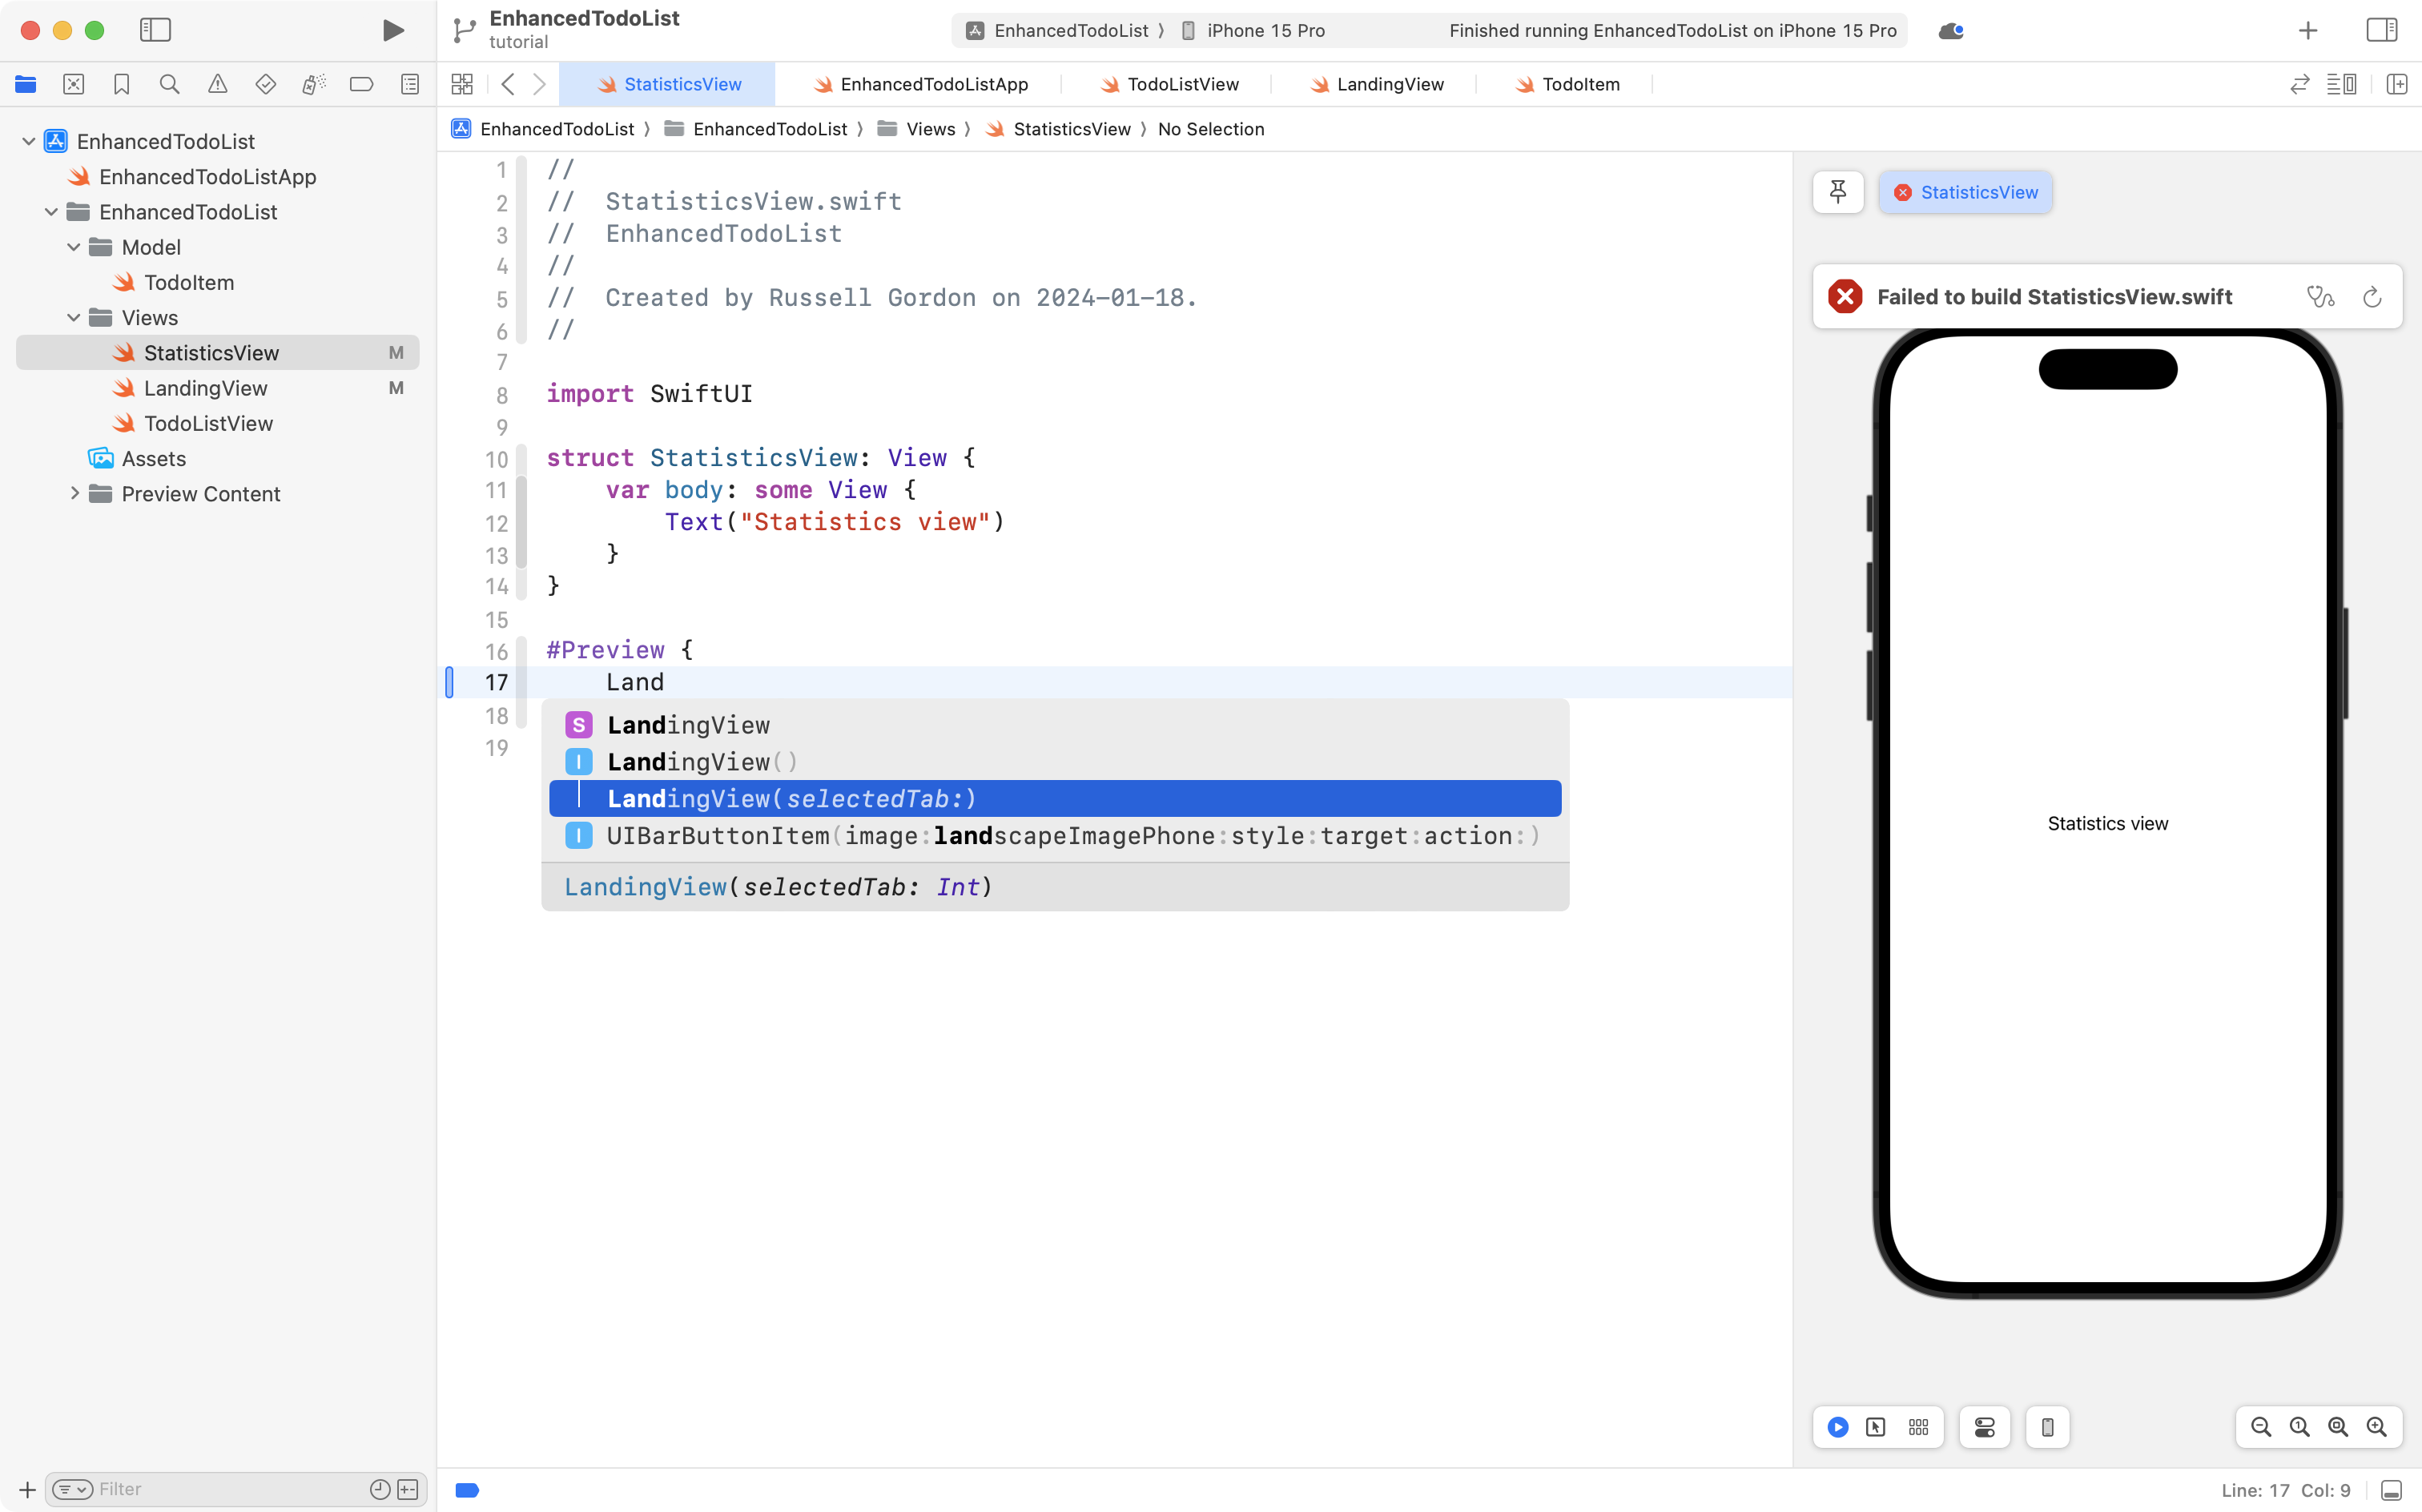
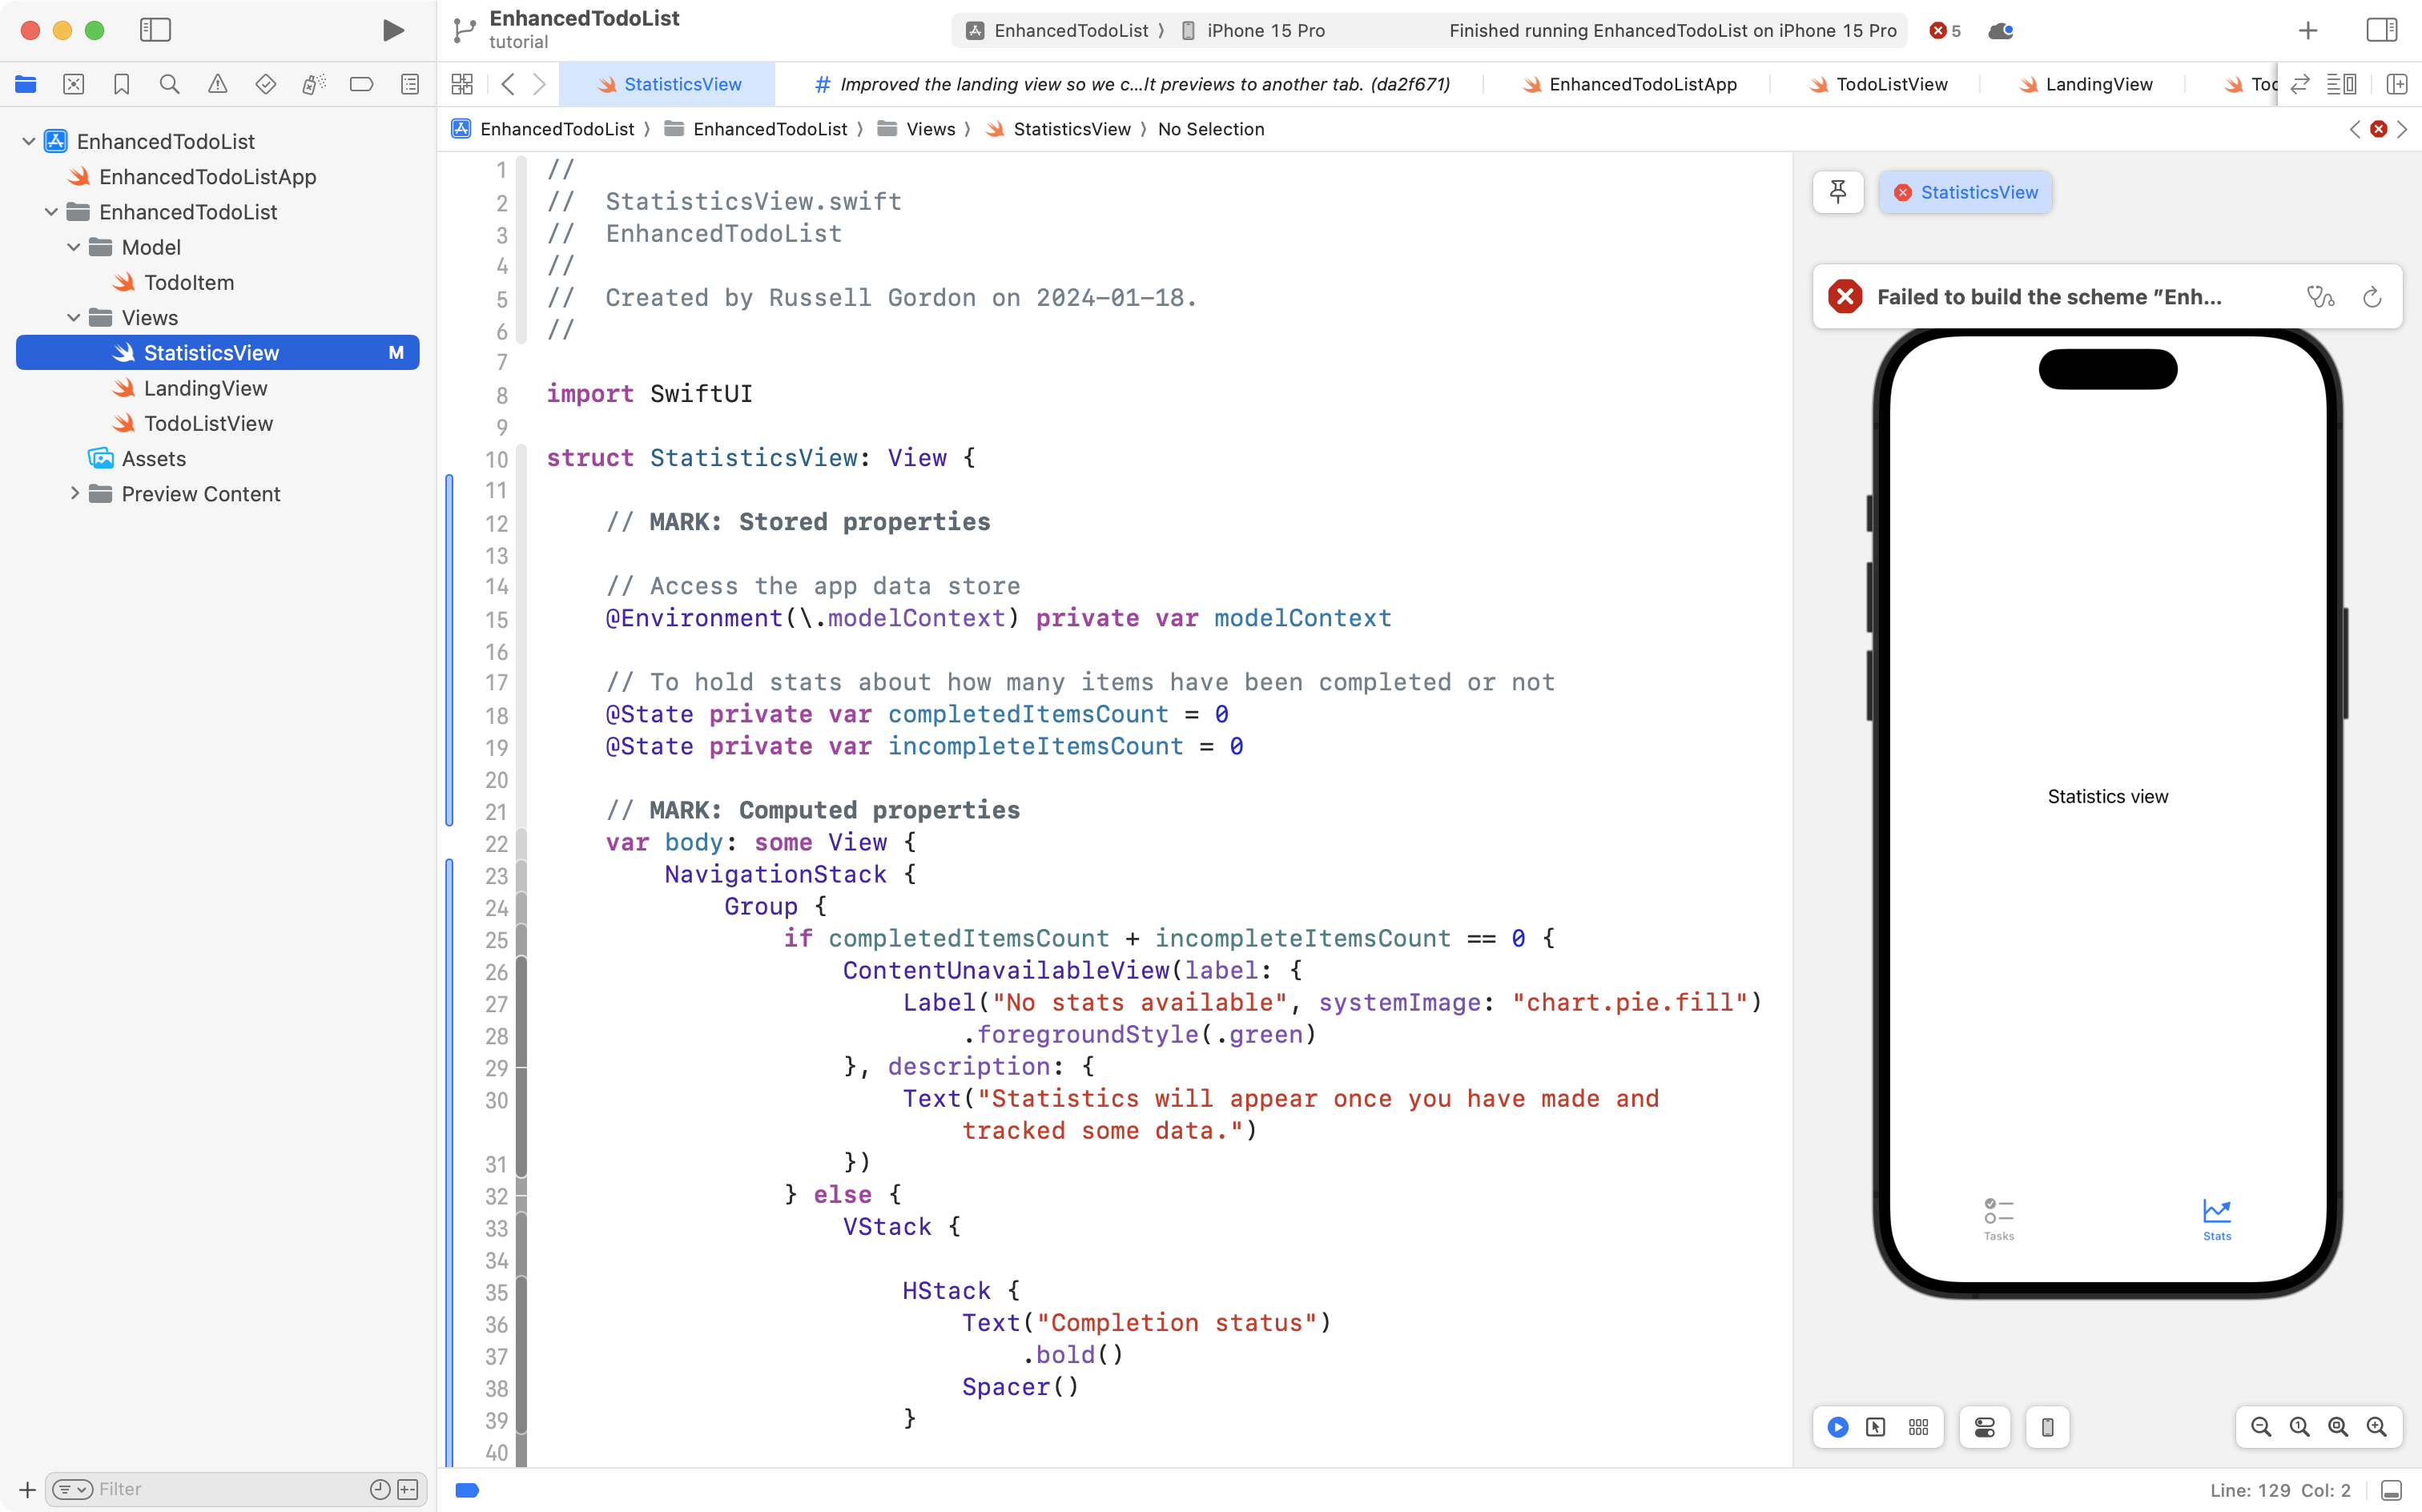
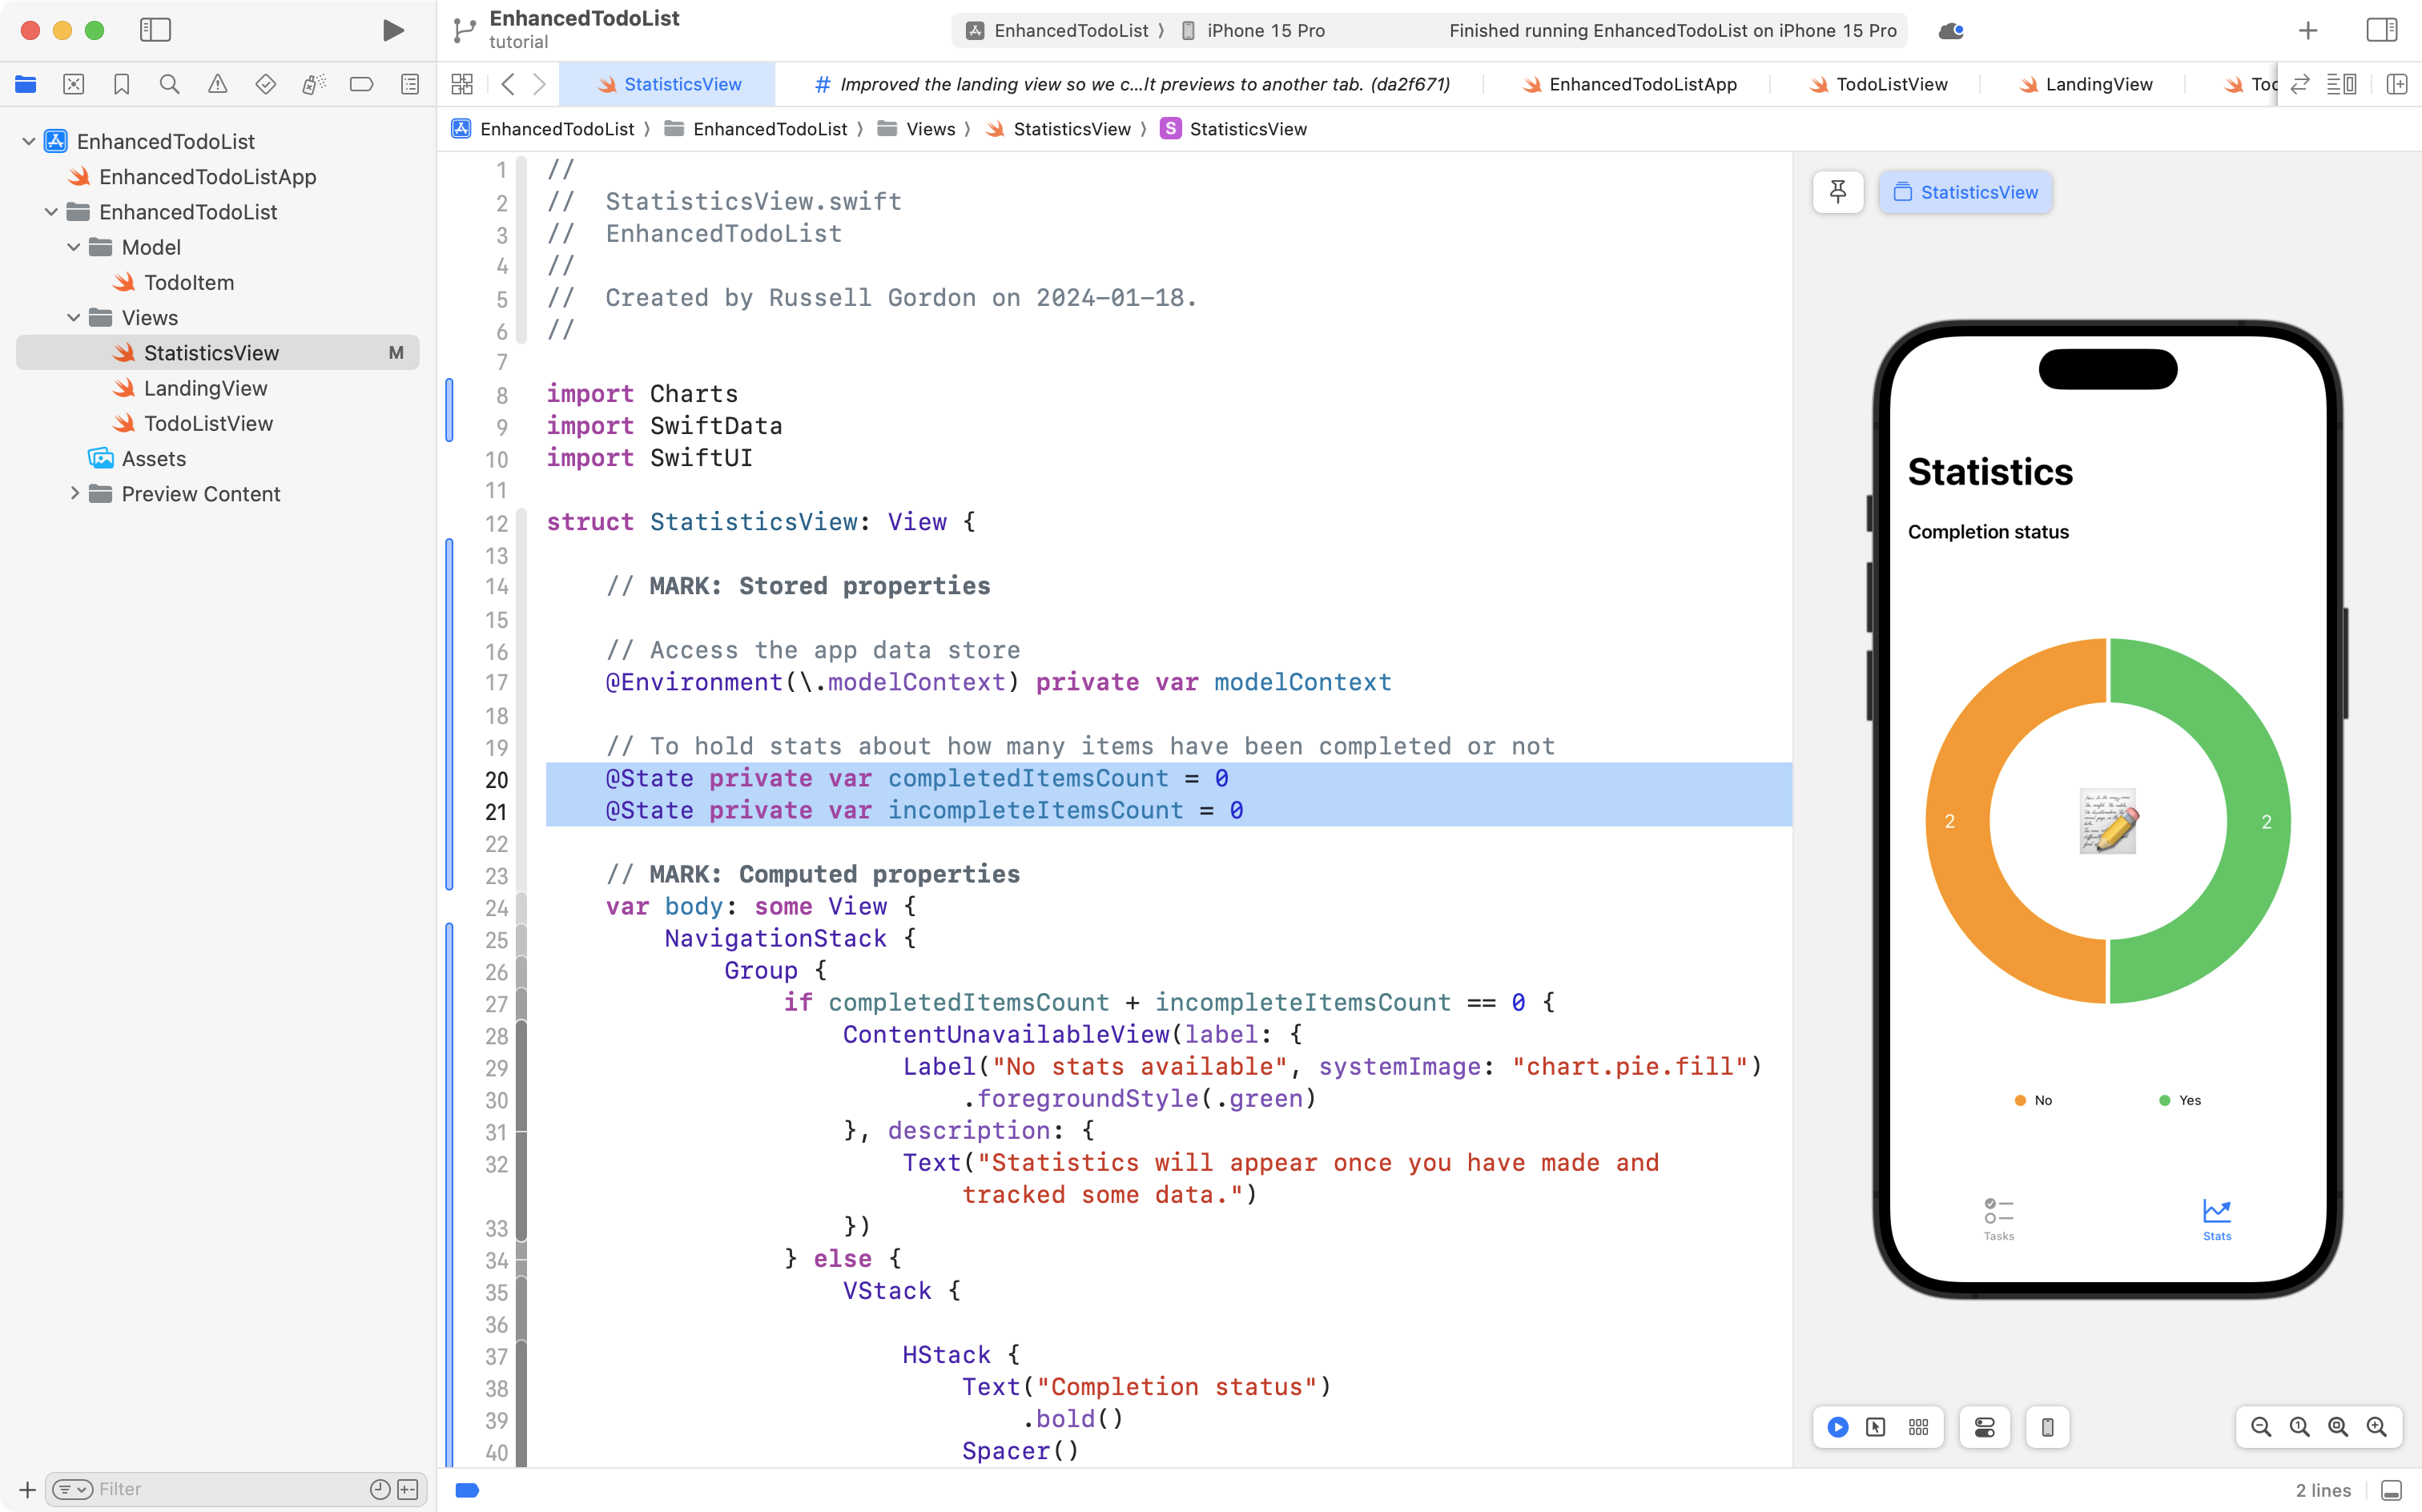
Now let's return to the to the StatisticsView file. Go to line 17:
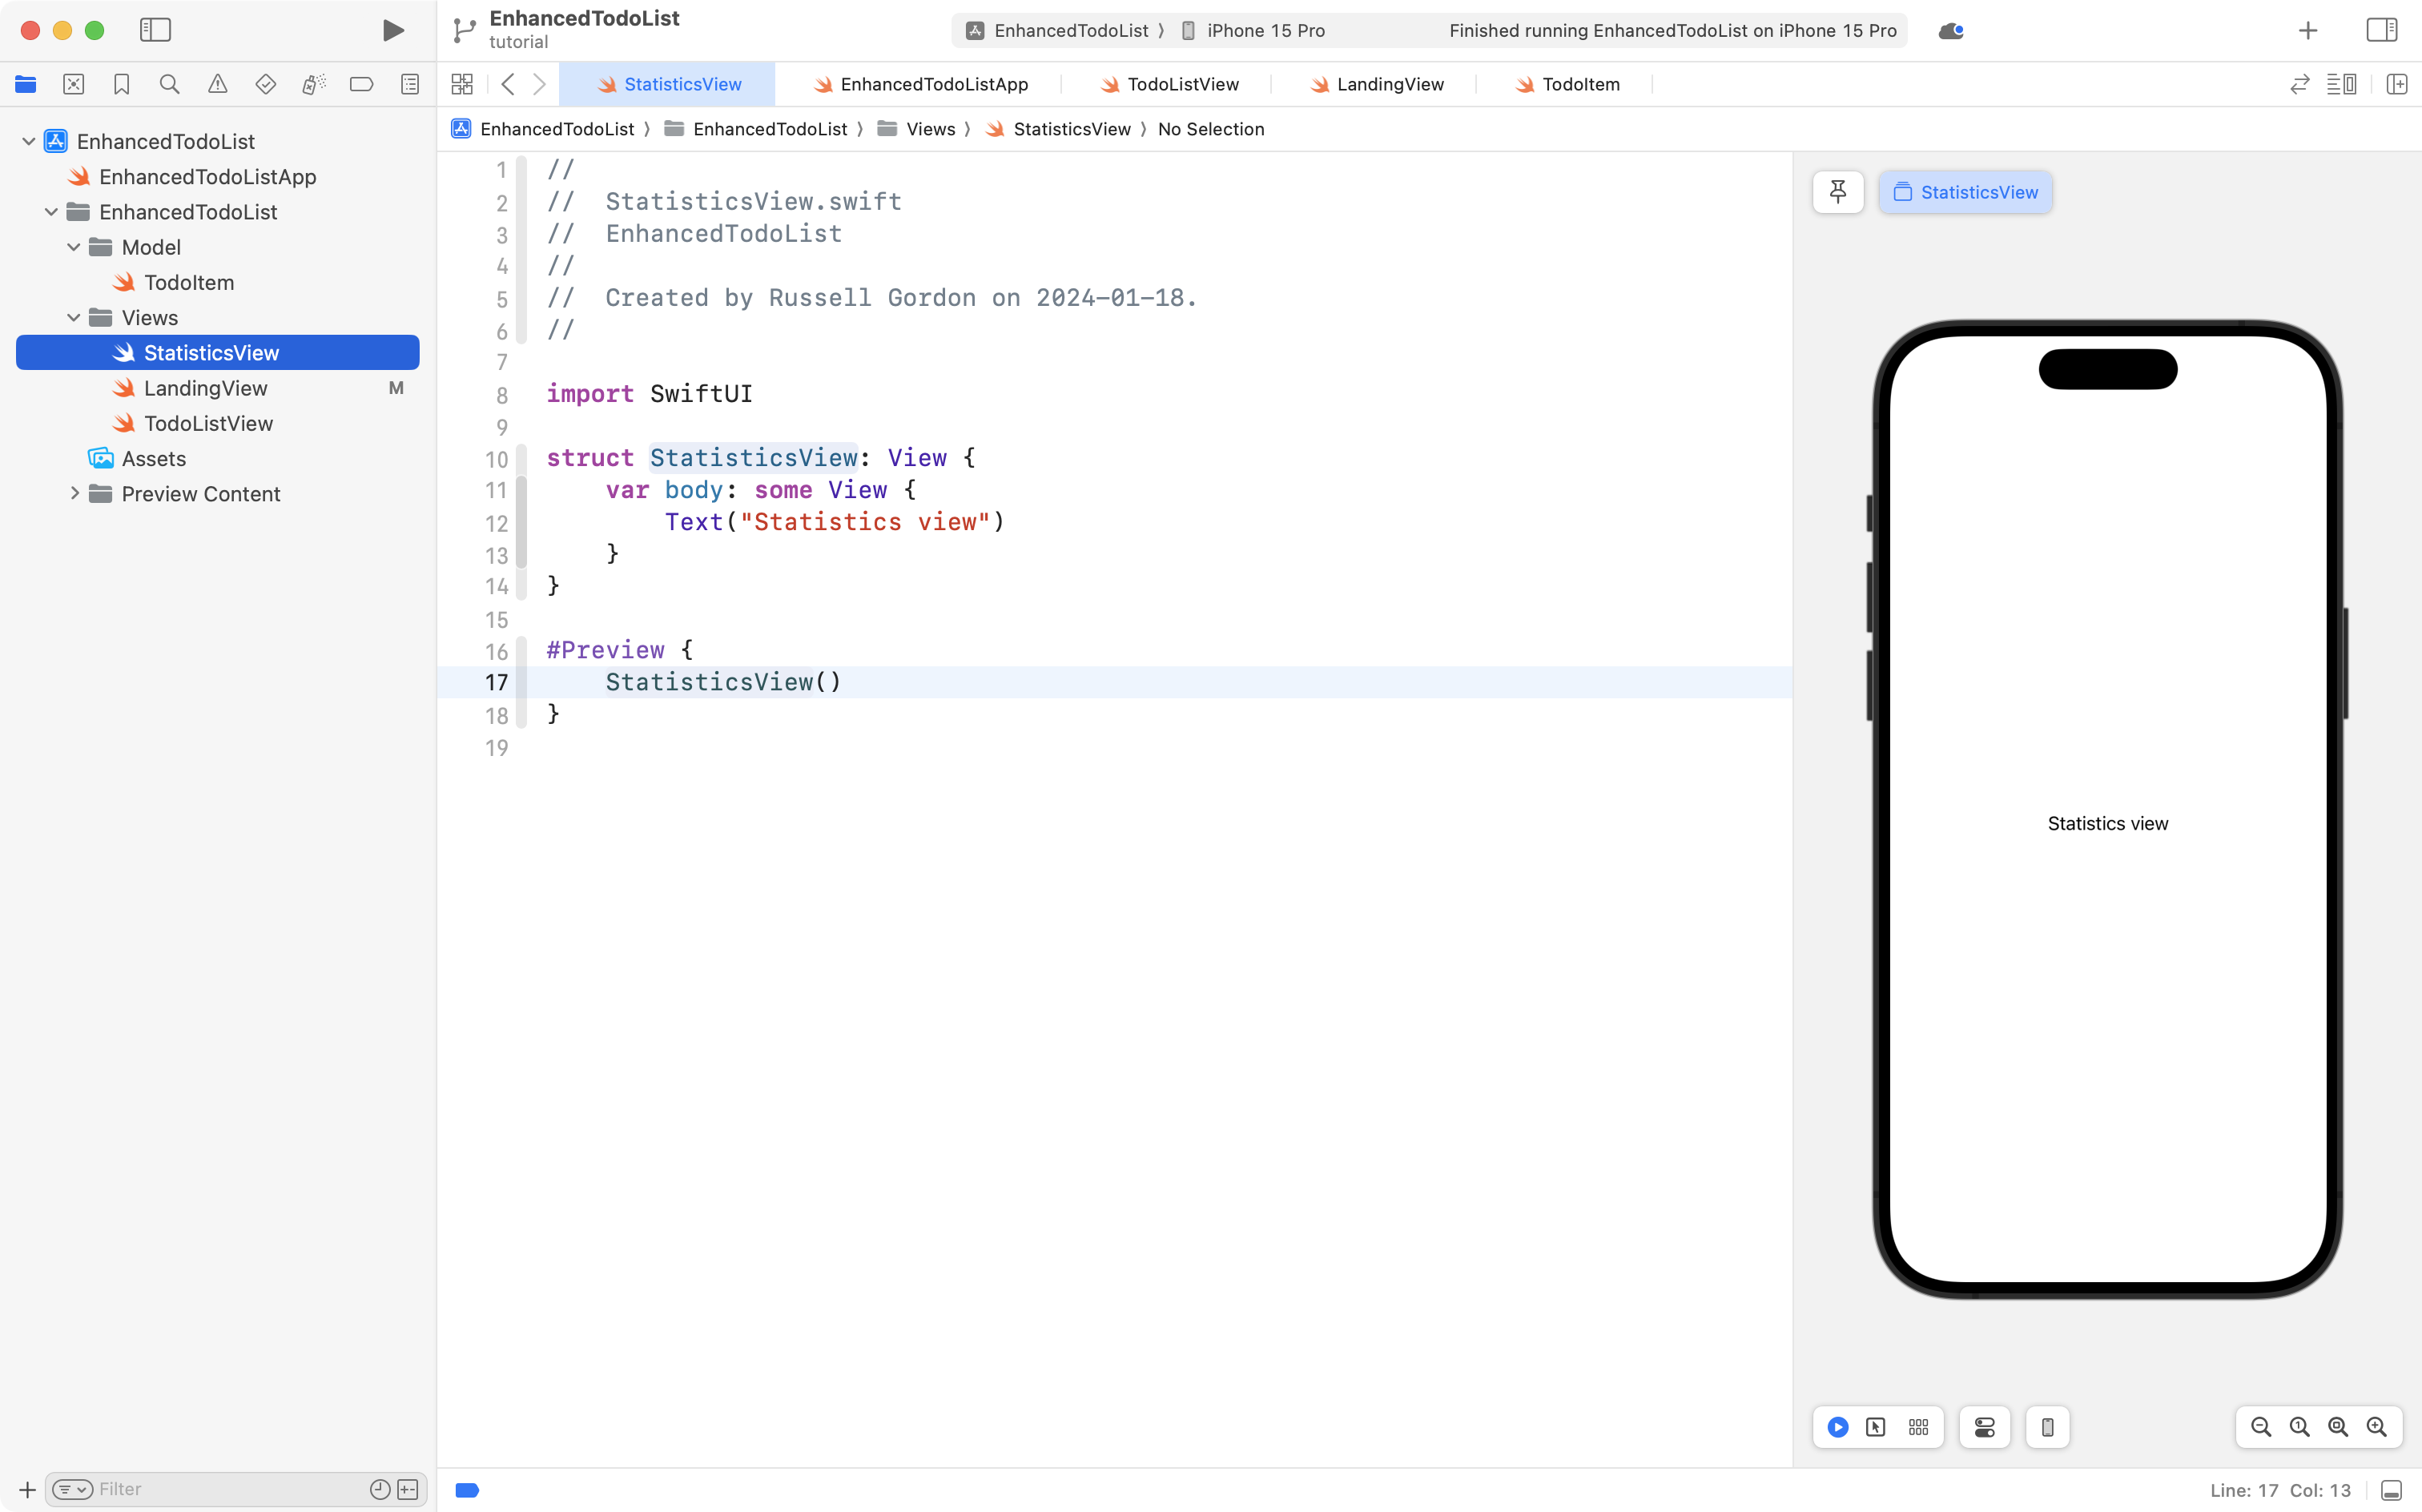
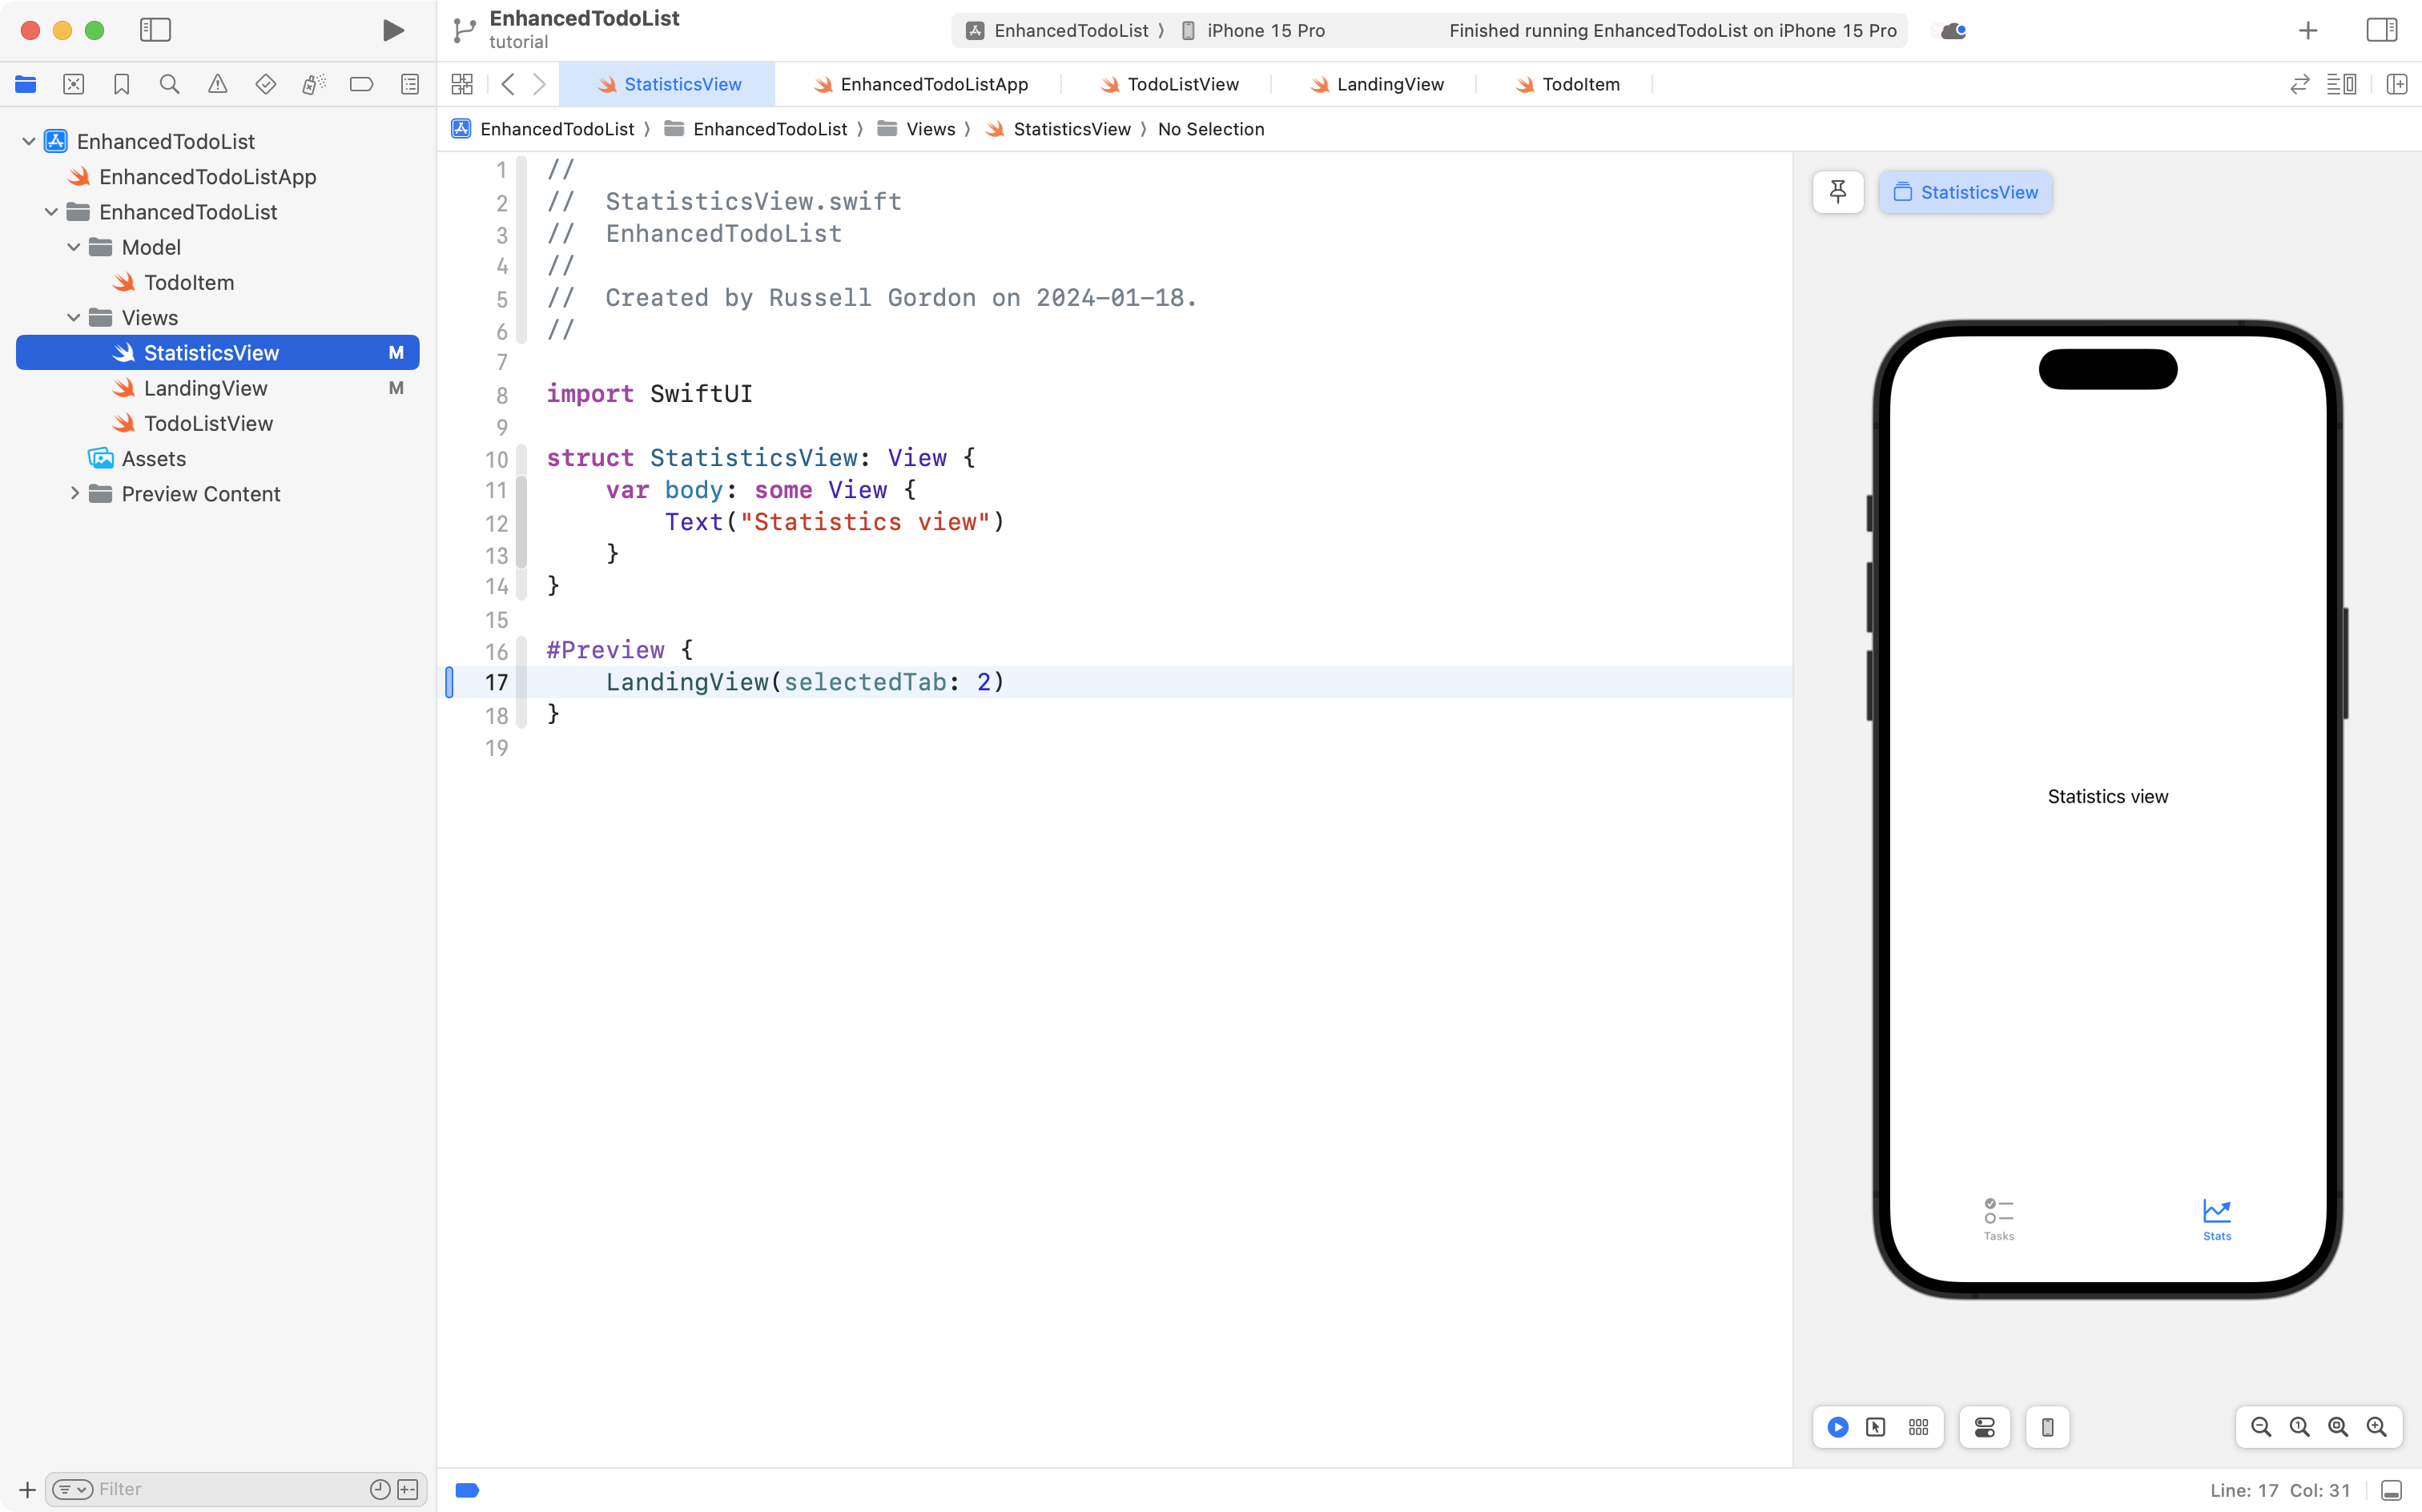
Replace the code with an instance of LandingView but passing in 2 for the selected tab:
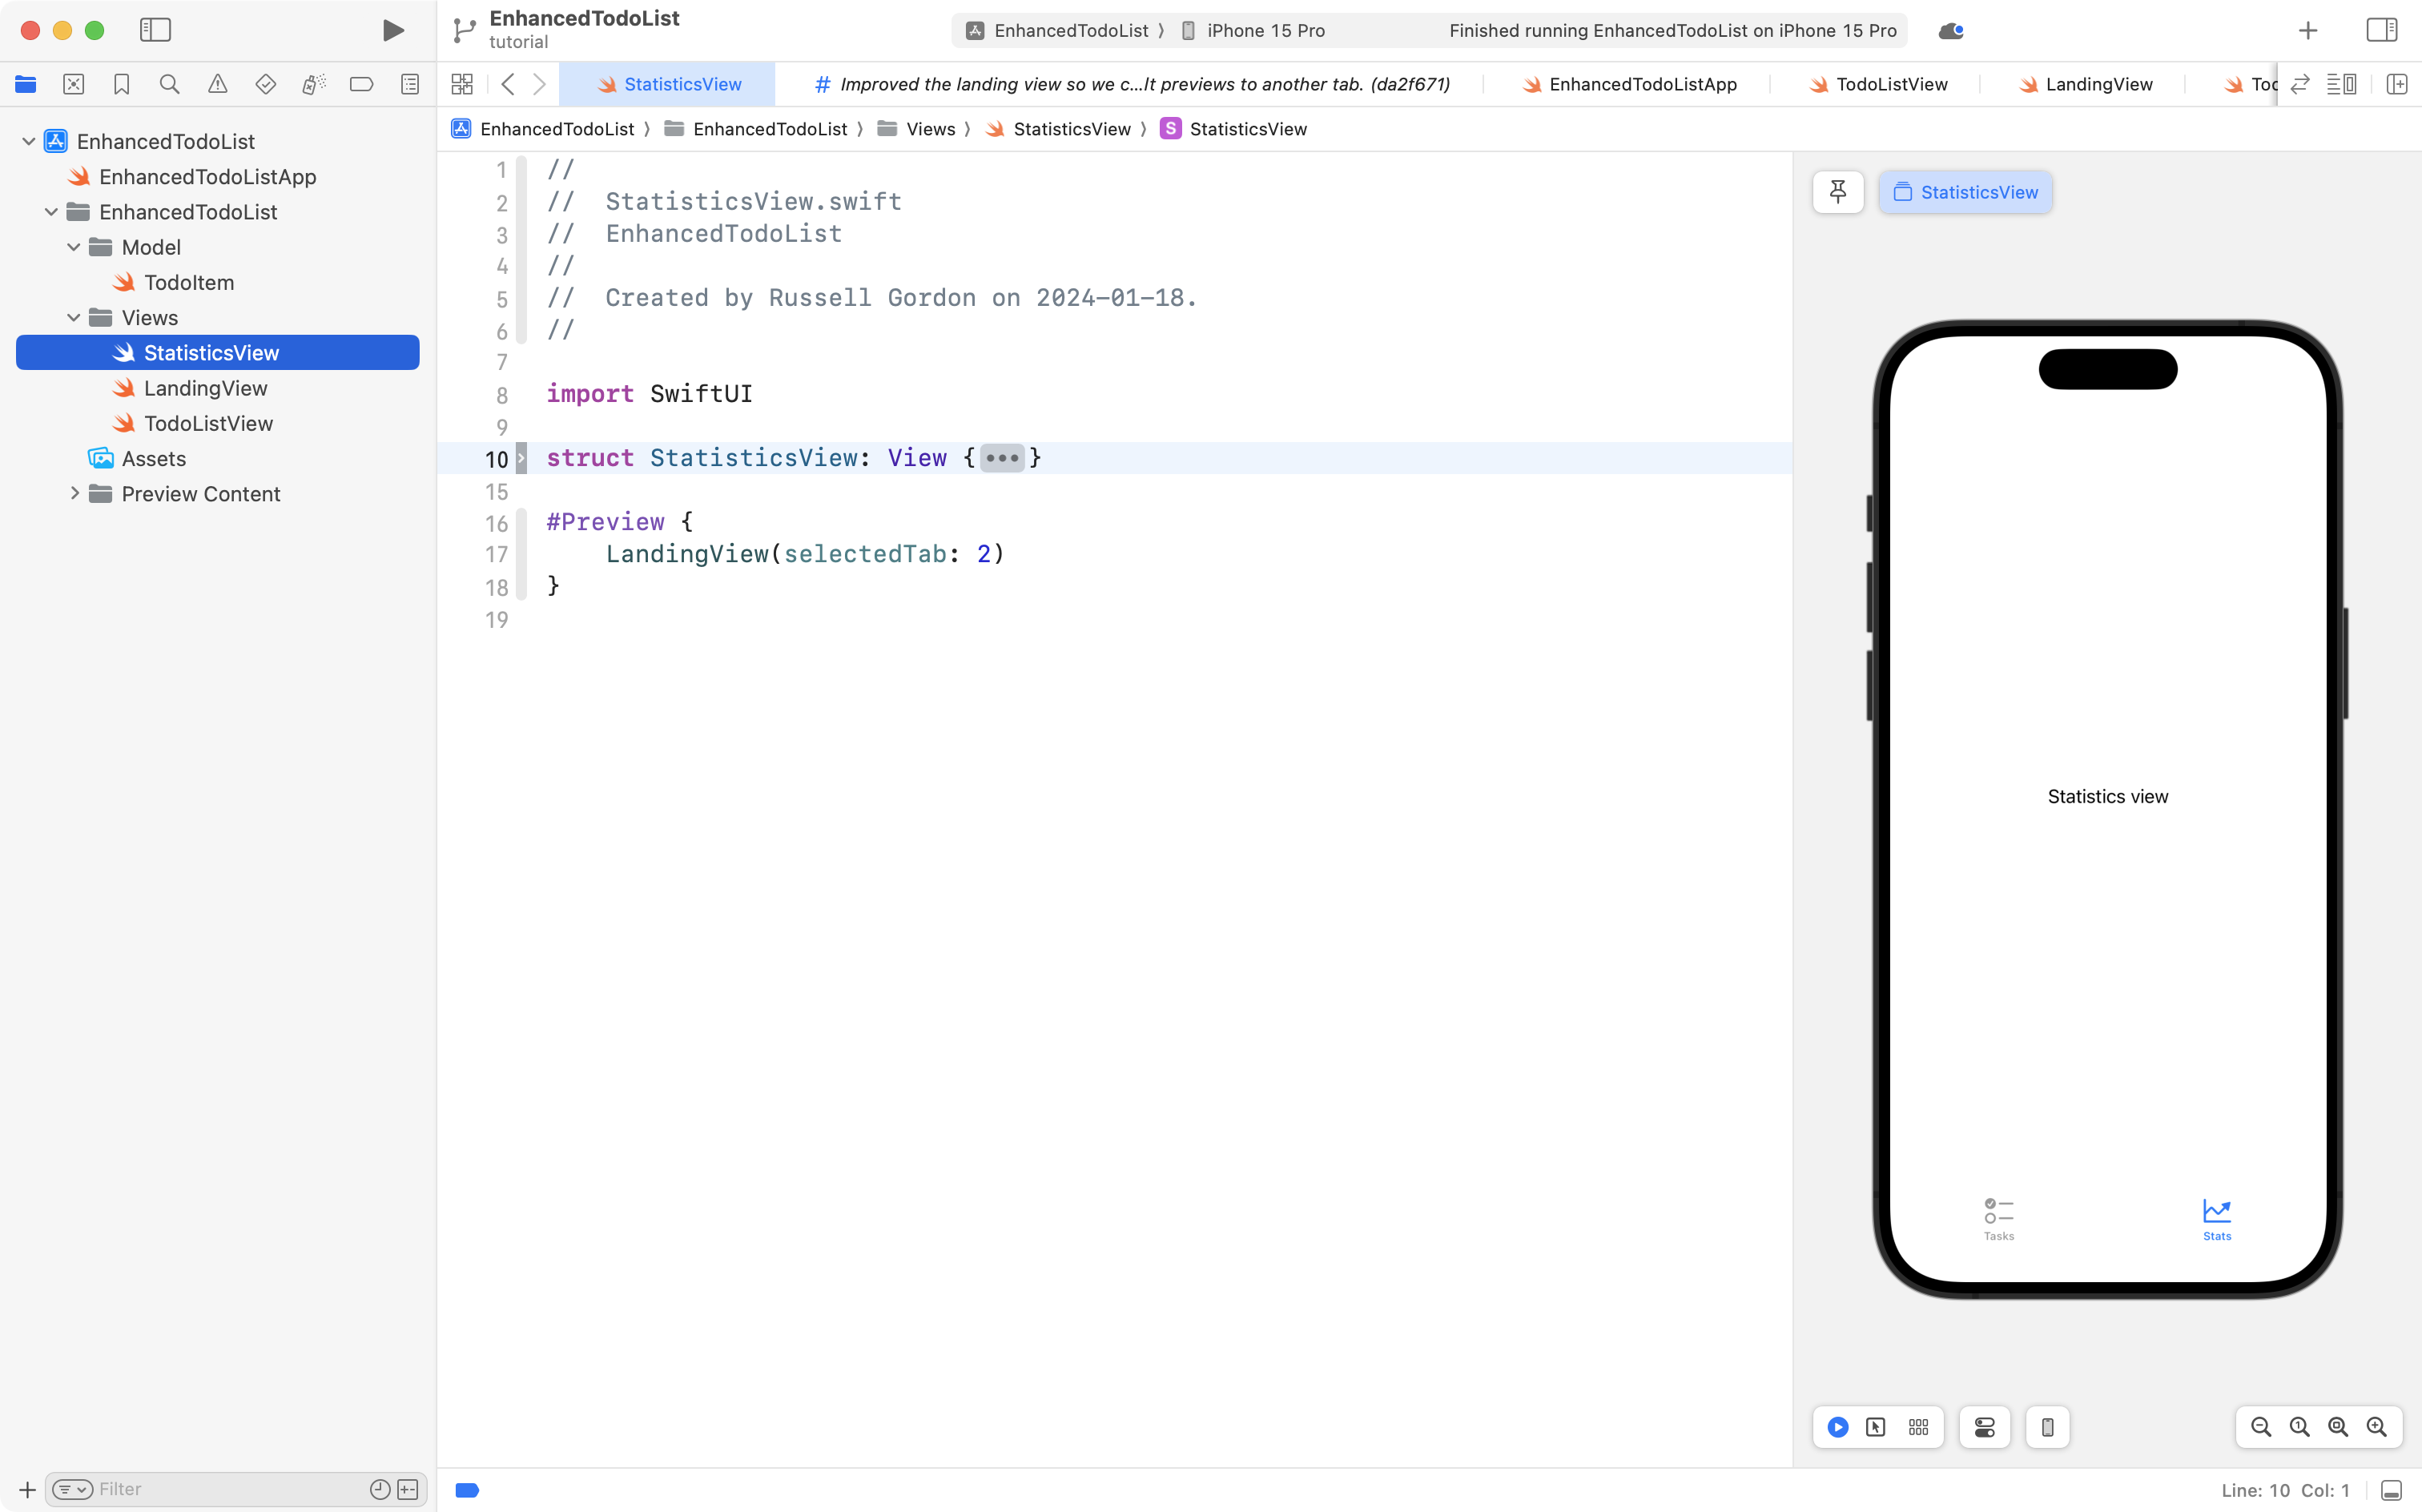
Now we see the tab bar at the bottom of the preview for StatisticsView but we don't have to manually click to the second tab all the time – the preview just begins by showing us that tab:
Commit and push your work with this message:
Improved the landing view so we can default previews to another tab.
Add charts
Let's get some graphical summary statistical goodness happening.
Use code-folding to fold up the StatisticsView structure:
Take all of this code:
struct StatisticsView: View {

    // MARK: Stored properties

    // Access the app data store
    @Environment(\.modelContext) private var modelContext

    // To hold stats about how many items have been completed or not
    @State private var completedItemsCount = 0
    @State private var incompleteItemsCount = 0

    // MARK: Computed properties
    var body: some View {
        NavigationStack {
            Group {
                if completedItemsCount + incompleteItemsCount == 0 {
                    ContentUnavailableView(label: {
                        Label("No stats available", systemImage: "chart.pie.fill")
                            .foregroundStyle(.green)
                    }, description: {
                        Text("Statistics will appear once you have made and tracked some data.")
                    })
                } else {
                    VStack {

                        HStack {
                            Text("Completion status")
                                .bold()
                            Spacer()
                        }

                        Chart {

                            if completedItemsCount > 0 {
                                SectorMark(
                                    angle: .value("Items Completed", completedItemsCount),
                                    innerRadius: .ratio(0.65),
                                    angularInset: 2.0
                                )
                                .foregroundStyle(.green)
                                .annotation(position: .overlay) {
                                    Text("\(completedItemsCount)")
                                        .foregroundStyle(.white)
                                }
                            }

                            if incompleteItemsCount > 0 {

                                SectorMark(
                                    angle: .value("Items Not Completed", incompleteItemsCount),
                                    innerRadius: .ratio(0.65),
                                    angularInset: 2.0
                                )
                                .foregroundStyle(.orange)
                                .annotation(position: .overlay) {
                                    Text("\(incompleteItemsCount)")
                                        .foregroundStyle(.white)
                                }
                            }
                        }
                        .chartBackground { proxy in
                            Text("📝")
                                .font(.system(size: 60))
                        }
                        .padding()

                        HStack {

                            Spacer()

                            Circle()
                                .frame(width: 10)
                                .foregroundStyle(.orange)

                            Text("No")
                                .font(.caption)

                            Spacer()

                            Circle()
                                .frame(width: 10)
                                .foregroundStyle(.green)

                            Text("Yes")
                                .font(.caption)

                            Spacer()
                        }

                        Rectangle()
                            .foregroundStyle(.clear)
                            .frame(height: 50)

                    }
                    .padding()
                }
            }
            .navigationTitle("Statistics")
        }
        .task {

            // How many completed items? (Defaults to zero if no items found at all.)
            let completedItemsPredicate = #Predicate<TodoItem> { item in
                item.isCompleted == true
            }
            let completedItemsDescriptor = FetchDescriptor<TodoItem>(predicate: completedItemsPredicate)
            completedItemsCount = (try? modelContext.fetchCount(completedItemsDescriptor)) ?? 0

            // How many incomplete items? (Defaults to zero if no items found at all.)
            let incompleteItemsPredicate = #Predicate<TodoItem> { item in
                item.isCompleted == false
            }
            let incompleteItemsDescriptor = FetchDescriptor<TodoItem>(predicate: incompleteItemsPredicate)
            incompleteItemsCount = (try? modelContext.fetchCount(incompleteItemsDescriptor)) ?? 0

        }


    }
}
... and replace the code for StatisticsView with it, like this:
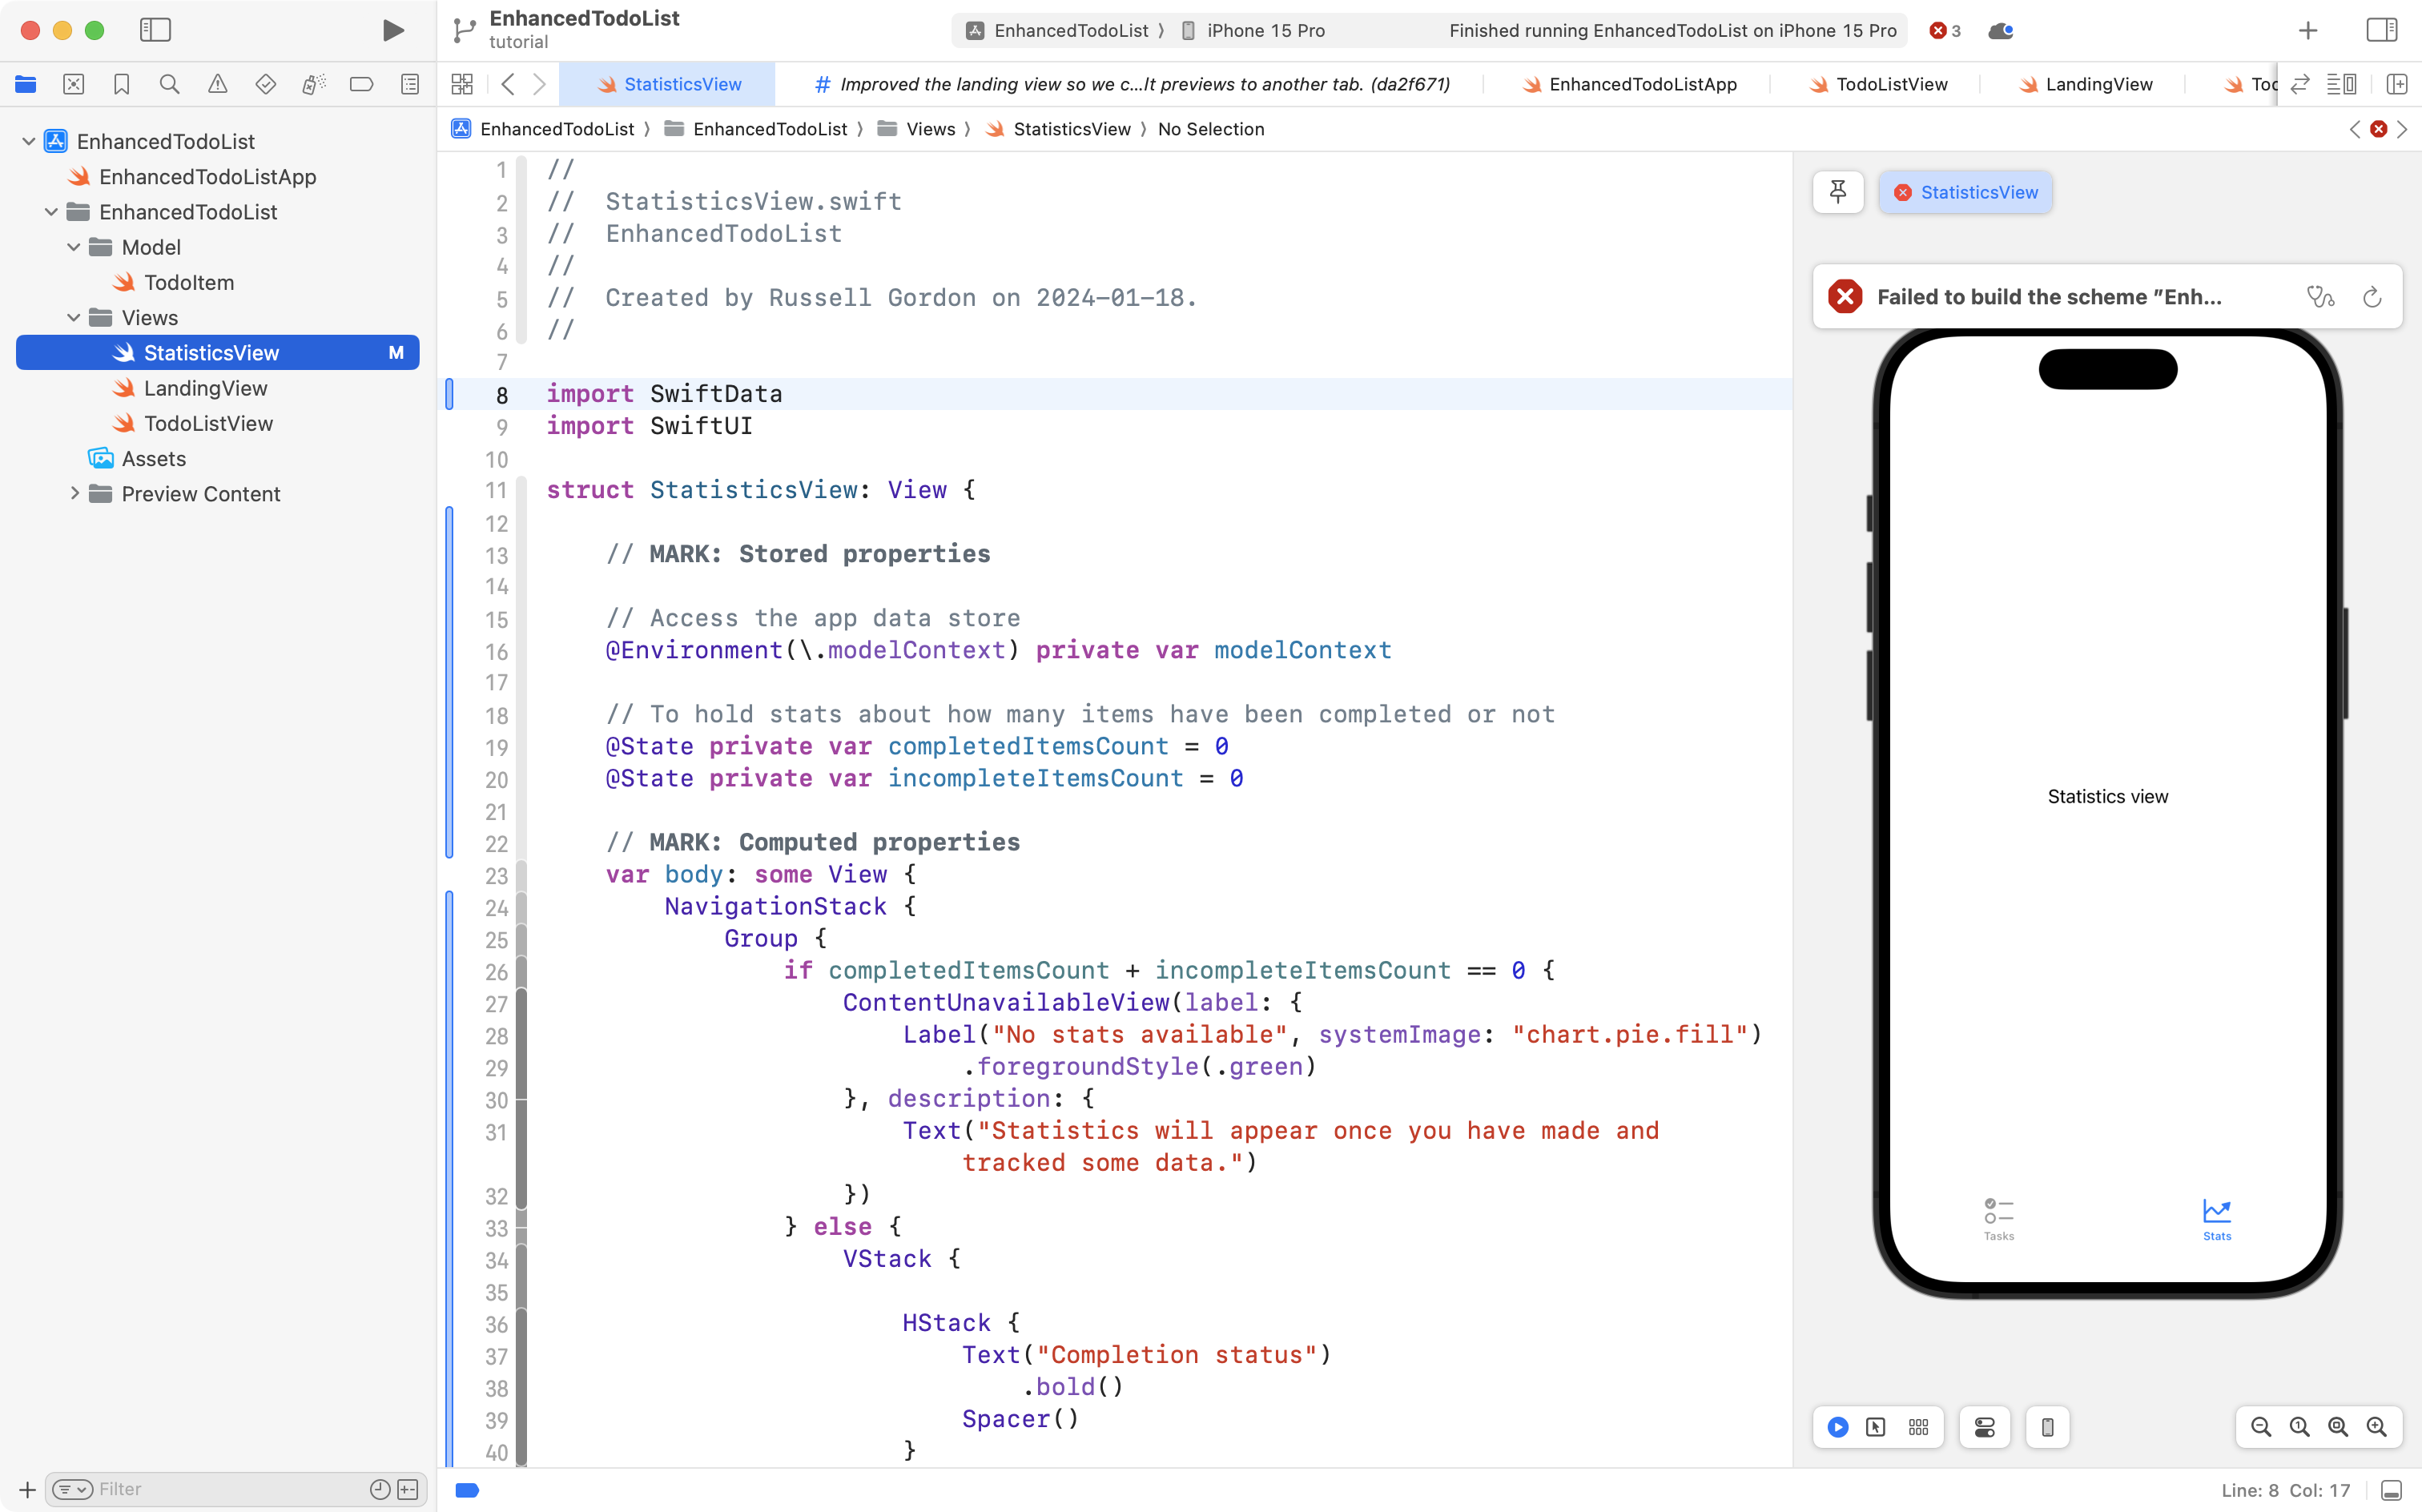
You will immediately see many errors. Can you guess the problem?
Remember to import the SwiftData framework! 🤦🏼♂️
Still see errors?
Remember to import the Charts framework! 🤦🏼♀️
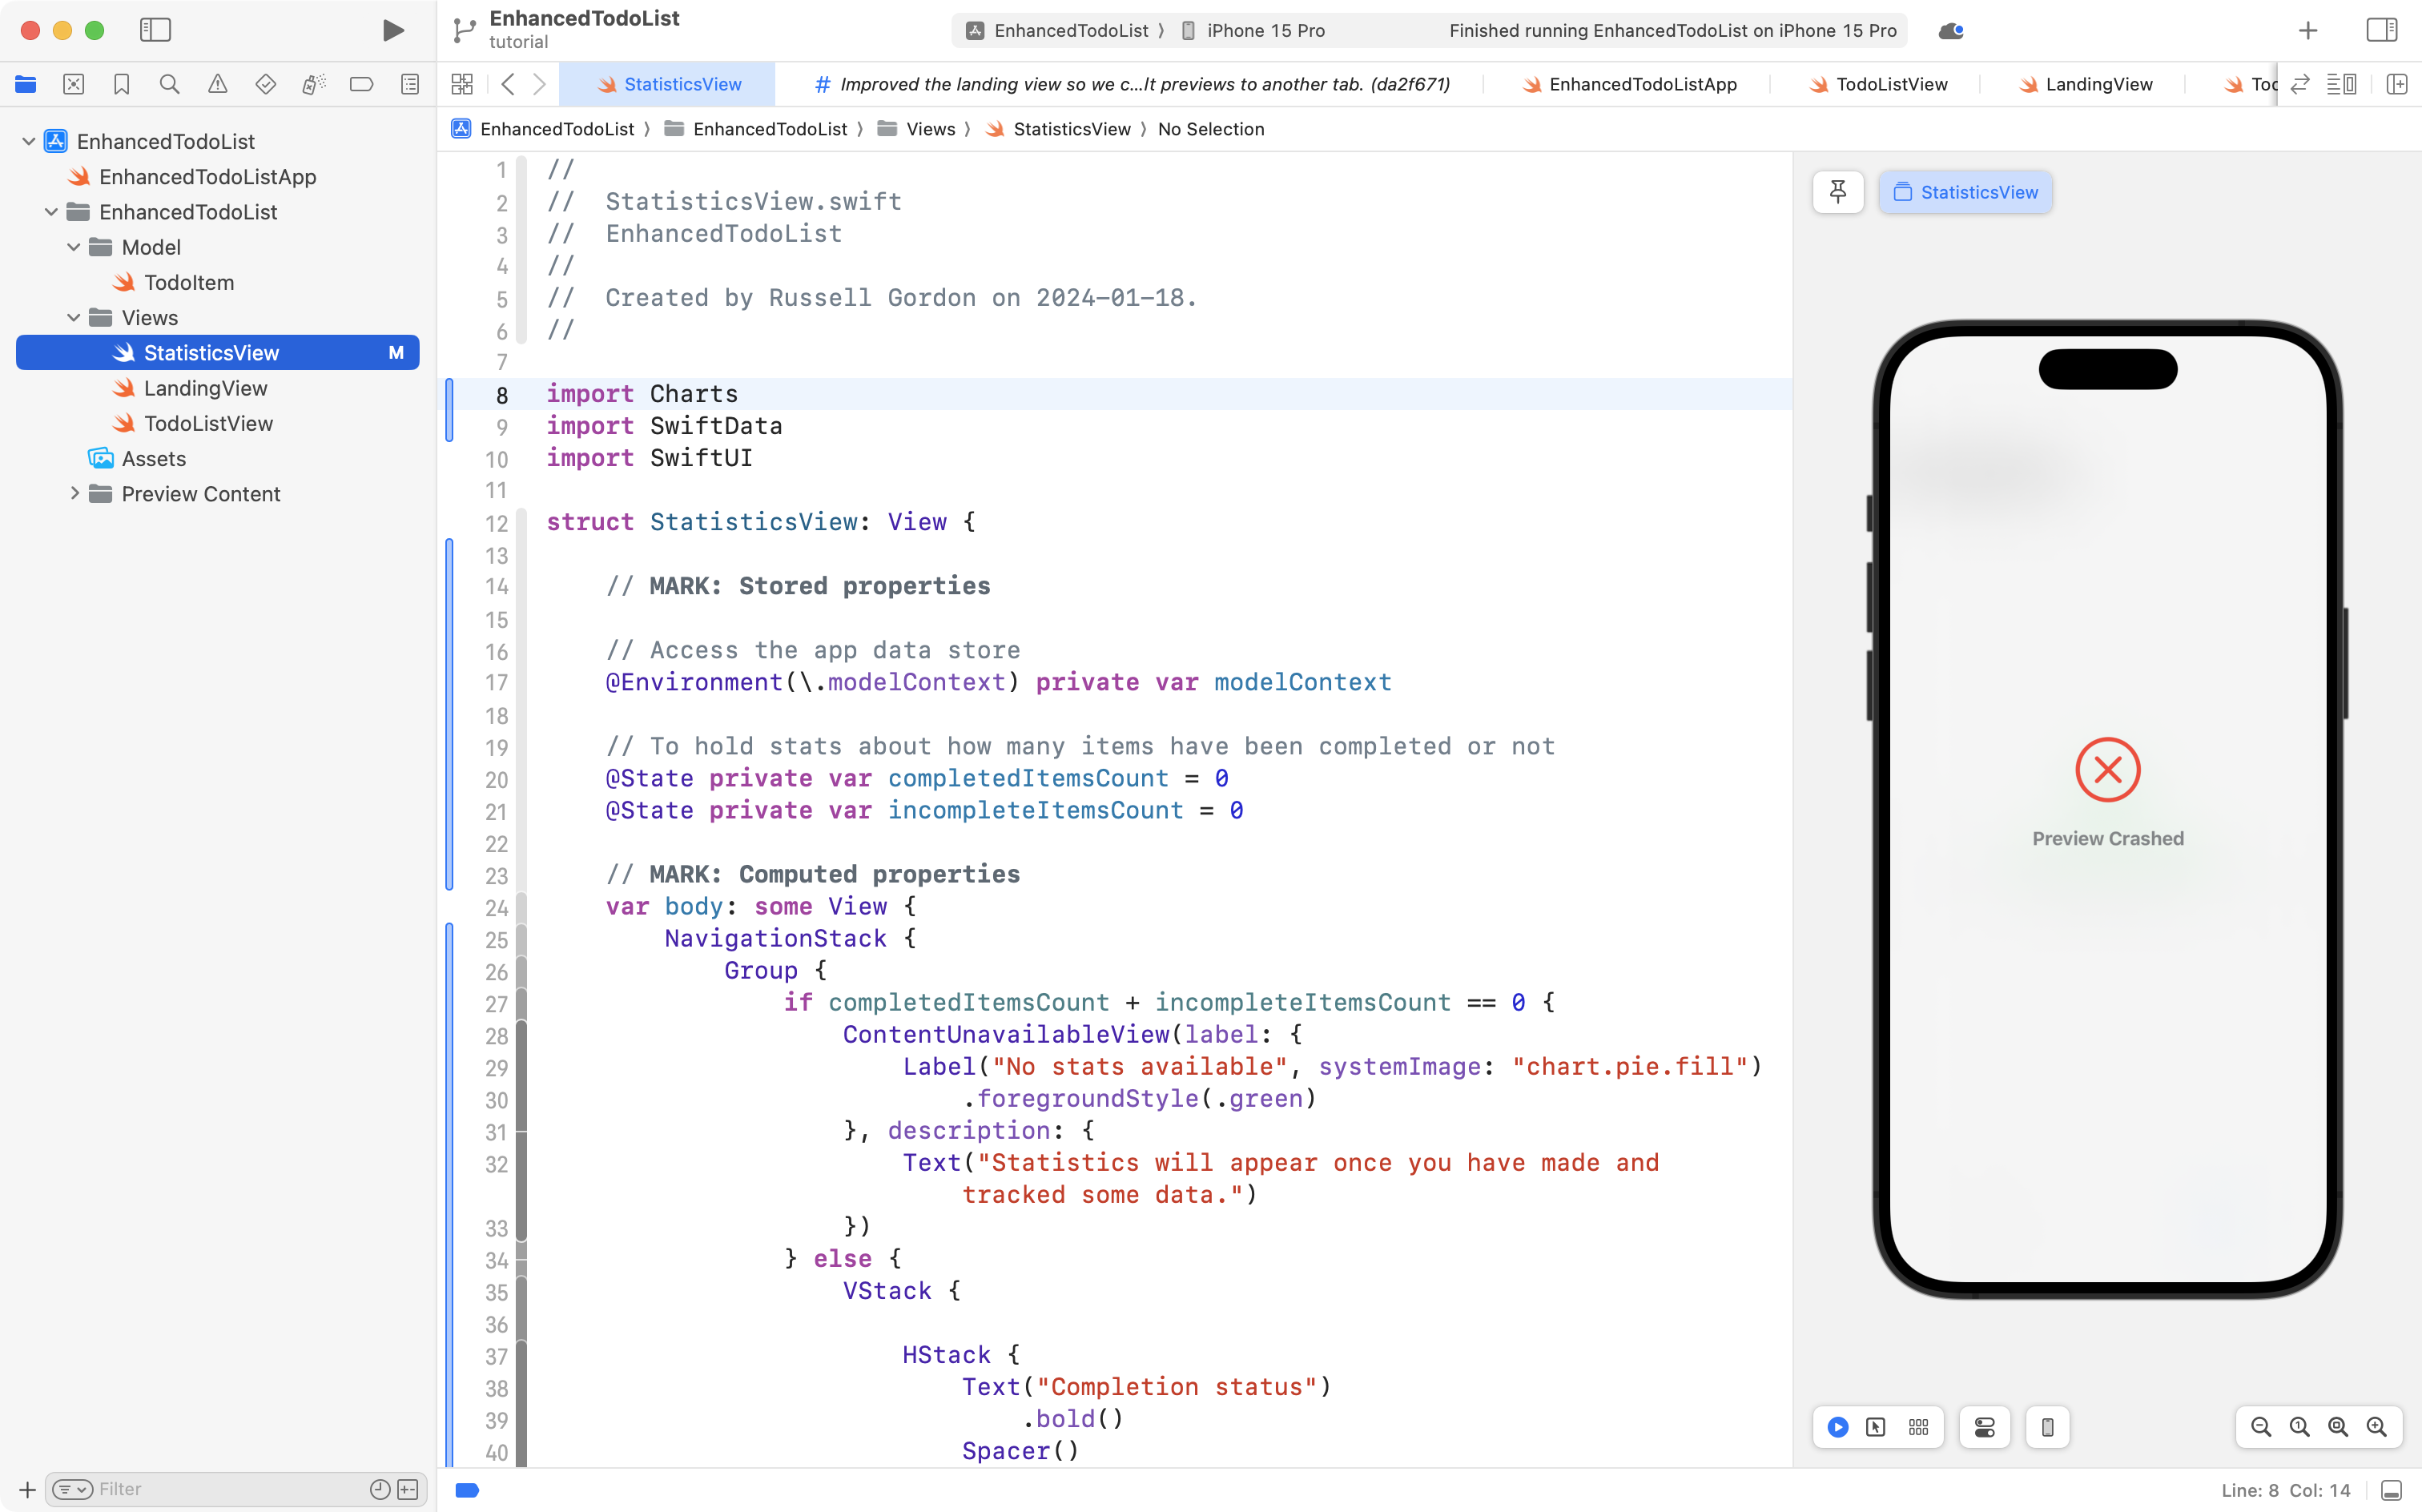
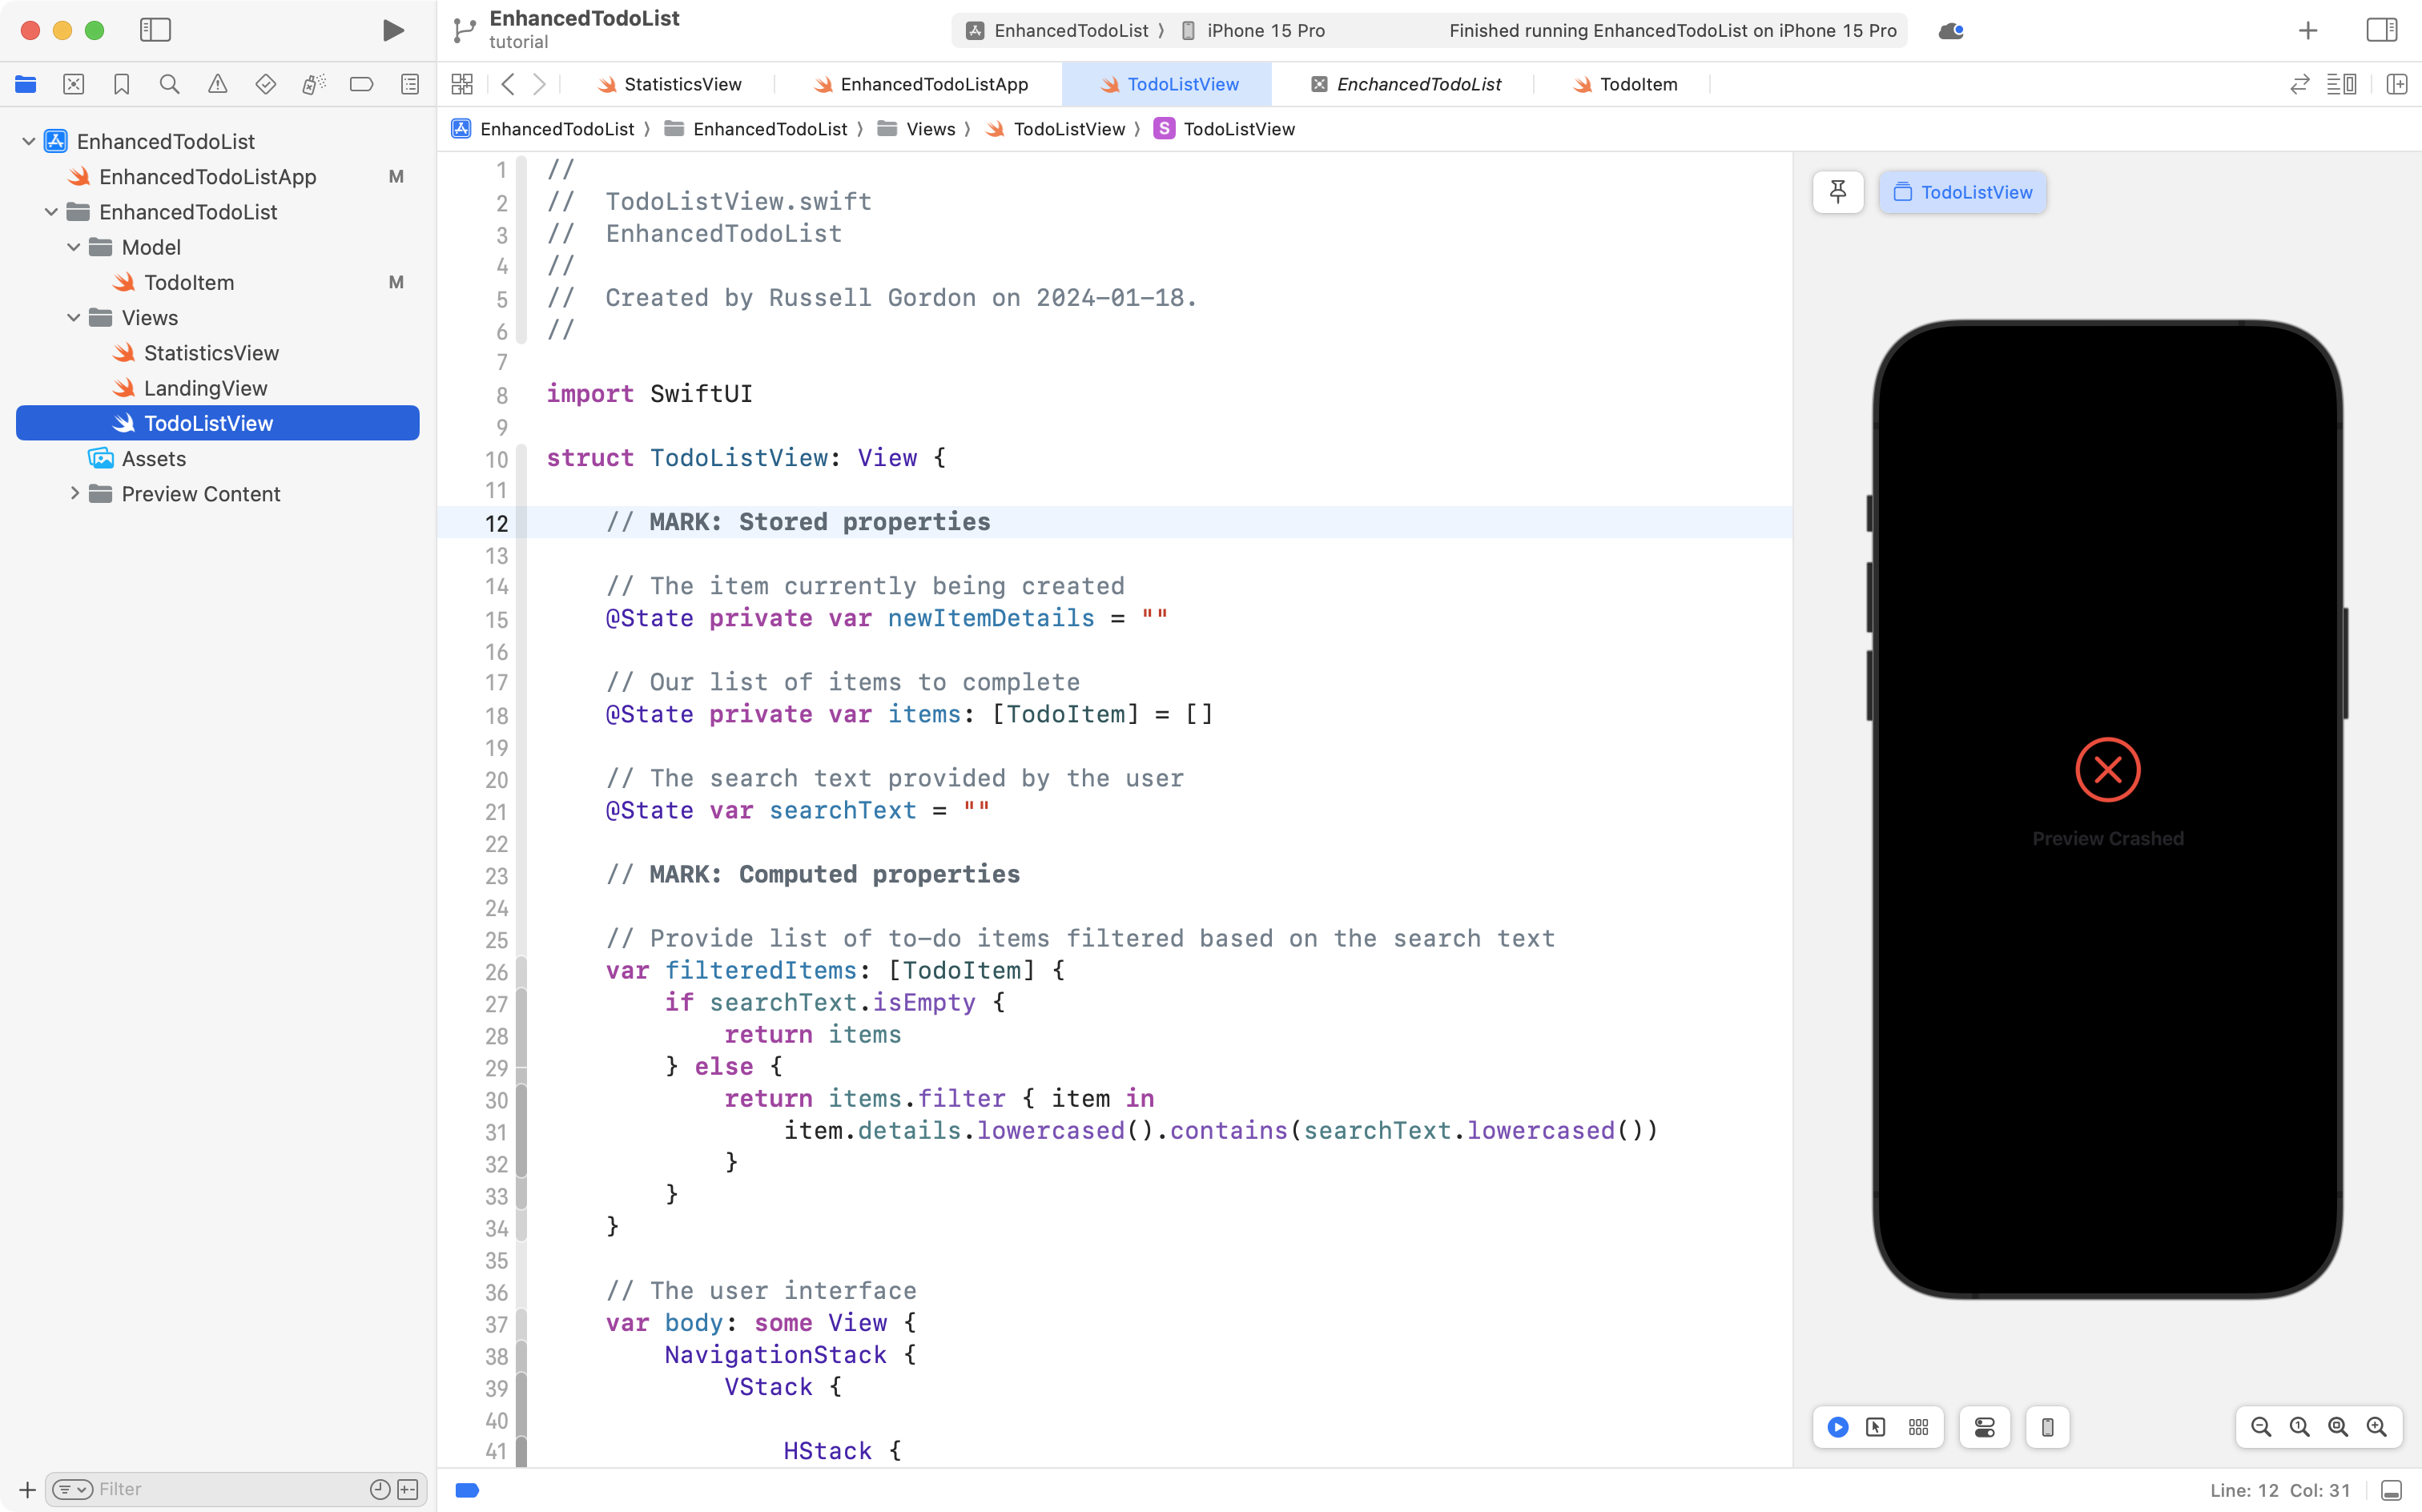
Preview crashing?
Remember to insert a container into the environment so that this preview has some mock data to work with! 🙈
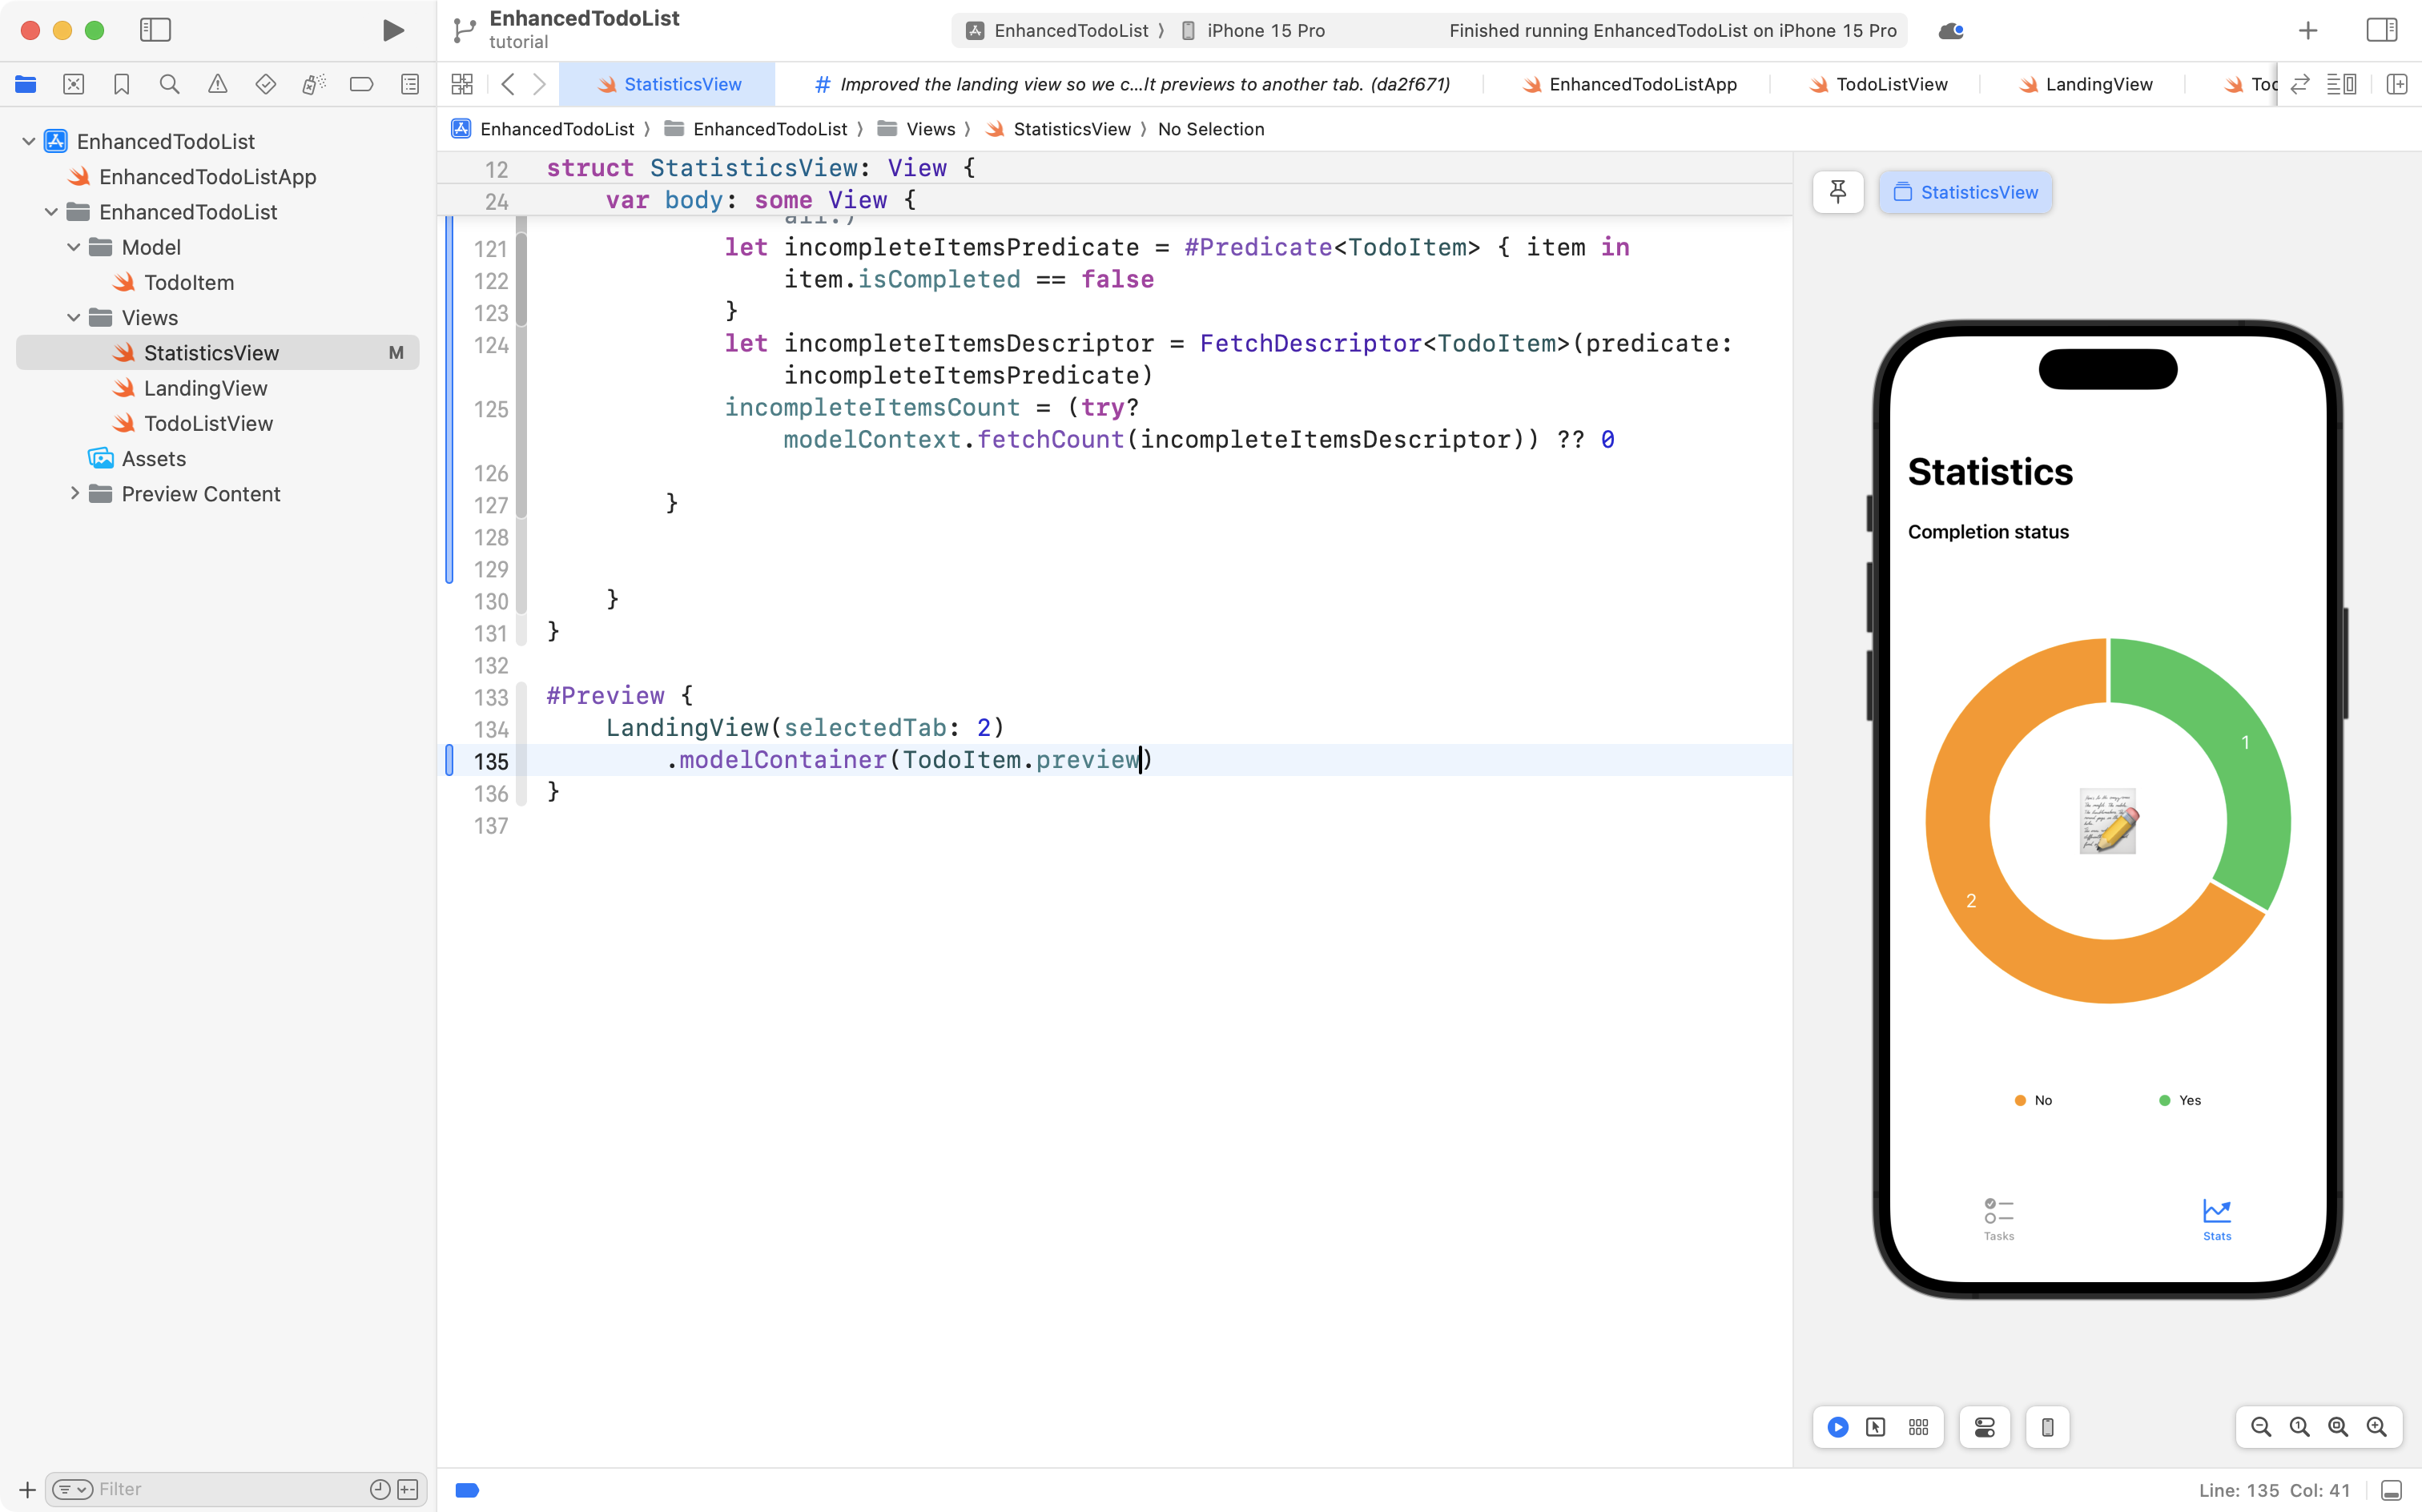
Now we see a lovely little donut chart showing us the proportion of completed to incomplete tasks. You can interact with the tab view and switch to the input screen to add more to-do items. Note that when you switch back to the stats view, the graph has been updated!
Understanding the code
This tutorial assumes you read and have an initial understanding of the Charts tutorials from the past two days of class.
We will focus here only on how we obtained the data we care about – how we found the number of:
- completed items
- incomplete items
First, two stored properties are created that will hold this information:
They start with initial values of 0.
There is an asynchronous task closure attached to the NavigationStack:
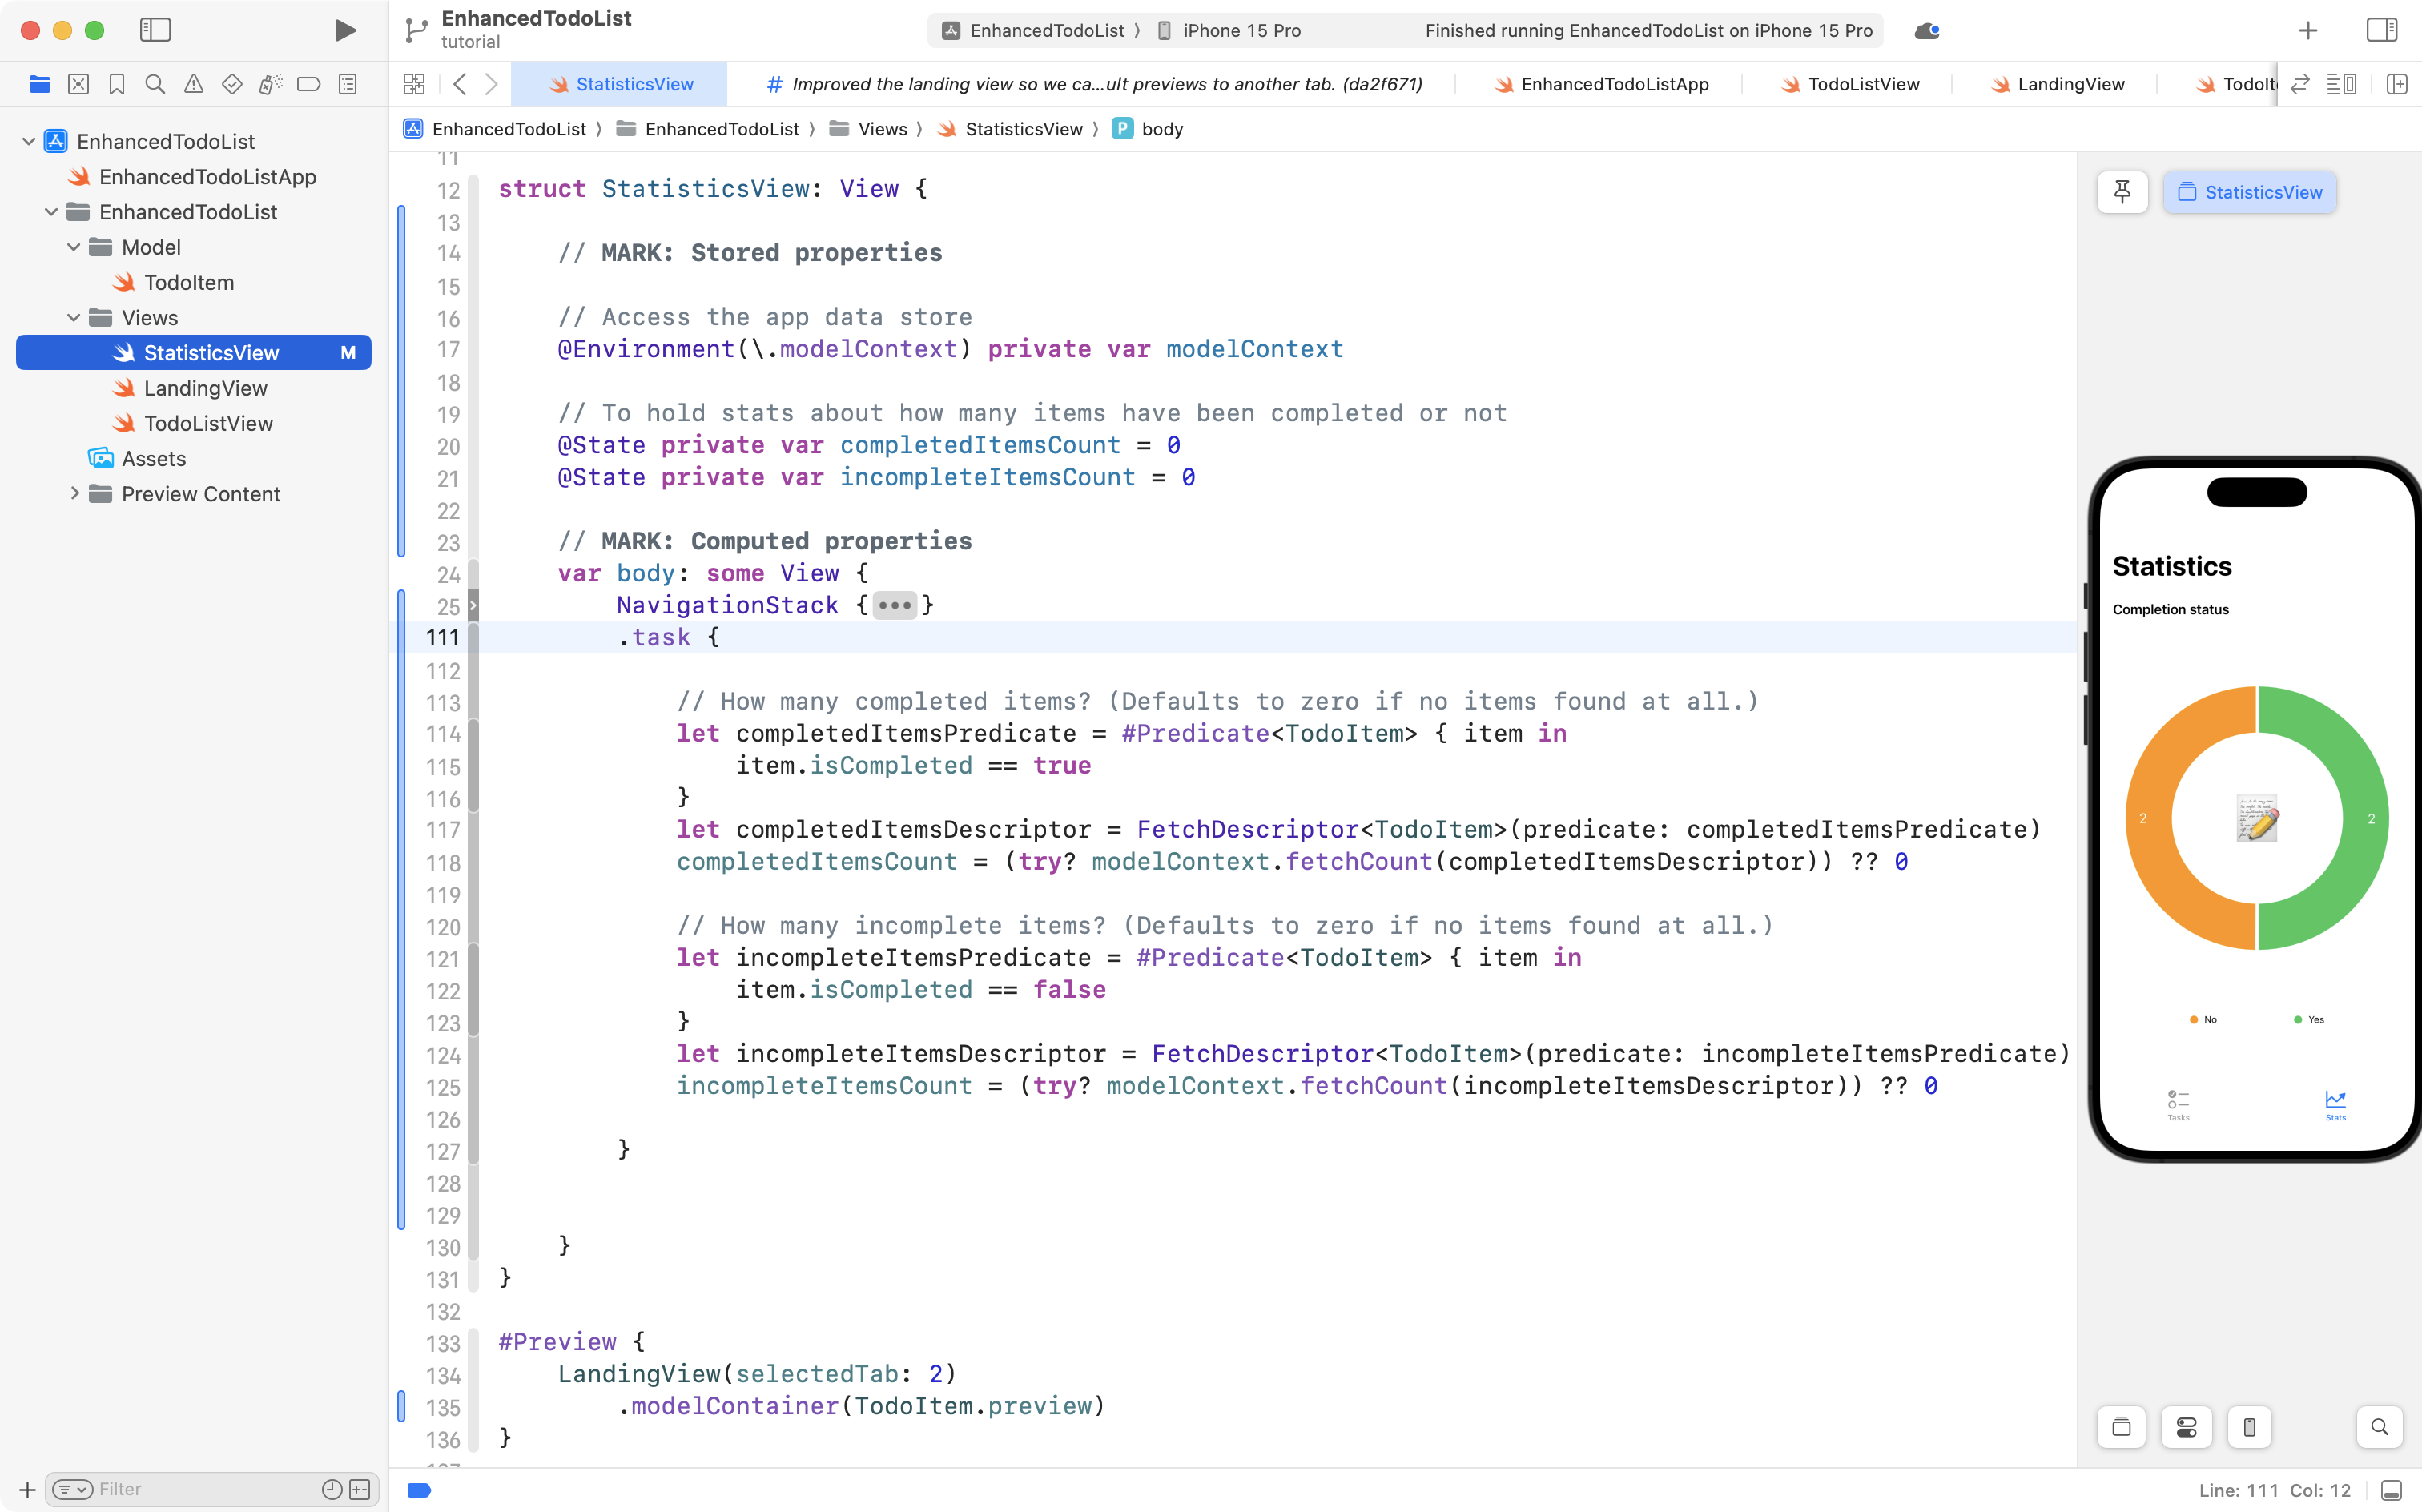
This task runs before the view even appears.
In order:
- Lines 114 to 116 create a predicate which is just a block of code indicating that we want to match all to-do items that are marked as completed
- On line 117 that predicate is passed to a fetch descriptor which is a way of telling the context what information we want to get
- On line 118 the
fetchCountmethod is used on the context. This does not actually retrieve all of the instances ofTodoItemthat are completed from the database – it just returns the count of how many instances ofTodoItemexist that are completed.
The same general idea applies for finding the number of incomplete to-do items on lines 120 to 125.
The syntax is absolutely a bit to get used to. How will you memorize this? You won't. You'll just refer to examples (like everyone else who has learned this did) and then over time, it will become second nature.
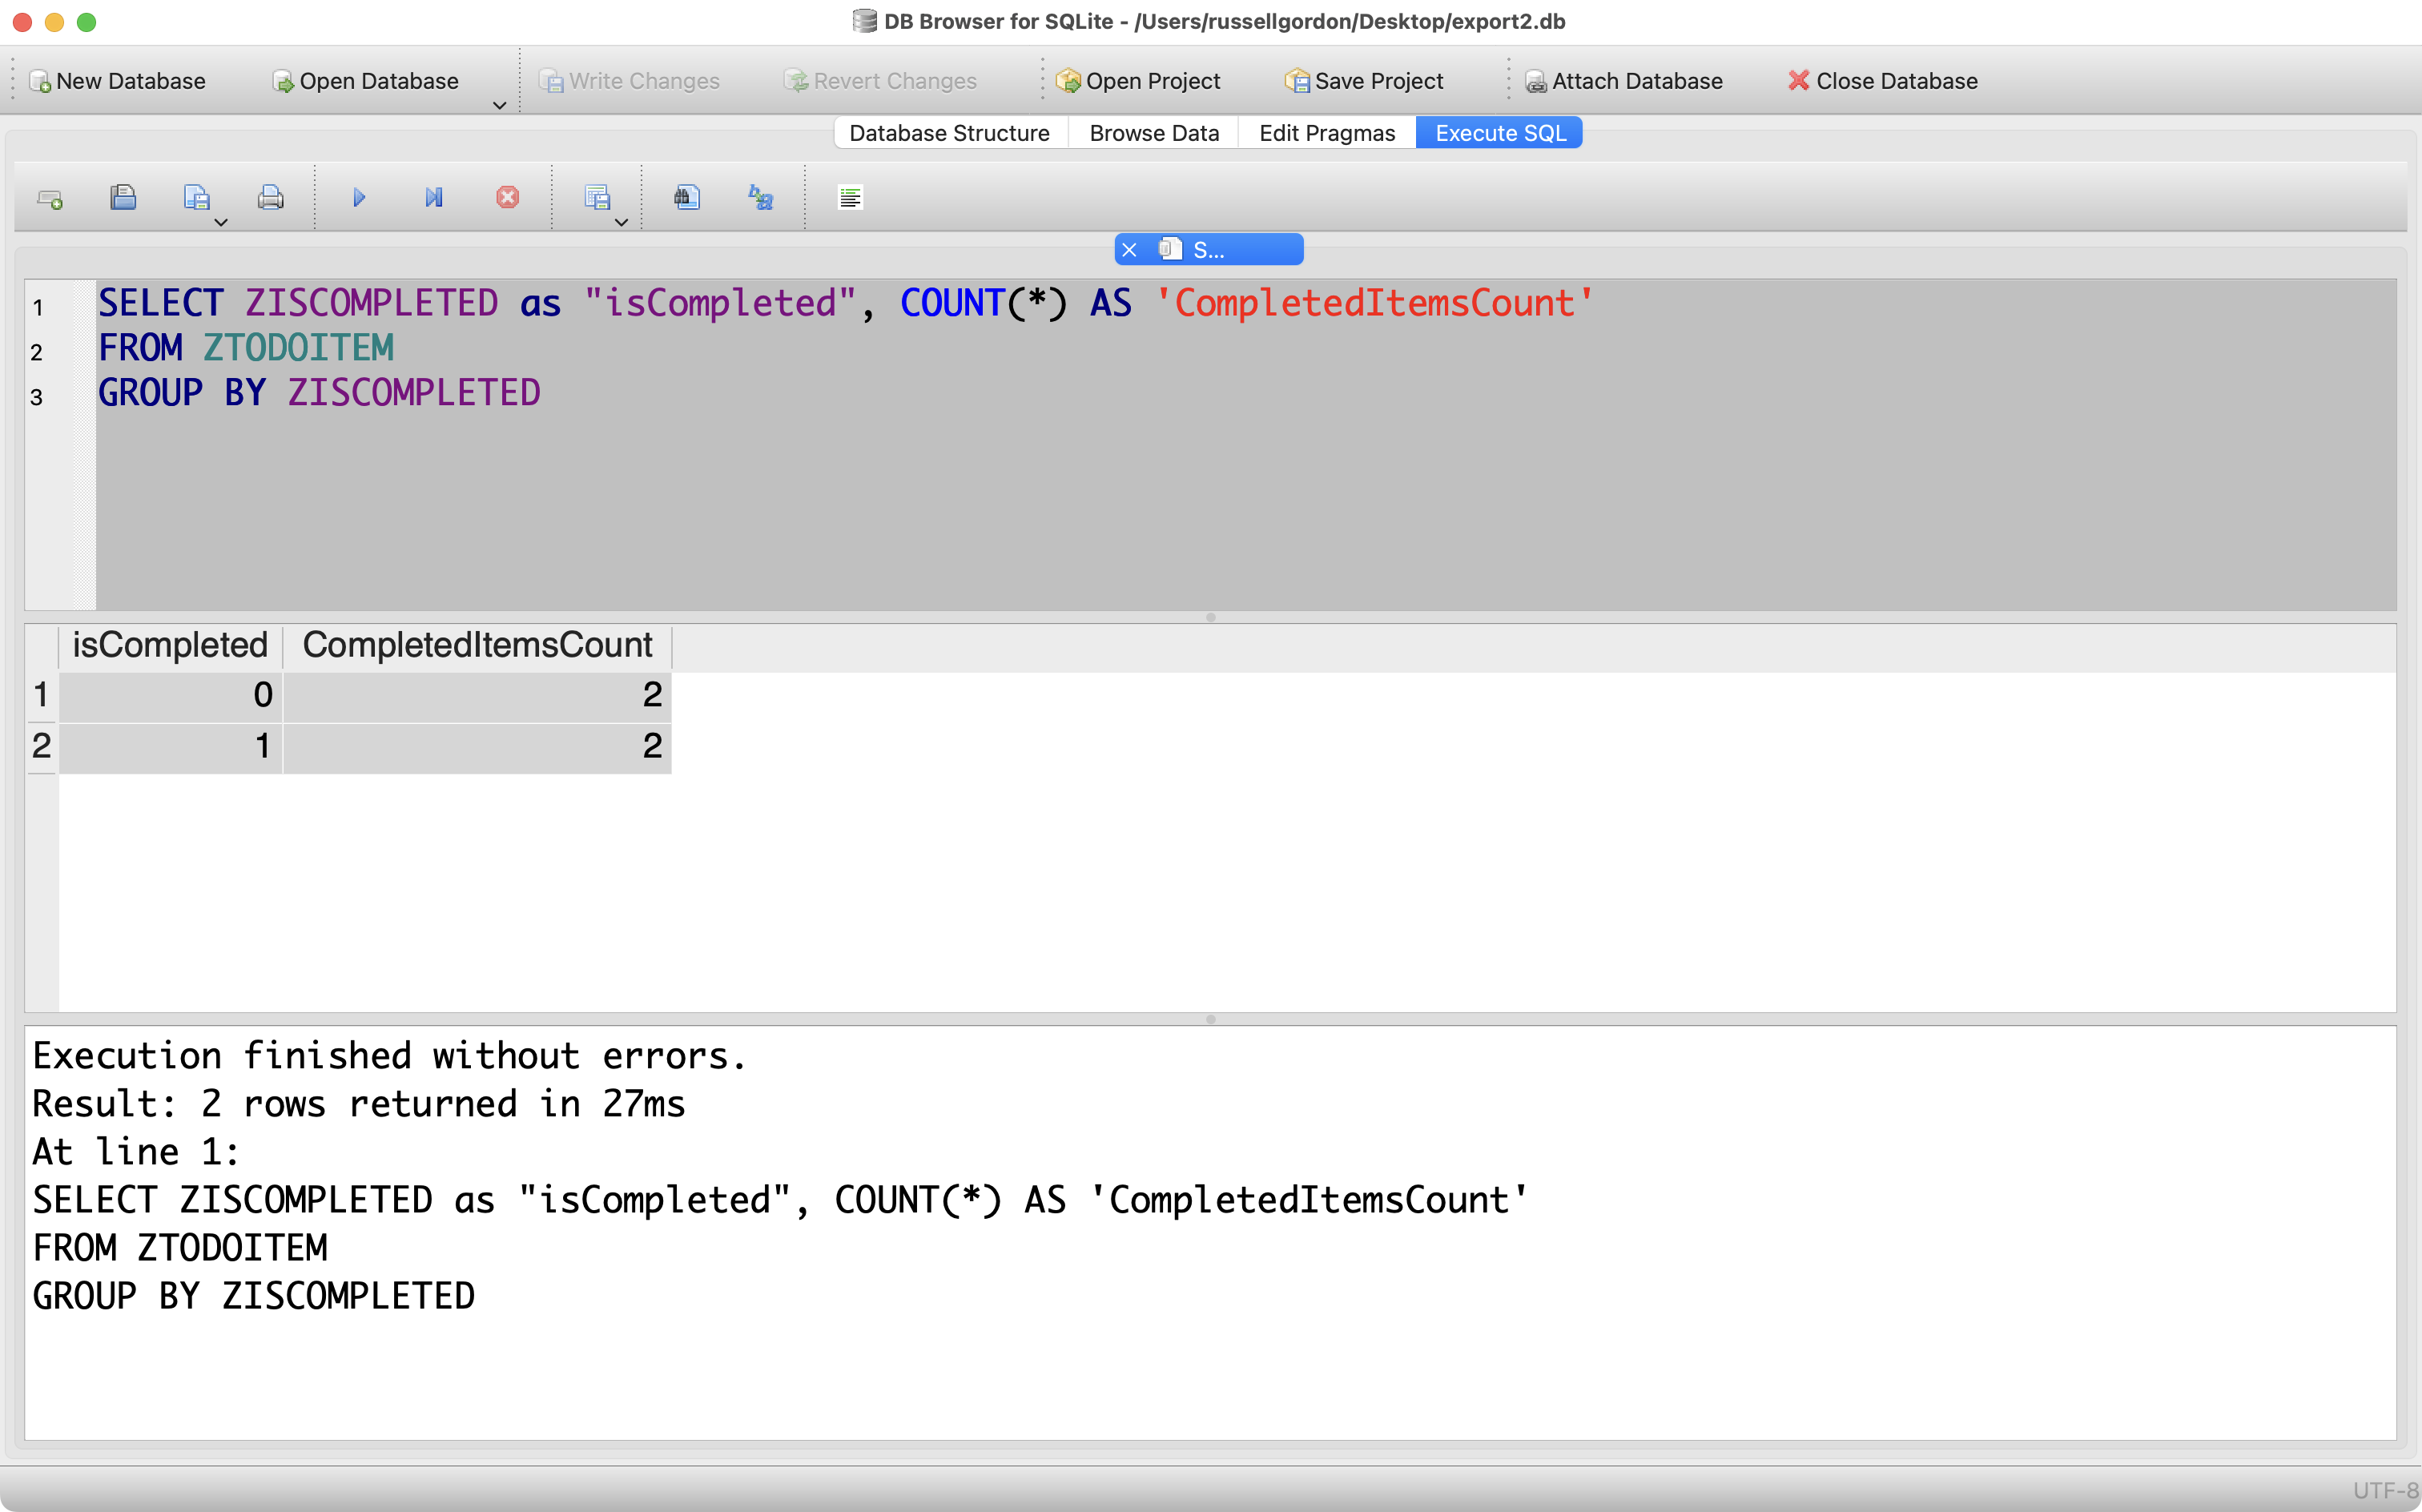
Note that what we are doing here – grouping to-do items by their completion status – and then counting how many they are – is equivalent to writing raw SQL that looks like this:
SELECT isCompleted, COUNT(*) AS 'CompletedItemsCount'
FROM TodoItem
GROUP BY isCompleted
In fact, here is what the underlying database looks like in DB Browser:
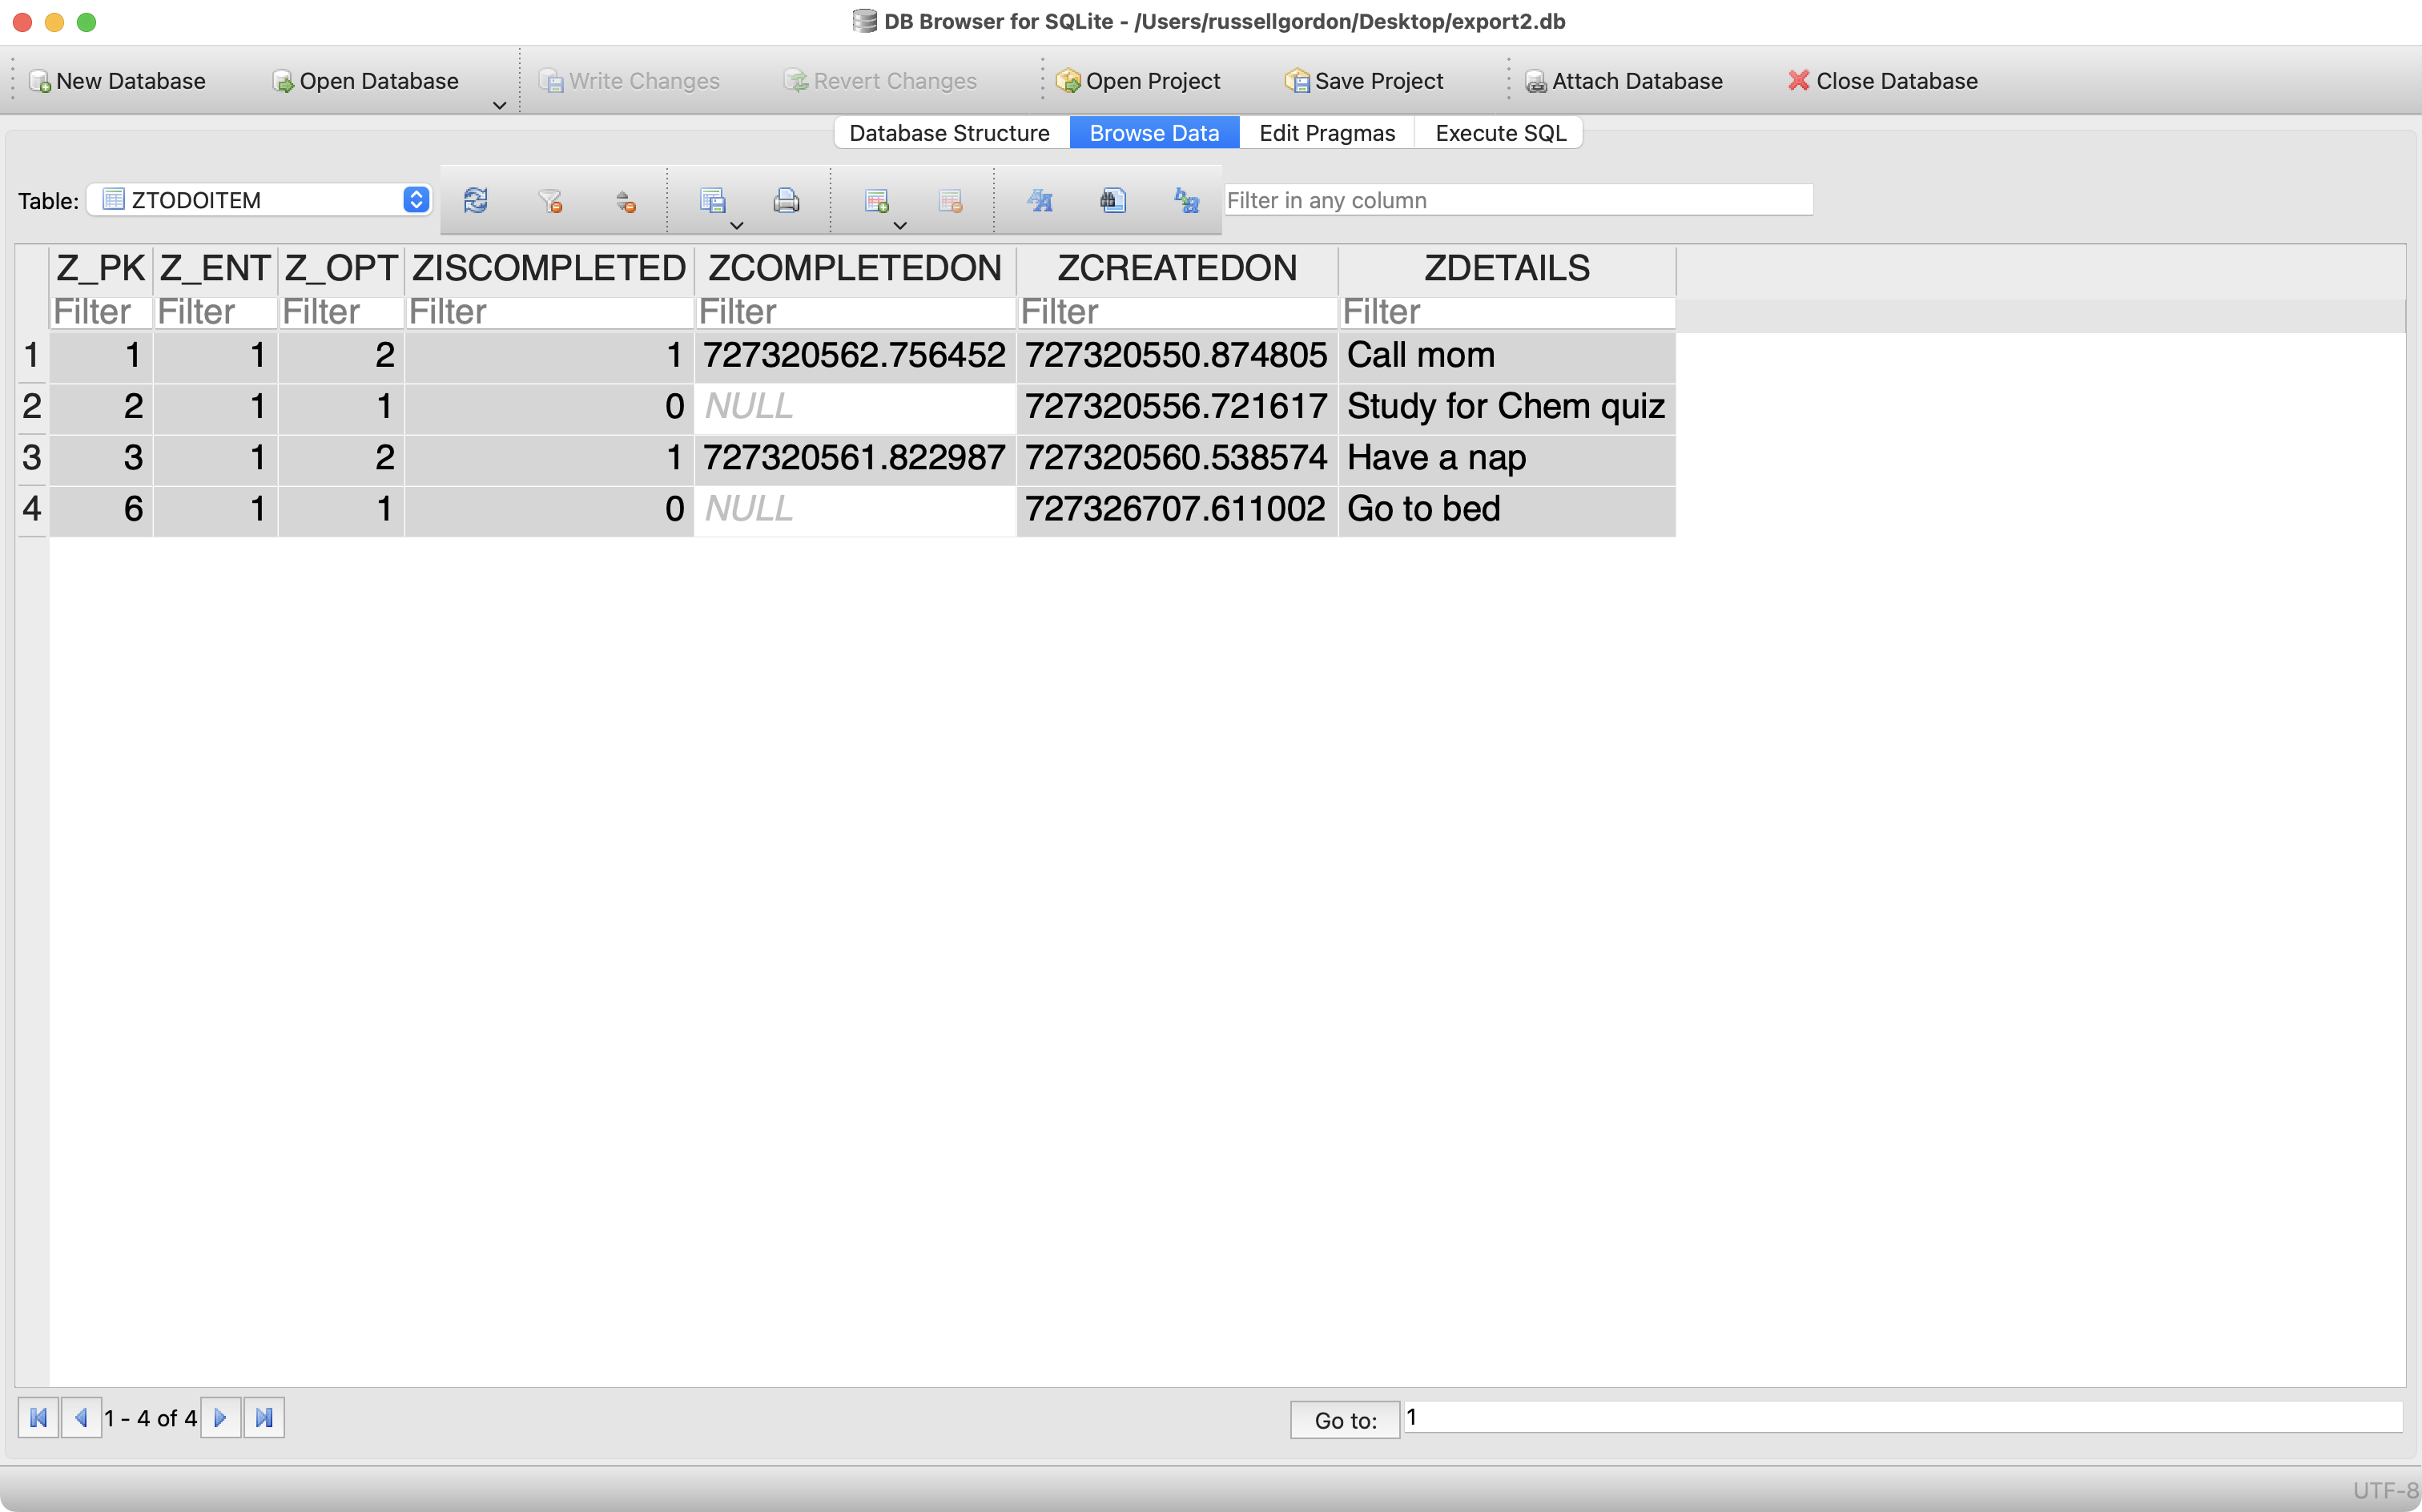
We can run the query right on the database – adjusting somewhat to compensate for the somewhat odd naming convention for tables and columns used by SwiftData:
And... that's enough for now.
Time to 😎 or 💤... whatever feels right.
It's the weekend.